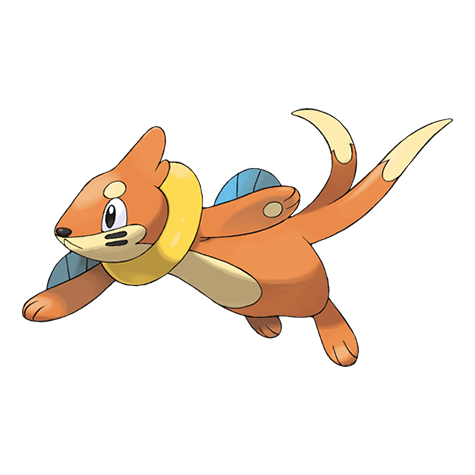




Buizel Best Moveset
Water at 65 Attack and 85 Speed with AbilitySwift Swim doubling Speed under rain. The Attack is pre-evolution level. The moveset builds toward Floatzel. Evolve for 105 Attack and the Swift Swim engine that creates a fast physical Water threat under rain.
Buizel saw minimal competitive use in Gen IV (Diamond, Pearl & Platinum). This was Buizel's competitive peak. Its most popular set ran Swiftswim with Choice Scarf, favoring a Adamant nature.
Best Moves
Best Build
Buizel best EVs are Attack and Speed
Physical Revenge Killer Moveset
- Aqua Jet
- Ice Punch
- Waterfall
- Water Pulse
Recommended Teammates
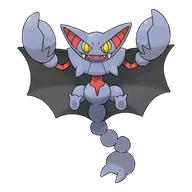
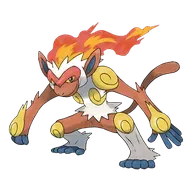
Buizel saw minimal competitive use in Gen V (Black & White / B2W2). Buizel maintained its position from the previous generation. Its most popular set ran Swiftswim with Choice Band, favoring a Jolly nature.
Physical Sweeper Moveset
- Aqua Jet
- Waterfall
- Return
- Switcheroo
Recommended Teammates


Buizel saw minimal competitive use in Gen VI (X & Y / ORAS). Buizel maintained its position from the previous generation. Its most popular set ran Swiftswim with Leftovers, favoring a Hardy nature.
Special Sweeper Moveset
- Hydro Pump
- Brick Break
- Ice Beam
- Aqua Jet
Recommended Teammates


Buizel saw minimal competitive use in Gen VII (Sun & Moon / USUM). Buizel maintained its position from the previous generation. Its most popular set ran Swiftswim with Nothing, favoring a Hardy nature.
Physical Tank Moveset
- Aqua Jet
- Sonic Boom
- Water Pulse
- Ice Punch
Recommended Teammates
Buizel saw minimal competitive use in Gen IX (Scarlet & Violet / Legends Z-A). Buizel maintained its position from the previous generation. Its most popular set ran Swiftswim with Eviolite, favoring a Jolly nature.
Utility Moveset
- Aqua Jet
- Waterfall
- Liquidation
- Ice Punch
Recommended Teammates

Buizel Weakness
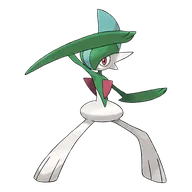
Type-wise, Buizel takes extra damage from Electric and Grass. 4 resistances help offset the weaknesses. Just 2 weak spots to worry about, which keeps teambuilding straightforward.
| Damage | Types |
|---|---|
| 2x (Weak) | Electric, Grass |
| 0.5x (Resist) | Fire, Water, Ice, Steel |
What is Buizel Weak Against
GoodBest Pokemon Against Buizel
Kartana's Knock Off hits Buizel for 41-49%. Mienfoo deals 53-62% with High Jump Kick.
 Kartana GrassSteel | B | |
Recommended Build Moves
Damage vs Buizel View Kartana builds →Knock Off41-49% | ||
C | ||
Recommended Build Moves
Damage vs Buizel View Glimmet builds →Sludge Bomb32-37% | ||
C | ||
Recommended Build AbilityRegenerator ItemEviolite NatureAdamant Moves
Damage vs Buizel View Mienfoo builds →Knock Off27-31% U Turn29-34% High Jump Kick53-62% | ||
 Rotom ElectricGhost | C | |
Recommended Build Moves
Damage vs Buizel View Rotom builds →Volt Switch 2x113-133%KO Shadow Ball64-76% Thunderbolt 2x144-170%KO | ||


Evolution
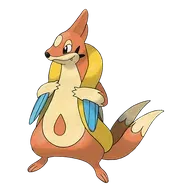
One evolution ahead. Buizel grows into Floatzel through a straightforward two-stage chain. A massive partner pool for breeding via two egg groups. Eggs take an average time to hatch. Evolving adds up to 165 stat points total. View every chain in the Evolution Chart.
How to Evolve
Breeding
Breed Buizel easily with 278 breeding partners from the Field and Water 1 egg groups.

Shiny Buizel
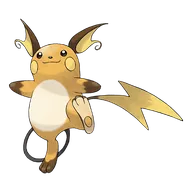
Buizel's orange shifts toward a more golden-yellow and the sea weasel looks like it spent too long in the sun. Noticeable on close inspection, forgettable from any distance. Functional at best.


Shiny Buizel Odds & Hunting Methods
12 of 12 VerifiedHow do we research these odds?
We check every game where a shiny is possible, then rank each one by the best method available in that game, so the row at the top is the fastest route overall.
Odds marked verified are cross-checked against multiple independent sources before we publish them. Where a rate is not yet confirmed we mark the row pending rather than guess a number.
Read our full methodologyHow to Get Buizel
Moderate rates across 47 locations for Buizel in early-game routes. Scroll the sorted list below and pick whichever spot sits closest to your current route. The rate differences between locations are worth comparing.
Where To Catch Buizel in SV
The line opens with Buizel at Lv. 2-59 via walking encounters. 2 catchable stages total, with locations listed for each one below.
 Step 1Buizel ✓South Paldean Sea - OceanLv.2-30OverworldRate 12%South Paldean Sea - RiverLv.2-30OverworldRate 12%South Province (Area Four) - OceanLv.2-30OverworldRate 12%South Province (Area Four) - RiverLv.2-30OverworldRate 12%South Province (Area One) - BeachLv.2-8OverworldRate 12%South Province (Area One) - OceanLv.2-8OverworldRate 12%South Province (Area One) - RiverLv.2-8OverworldRate 12%West Province (Area Two) - BeachLv.2-30OverworldRate 12%West Province (Area Two) - OceanLv.2-30OverworldRate 12%West Province (Area Two) - RiverLv.2-30OverworldRate 12%South Province (Area Two) - RiverLv.7-14OverworldRate 12%West Province (Area One) - BeachLv.13-20OverworldRate 12%West Province (Area One) - OceanLv.13-20OverworldRate 12%West Province (Area One) - RiverLv.13-20OverworldRate 12%East Paldean Sea - BeachLv.14-36OverworldRate 12%East Paldean Sea - OceanLv.14-36OverworldRate 12%East Province (Area One) - BeachLv.16-23OverworldRate 12%East Province (Area One) - OceanLv.16-23OverworldRate 12%East Province (Area One) - RiverLv.16-23OverworldRate 12%South Province (Area Five) - BeachLv.16-23OverworldRate 12%South Province (Area Five) - OceanLv.16-23OverworldRate 12%South Province (Area Five) - RiverLv.16-23OverworldRate 12%West Paldean Sea - OceanLv.18-42OverworldRate 12%Asado Desert - RiverLv.19-26OverworldRate 12%East Province (Area Two) - BeachLv.19-26OverworldRate 12%East Province (Area Two) - OceanLv.19-26OverworldRate 12%East Province (Area Two) - RiverLv.19-26OverworldRate 12%East Province (Area Three) - OceanLv.22-29OverworldRate 12%East Province (Area Three) - RiverLv.22-29OverworldRate 12%Tagtree Thicket - RiverLv.26-32OverworldRate 12%West Province (Area Three) - RiverLv.28-35OverworldRate 12%Glaseado Mountain - East - RiverLv.34-41OverworldRate 12%Glaseado Mountain - West - OceanLv.34-41OverworldRate 12%Glaseado Mountain - West - RiverLv.34-41OverworldRate 12%South Province (Area Six) - OceanLv.37-44OverworldRate 12%South Province (Area Six) - RiverLv.37-44OverworldRate 12%North Paldean Sea - OceanLv.38-50OverworldRate 12%North Province (Area Three) - BeachLv.43-50OverworldRate 12%North Province (Area Three) - OceanLv.43-50OverworldRate 12%North Province (Area Three) - RiverLv.43-50OverworldRate 12%North Province (Area One) - BeachLv.46-53OverworldRate 12%North Province (Area One) - OceanLv.46-53OverworldRate 12%North Province (Area One) - RiverLv.46-53OverworldRate 12%Casseroya Lake - BeachLv.49-56OverworldRate 12%Casseroya Lake - OceanLv.49-56OverworldRate 12%Casseroya Lake - RiverLv.49-56OverworldRate 12%The Great Crater of PaldeaLv.52-59Overworld
 Step 2Catch or Evolve into FloatzelEast Paldean Sea - OceanLv.28-36OverworldRate 16%East Province (Area One) - OceanLv.28-60OverworldRate 16%East Province (Area Three) - OceanLv.28-29OverworldRate 16%East Province (Area Two) - OceanLv.28-60OverworldRate 16%South Paldean Sea - OceanLv.28-60OverworldRate 16%South Province (Area Five) - OceanLv.28-60OverworldRate 16%South Province (Area Four) - OceanLv.28-60OverworldRate 16%South Province (Area One) - OceanLv.28-60OverworldRate 16%West Paldean Sea - OceanLv.28-42OverworldRate 16%West Province (Area One) - OceanLv.28-60OverworldRate 16%West Province (Area Two) - OceanLv.28-60OverworldRate 16%Asado Desert - RiverLv.28-60OverworldRate 4%East Paldean Sea - BeachLv.28-36OverworldRate 4%East Province (Area One) - BeachLv.28-60OverworldRate 4%East Province (Area One) - RiverLv.28-60OverworldRate 4%East Province (Area Three) - RiverLv.28-29OverworldRate 4%East Province (Area Two) - BeachLv.28-60OverworldRate 4%East Province (Area Two) - RiverLv.28-60OverworldRate 4%South Paldean Sea - RiverLv.28-60OverworldRate 4%South Province (Area Five) - BeachLv.28-60OverworldRate 4%South Province (Area Five) - RiverLv.28-60OverworldRate 4%South Province (Area Four) - RiverLv.28-60OverworldRate 4%South Province (Area One) - BeachLv.28-60OverworldRate 4%South Province (Area One) - RiverLv.28-60OverworldRate 4%South Province (Area Two) - RiverLv.28-60OverworldRate 4%Tagtree Thicket - RiverLv.28-32OverworldRate 4%West Province (Area One) - BeachLv.28-60OverworldRate 4%West Province (Area One) - RiverLv.28-60OverworldRate 4%West Province (Area Three) - RiverLv.28-35OverworldRate 4%West Province (Area Two) - BeachLv.28-60OverworldRate 4%West Province (Area Two) - RiverLv.28-60OverworldRate 4%Glaseado Mountain - West - OceanLv.34-41OverworldRate 16%South Province (Area Six) - OceanLv.37-44OverworldRate 16%North Paldean Sea - OceanLv.38-50OverworldRate 16%North Province (Area Three) - OceanLv.43-50OverworldRate 16%Glaseado Mountain - East - RiverLv.34-41OverworldRate 4%Glaseado Mountain - West - RiverLv.34-41OverworldRate 4%South Province (Area Six) - RiverLv.37-44OverworldRate 4%North Province (Area Three) - BeachLv.43-50OverworldRate 4%North Province (Area Three) - RiverLv.43-50OverworldRate 4%North Province (Area One) - OceanLv.46-53OverworldRate 16%Casseroya Lake - OceanLv.49-56OverworldRate 16%The Great Crater of Paldea - Lower Level - RiverLv.55-59OverworldNorth Province (Area One) - BeachLv.46-53OverworldRate 4%North Province (Area One) - RiverLv.46-53OverworldRate 4%Casseroya Lake - BeachLv.49-56OverworldRate 4%Casseroya Lake - RiverLv.49-56OverworldRate 4%or evolve from Buizel (Step 1)
Want the exact numbers? Work out your catch odds in Scarlet & Violet for Buizel.
Decent spawn rates across 5 locations for Buizel in early-game routes. Scroll the sorted list below and pick whichever spot sits closest to your current route. The rate differences between locations are worth comparing.
Where To Catch Buizel in PLA
The line opens with Buizel at Lv. 2-25 via walking encounters. 2 catchable stages total, with locations listed for each one below.
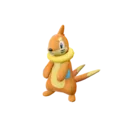 Step 1Buizel ✓Horseshoe PlainsLv.2-4GrassUncommonWindswept RunLv.9-12GrassUncommonWorn BridgeLv.9-12GrassUncommonAipom HillLv.22-25GrassUncommonBathers' LagoonLv.22-25GrassUncommon
 Step 2Catch or Evolve into FloatzelWorn BridgeLv.9-12GrassUncommonAipom HillLv.29-32GrassUncommonBathers' LagoonLv.29-32GrassUncommonSpace-Time Distortion - Crimson MirelandsLv.26-61Caveor evolve from Buizel (Step 1)
Buizel is available from early-game routes onward at high spawn rates. 8 encounter spots give you plenty of options. Grab one early and it'll be ready to evolve or train by mid-game.
Where To Catch Buizel in BDSP
Buizel is where the line starts, caught through walking encounters at Lv. 7-63. The chain covers 2 catchable stages before reaching the final form.
- Step 1Buizel ✓Valley WindworksLv.7-9FloorRate 35%Route 205 - SouthLv.8-10GrassRate 35%Route 205 - NorthLv.10-12GrassRate 35%Route 213Lv.20-21GrassRate 30%Fountainspring CaveLv.16-63CaveRiverbank CaveLv.16-63CaveStill-Water CavernLv.16-63CaveRoute 224Lv.23GrassRate 4%
- Step 2Catch or Evolve into FloatzelRoute 218Lv.28-30GrassRate 35%Route 221Lv.28-30GrassRate 25%Fuego IronworksLv.29-30FloorRate 25%Route 213Lv.22GrassRate 10%Route 222Lv.40-42GrassRate 35%NightVictory Road - B1FLv.44-45CaveRate 30%Route 222Lv.40-42GrassRate 25%Morning/dayVictory Road - Nat Dex Area B1FLv.50-51CaveRate 30%Route 224Lv.53-54GrassRate 30%NightRoute 224Lv.53GrassRate 20%Morning/dayRoute 230Lv.50-52GrassRate 13%or evolve from Buizel (Step 1)
Want the exact numbers? Work out your catch odds in Brilliant Diamond & Shining Pearl for Buizel.
Buizel doesn't appear in the wild in Ultra Sun & Ultra Moon. Catch Floatzel instead and breed it. Its Egg hatches into Buizel, and the step cards below show where Floatzel turns up.
How to Obtain Buizel in USUM
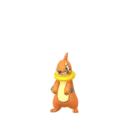 Step 1Buizel ✓
 Step 2Catch or Evolve into Floatzelor evolve from Buizel (Step 1)
Base Stats
Speed and Attack carry most of Buizel's stat budget. Sp. Def's the obvious dump stat. Common in the wild and yields 1 Speed EV. Follows a medium-fast 1M XP curve.
It inflates its flotation sac, keeping its face above water in order to watch for prey movement.
Buizel Guide
You can run Buizel through the first few routes without issues. 330 BST won't carry you far though. Get it to Floatzel as fast as you can.
Game Availability
Available in 12 titles since its debut in Diamond & Pearl, Buizel spans 6 generations of Pokemon games. It's accessible through catching or hatching as a base form in a solid number of games.
Click a game to view version-specific details
- Gen 1RB
 Red & Blue
- Gen 1Y
 Yellow
- Gen 2GS
 Gold & Silver
- Gen 2C
 Crystal
- Gen 3RS
 Ruby & Sapphire
- Gen 3E
 Emerald
- Gen 3FRLG
 FireRed & LeafGreen
- Gen 4DPDebut
 Diamond & Pearl
- Gen 4Pt
 Platinum
- Gen 4HGSS
 HeartGold & SoulSilver
- Gen 5BW
 Black & White
- Gen 5B2W2
 Black 2 & White 2
- Gen 6XY
 X & Y
- Gen 6ORAS

 Omega Ruby & Alpha Sapphire
- Gen 7SM

 Sun & Moon
- Gen 7USUM
 Ultra Sun & Ultra Moon
- Gen 7Let's Go

 Let's Go Pikachu & Eevee
- Gen 8SwSh
 Sword & Shield
- Gen 8BDSP

 Brilliant Diamond & Shining Pearl
- Gen 8PLA
 Legends: Arceus
- Gen 9SV

 Scarlet & Violet
- Gen 9LZA
 Legends: Z-A
- Gen 10WW
 Winds & Waves
Explore
Where to go next after Buizel.
Next stepPokedexBrowse the full Pokedex for every gameSee Pokedex