



How to evolve
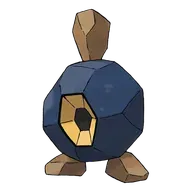 Roggenrola
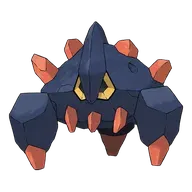 BoldoreThis pageLevel 25
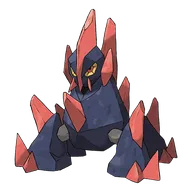 GigalithTrade
Boldore Best Moveset
105 in both Attack and Defense behind Rock typing. AbilitySturdy survives one hit and 20 Speed means going last in every matchup. The moveset has raw physical power for a middle evolution. One evolution from Gigalith's sand-setting physical bulk.
Boldore saw minimal competitive use in Gen V (Black & White / B2W2). This was Boldore's competitive peak. Its most popular set ran Sturdy with Custapberry, favoring a Adamant nature.
Best Moves
Best Build
Boldore best EVs are HP and Attack
Physical Tank Moveset
- Stealth Rock
- Rock Blast
- Earthquake
- Explosion
Recommended Teammates


Boldore saw minimal competitive use in Gen VI (X & Y / ORAS). Boldore maintained its position from the previous generation. Its most popular set ran sturdy with Eviolite, favoring a Bold nature.
Hazard Setter Moveset
- Stone Edge
- Stealth Rock
- Power Gem
- Rock Slide
Boldore saw minimal competitive use in Gen VII (Sun & Moon / USUM). Boldore maintained its position from the previous generation. Its most popular set ran Sturdy with Eviolite, favoring a Impish nature.
Wall Moveset
- Earthquake
- Stealth Rock
- Stone Edge
- Toxic
Recommended Teammates

Boldore saw minimal competitive use in Gen VIII (Sword & Shield / BDSP). Boldore maintained its position from the previous generation. Its most popular set ran Sturdy with Eviolite, favoring a Relaxed nature.
Bulky Support Moveset
- Stone Edge
- Earthquake
- Iron Defense
- Body Press
Recommended Teammates
Boldore Weakness
Water, Grass, Fighting, Ground, and Steel moves hit Boldore for super-effective damage. It resists 4 types, giving it decent defensive coverage. Boldore's physical bulk (base 105 Def) helps cushion physical weakness hits, but special attackers are the bigger threat.
| Damage | Types |
|---|---|
| 2x (Weak) | Water, Grass, Fighting, Ground, Steel |
| 0.5x (Resist) | Normal, Fire, Poison, Flying |
What is Boldore Weak Against
FragileBest Pokemon Against Boldore
Scizor's Close Combat hits Boldore for 59-69%. Gyarados's Waterfall hits Boldore for 38-45%.
 Scizor BugSteel | A | |
Recommended Build Moves
Damage vs Boldore View Scizor builds →Bullet Punch 2x30-36% Knock Off16-19% U Turn26-31% Close Combat 2x59-69% | ||
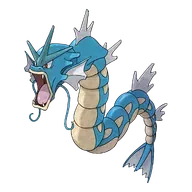 Gyarados Water | B | |
Recommended Build Moves
Damage vs Boldore View Gyarados builds →Waterfall 2x38-45% Earthquake 2x32-38% Ice Fang10-13% | ||
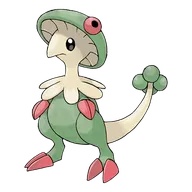 Breloom GrassFighting | B | |
Recommended Build Moves
Damage vs Boldore View Breloom builds →Mach Punch 2x18-22% Bullet Seed 2x12-14% | ||
 Lucario FightingSteel | B | |
Recommended Build Moves
Damage vs Boldore View Lucario builds →Extreme Speed7-8% Close Combat 2x63-74% Aura Sphere 2x91-107%KO | ||
 Garchomp DragonGround | B | |
Recommended Build Moves
Damage vs Boldore View Garchomp builds →Earthquake 2x45-53% | ||
Evolution
Boldore is partway through a three-stage line between Roggenrola and Gigalith. The chain involves a trade, so it's not a straightforward grind. So far, Attack got the biggest boost (+30 from Roggenrola). The final form adds another 125 stats on top. View every chain in the Evolution Chart.
How to Evolve
Breeding
Breed with Boldore to get Roggenrola eggs easily using 84 partners from the Mineral egg group.
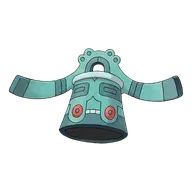
Shiny Boldore
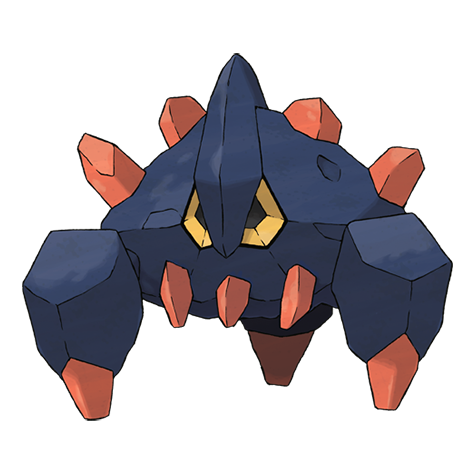
Boldore flips the script by turning its orange crystals teal-blue while the body shifts underneath. The crystal Pokemon now looks like it's growing aquamarine gems instead of raw fire opals, and the combination is chef's-kiss good. This line proves that mineral Pokemon are perfect candidates for color swaps.


Shiny Boldore Odds & Hunting Methods
7 of 7 VerifiedHow do we research these odds?
We check every game where a shiny is possible, then rank each one by the best method available in that game, so the row at the top is the fastest route overall.
Odds marked verified are cross-checked against multiple independent sources before we publish them. Where a rate is not yet confirmed we mark the row pending rather than guess a number.
Read our full methodologyHow to Get Boldore
No trade evolution is needed to reach Boldore from Roggenrola. A trade is needed only further along its 3-stage chain, as the step cards below show.
Where To Catch Boldore in SwSh
Roggenrola is your first catch on the way to Boldore. You'll find walking encounters from Lv. 8-58 across 109 total spots in the chain.
 Step 1Catch RoggenrolaRolling Fields - GroundLv.8-10OverworldRate 80%OvercastRolling Fields - GroundLv.8-10OverworldRate 80%SandstormRolling Fields - GroundLv.8-10OverworldRate 80%Intense SunChallenge RoadLv.10-15OverworldShieldRate 56%SnowstormChallenge RoadLv.10-15OverworldShieldRate 56%Normal WeatherChallenge RoadLv.10-15OverworldShieldRate 56%Heavy FogChallenge RoadLv.10-15OverworldShieldRate 56%SnowingChallenge RoadLv.10-15OverworldShieldRate 36%OvercastChallenge RoadLv.10-15OverworldShieldRate 36%RainingChallenge RoadLv.10-15OverworldShieldRate 36%SandstormChallenge RoadLv.10-15OverworldShieldRate 36%Intense SunChallenge RoadLv.10-15OverworldShieldRate 36%ThunderstormGalar MineLv.11-15CaveShieldRate 30%All WeatherGalar MineLv.11-14OverworldShieldRate 25%All WeatherRolling Fields - GroundLv.8-10OverworldRate 20%SnowstormRolling Fields - GroundLv.8-10OverworldRate 20%Normal WeatherRolling Fields - GroundLv.8-10OverworldRate 20%Heavy FogRolling Fields - GroundLv.8-10OverworldRate 20%RainingRolling Fields - GroundLv.8-10OverworldRate 20%SnowingRolling Fields - GroundLv.8-10OverworldRate 20%ThunderstormGalar MineLv.11-15CaveSwordRate 5%All WeatherGalar MineLv.11-14OverworldSwordRate 5%All WeatherChallenge RoadLv.16-21OverworldSwordRate 56%SnowstormChallenge RoadLv.16-21OverworldSwordRate 56%Normal WeatherChallenge RoadLv.16-21OverworldSwordRate 56%Heavy FogChallenge RoadLv.16-21OverworldSwordRate 56%SnowingChallenge RoadLv.16-21OverworldSwordRate 36%OvercastChallenge RoadLv.16-21OverworldSwordRate 36%RainingChallenge RoadLv.16-21OverworldSwordRate 36%SandstormChallenge RoadLv.16-21OverworldSwordRate 36%Intense SunChallenge RoadLv.16-21OverworldSwordRate 36%ThunderstormChallenge RoadLv.19-24GrassRate 30%SnowstormChallenge RoadLv.19-24GrassRate 30%Normal WeatherChallenge RoadLv.19-24GrassRate 30%OvercastChallenge RoadLv.19-24GrassRate 30%Heavy FogChallenge RoadLv.19-24GrassRate 30%RainingChallenge RoadLv.19-24GrassRate 30%SandstormChallenge RoadLv.19-24GrassRate 30%SnowingChallenge RoadLv.19-24GrassRate 30%Intense SunChallenge RoadLv.19-24GrassRate 30%ThunderstormMotostoke OutskirtsLv.21-24GrassRate 30%All WeatherStony Wilderness - 2Lv.28-30OverworldRate 15%SandstormStony Wilderness - 2Lv.28-30OverworldSwordRate 15%Intense Sun
 Step 2Boldore ✓Stony WildernessLv.26-28GrassShieldRate 40%SandstormStony WildernessLv.27-29GrassShieldRate 40%Normal WeatherStony WildernessLv.26-28GrassShieldRate 30%Intense SunStony WildernessLv.26-28GrassShieldRate 30%ThunderstormStony WildernessLv.26-28GrassSwordRate 20%SandstormStony WildernessLv.26-28GrassShieldRate 10%SnowingGiant's Cap - GroundLv.31-34OverworldShieldRate 30%SnowstormGiant's Cap - GroundLv.31-34OverworldShieldRate 30%Normal WeatherGiant's Cap - GroundLv.31-34OverworldShieldRate 30%OvercastGiant's Cap - GroundLv.31-34OverworldShieldRate 30%Heavy FogGiant's Cap - GroundLv.31-34OverworldShieldRate 30%RainingGiant's Cap - GroundLv.31-34OverworldShieldRate 30%SandstormGiant's Cap - GroundLv.31-34OverworldShieldRate 30%SnowingGiant's Cap - GroundLv.31-34OverworldShieldRate 30%Intense SunGiant's Cap - GroundLv.31-34OverworldShieldRate 30%ThunderstormGiant's Mirror - GroundLv.31-34OverworldShieldRate 30%SnowstormGiant's Mirror - GroundLv.31-34OverworldShieldRate 30%Normal WeatherGiant's Mirror - GroundLv.31-34OverworldShieldRate 30%OvercastGiant's Mirror - GroundLv.31-34OverworldShieldRate 30%Heavy FogGiant's Mirror - GroundLv.31-34OverworldShieldRate 30%RainingGiant's Mirror - GroundLv.31-34OverworldShieldRate 30%SandstormGiant's Mirror - GroundLv.31-34OverworldShieldRate 30%SnowingGiant's Mirror - GroundLv.31-34OverworldShieldRate 30%Intense SunGiant's Mirror - GroundLv.31-34OverworldShieldRate 30%ThunderstormRoute 8Lv.39-41OverworldShieldRate 25%All WeatherGiant's Cap - GroundLv.31-34OverworldSwordRate 10%SnowstormGiant's Cap - GroundLv.31-34OverworldSwordRate 10%Normal WeatherGiant's Cap - GroundLv.31-34OverworldSwordRate 10%OvercastGiant's Cap - GroundLv.31-34OverworldSwordRate 10%Heavy FogGiant's Cap - GroundLv.31-34OverworldSwordRate 10%RainingGiant's Cap - GroundLv.31-34OverworldSwordRate 10%SandstormGiant's Cap - GroundLv.31-34OverworldSwordRate 10%SnowingGiant's Cap - GroundLv.31-34OverworldSwordRate 10%Intense SunGiant's Cap - GroundLv.31-34OverworldSwordRate 10%ThunderstormGiant's Mirror - GroundLv.31-34OverworldSwordRate 10%SnowstormGiant's Mirror - GroundLv.31-34OverworldSwordRate 10%Normal WeatherGiant's Mirror - GroundLv.31-34OverworldSwordRate 10%OvercastGiant's Mirror - GroundLv.31-34OverworldSwordRate 10%Heavy FogGiant's Mirror - GroundLv.31-34OverworldSwordRate 10%RainingGiant's Mirror - GroundLv.31-34OverworldSwordRate 10%SandstormGiant's Mirror - GroundLv.31-34OverworldSwordRate 10%SnowingGiant's Mirror - GroundLv.31-34OverworldSwordRate 10%Intense SunGiant's Mirror - GroundLv.31-34OverworldSwordRate 10%ThunderstormRoute 8Lv.39-41OverworldSwordRate 10%All WeatherLake of OutrageLv.55-58OverworldRate 30%Sandstormor evolve from Roggenrola (Step 1)
 Step 3Evolve into GigalithBREEDINGAvailableLeave a compatible parent at the Pokemon Day Care to receive a Roggenrola egg.
Want the exact numbers? Work out your catch odds in Sword & Shield for Boldore.
Boldore keeps to a single out-of-the-way spot, the ore Pokemon walked out on foot somewhere between levels 42 and 46 in both versions.
Where To Catch Boldore in USUM
To get Boldore, start by catching Roggenrola through walking encounters at Lv. 11-14. The chain covers 2 catchable stages before reaching the final form.
 Step 2Boldore ✓Vast Poni Canyon - InsideLv.42-45GrassRate 30%Vast Poni Canyon - Northwest (Hidden Area)Lv.42-45GrassRate 30%Vast Poni Canyon - OutsideLv.43-46GrassRate 10%or evolve from Roggenrola (Step 1)
 Step 3Evolve into Gigalith
Want the exact numbers? Work out your catch odds in Ultra Sun & Ultra Moon for Boldore.
Deeper underground than its Unova cousins usually venture, Boldore turns up at a single rocky haunt, its blue crystals glinting in the dark as you battle it around level 41 to level 44.
Where To Catch Boldore in SM
The path to Boldore starts with Roggenrola at Lv. 10-13 via walking encounters. 2 catchable stages total, with locations listed for each one below.
- Step 2Boldore ✓Vast Poni Canyon - InsideLv.41-44GrassRate 30%Vast Poni Canyon - Northwest (Hidden Area)Lv.41-44GrassRate 30%Vast Poni Canyon - OutsideLv.41-44GrassRate 10%or evolve from Roggenrola (Step 1)
- Step 3Evolve into GigalithBREEDINGAvailableLeave a compatible parent at the Pokemon Day Care to receive a Roggenrola egg.
Want the exact numbers? Work out your catch odds in Sun & Moon for Boldore.
Boldore only turns up when you smash rocks in a single spot, a rare find at level 37 that plays the same in both games.
Where To Catch Boldore in ORAS
To get Boldore, start by catching Roggenrola through walking encounters at Lv. 15. The chain covers 2 catchable stages before reaching the final form.
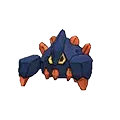 Step 2Boldore ✓Mirage Spots - Area 25Lv.37Smashing rocksRate 5%Mirage Spots - Area 26Lv.37Smashing rocksRate 5%Mirage Spots - Area 29Lv.37Smashing rocksRate 5%Mirage Spots - Area 31Lv.37Smashing rocksRate 5%or evolve from Roggenrola (Step 1)
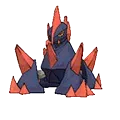 Step 3Evolve into Gigalith

Want the exact numbers? Work out your catch odds in Omega Ruby & Alpha Sapphire for Boldore.
Base Stats
Boldore's all-in on Attack at the expense of Speed. The physical lean is obvious from the bars. Yields 2 Attack and Defense EVs and follows a 1.06M XP medium-slow curve.
It relies on sound in order to monitor what’s in its vicinity. When angered, it will attack without ever changing the direction it’s facing.
Boldore Guide
Boldore evolves into Gigalith via trade.
Boldore does the job early-game if you need a Rock type on your team. Evolve it into Gigalith before the later gyms and it holds up fine through the story.
Sand Force is the hidden ability. Strengthens rock, ground, and steel moves to 1.3× their power during a sandstorm. Not always the best choice. Compare it to Boldore's regular abilities before committing.
Use Boldore as a setup sweeper. Physical side carries the damage. It's slow, so Trick Room or priority moves are key.
Game Availability
Introduced in Black & White, Boldore has appeared in 7 games across 5 generations. Later debuts mean fewer total appearances, but it's been a consistent presence since its introduction.
Click a game to view version-specific details
- Gen 1RB
 Red & Blue
- Gen 1Y
 Yellow
- Gen 2GS

 Gold & Silver
- Gen 2C
 Crystal
- Gen 3RS
 Ruby & Sapphire
- Gen 3E
 Emerald
- Gen 3FRLG
 FireRed & LeafGreen
- Gen 4DP
 Diamond & Pearl
- Gen 4Pt
 Platinum
- Gen 4HGSS
 HeartGold & SoulSilver
- Gen 5BWDebut
 Black & White
- Gen 5B2W2
 Black 2 & White 2
- Gen 6XY
 X & Y
- Gen 6ORAS

 Omega Ruby & Alpha Sapphire
- Gen 7SM

 Sun & Moon
- Gen 7USUM
 Ultra Sun & Ultra Moon
- Gen 7Let's Go

 Let's Go Pikachu & Eevee
- Gen 8SwSh
 Sword & Shield
- Gen 8BDSP
 Brilliant Diamond & Shining Pearl
- Gen 8PLA
 Legends: Arceus
- Gen 9SV

 Scarlet & Violet
- Gen 9LZA
 Legends: Z-A
- Gen 10WW

 Winds & Waves
Explore
Where to go next after Boldore.
Next stepPokedexBrowse the full Pokedex for every gameSee Pokedex