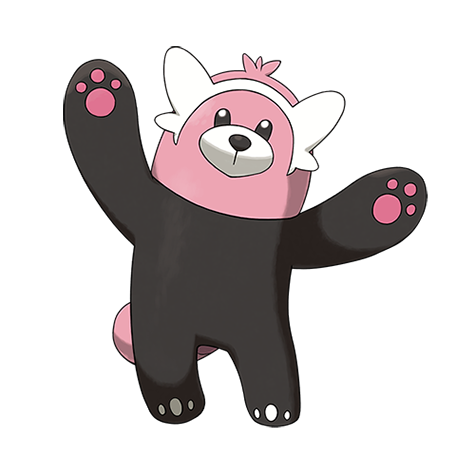





Bewear Best Moveset
Contact damage halved by AbilityFluffy, effectively doubling physical bulk at the cost of 2x Fire weakness. 125 Attack at 120 HP behind Normal/Fighting TermStab gives the moveset devastating power with enormous effective physical bulk. B-tier because 60 Speed goes second and Fire attacks cut through the Fluffy protection.
Fluffy halved contact damage but doubled Fire damage taken in Gen VII (Sun & Moon). 125 Attack with Drain Punch sustained it. A physical tank that punished close-range fighters.
Best Moves
Best Build
Bewear best EVs are Attack and Speed
Physical Sweeper Moveset
- Earthquake
- Return
- Ice Punch
- Drain Punch
Recommended Teammates


Between tiers in Gen VIII (Sword & Shield). Fluffy walled physical attackers but any special Fire move was lethal. Two gens of the same tradeoff.
Physical Tank Moveset
- Drain Punch
- Double Edge
- Earthquake
- Darkest Lariat
Recommended Teammates


Bewear Weakness
Bewear is weak to Fighting, Flying, Psychic, and Fairy. On the flip side, it's immune to Ghost-type moves entirely. Standard number of weaknesses for the Normal/Fighting typing.
| Damage | Types |
|---|---|
| 2x (Weak) | Fighting, Flying, Psychic, Fairy |
| 0.5x (Resist) | Bug, Rock, Dark |
| 0x (Immune) | Ghost |
What is Bewear Weak Against
AvgBest Pokemon Against Bewear
S | ||
Recommended Build Moves
Damage vs Bewear View Great Tusk builds →Rapid Spin15-18% | ||
A | ||
Recommended Build Moves
Damage vs Bewear View Kingambit builds →Sucker Punch12-14% | ||
A | ||
Recommended Build AbilityRegenerator ItemHeavy-Duty Boots NatureRelaxed Moves
Damage vs Bewear View Alomomola builds →Flip Turn9-11% Scald10-11% | ||
B | ||
Recommended Build AbilityPressure ItemHeavy-Duty Boots NatureJolly Moves
Damage vs Bewear View Weavile builds →Knock Off9-11% Ice Shard11-14% | ||
B | ||
B | ||
Recommended Build AbilityNatural Cure ItemLeftovers NatureCalm Moves View Blissey builds →
| ||
B | ||
Recommended Build Moves
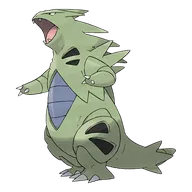
Damage vs Bewear View Tyranitar builds →Knock Off16-19% Stone Edge25-29% | ||
B | ||
Recommended Build AbilityIronfist ItemChoice Band NatureBrave Moves
Damage vs Bewear View Melmetal builds →Earthquake52-61% | ||
B | ||
Recommended Build AbilityIron Barbs ItemLeftovers NatureRelaxed Moves View Ferrothorn builds →
| ||
B | ||
Recommended Build Moves
Damage vs Bewear View Gliscor builds →Earthquake19-22% Knock Off6-7% | ||
Recommended Build Moves View Urshifu-Rapid-Strike builds →
| ||







Evolution
Evolved from Stufful. Bewear is the final form in this two-stage line. A massive partner pool for breeding via one egg group. Eggs are quick to hatch. HP grew the most through evolution (+50 over Stufful), and Bewear peaks at 500 total stats. View every chain in the Evolution Chart.
How to Evolve
Breeding
Breed with Bewear to get Stufful eggs easily using 278 partners from the Field egg group.

Shiny Bewear
Deeper red-brown Bewear swaps the pink cuddle-bear for something that actually looks like it might crush you on purpose. The darker palette adds real intimidation to a Pokemon known for lethal hugs. Simple change, clear upgrade.


Shiny Bewear Odds & Hunting Methods
3 of 3 VerifiedHow do we research these odds?
We check every game where a shiny is possible, then rank each one by the best method available in that game, so the row at the top is the fastest route overall.
Odds marked verified are cross-checked against multiple independent sources before we publish them. Where a rate is not yet confirmed we mark the row pending rather than guess a number.
Read our full methodologyHow to Get Bewear
Bewear starts showing up in mid-game routes at high spawn rates across 20 encounter spots. The list below is sorted so you can pick what fits your current progress without scrolling through everything.
Where To Catch Bewear in SwSh
Stufful is your first catch on the way to Bewear. You'll find walking encounters from Lv. 8-52 across 112 total spots in the chain.
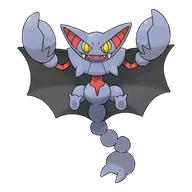
 Step 1Catch StuffulEast Lake AxewellLv.10-15OverworldRate 50%Normal WeatherEast Lake AxewellLv.10-15OverworldRate 50%OvercastDappled GroveLv.11-15GrassRate 40%OvercastEast Lake AxewellLv.10-15OverworldRate 35%RainingNorth Lake MilochLv.14-16GrassRate 30%Normal WeatherNorth Lake MilochLv.14-16GrassRate 30%Heavy FogEast Lake AxewellLv.10-15OverworldRate 25%SnowstormEast Lake AxewellLv.10-15OverworldRate 25%Heavy FogEast Lake AxewellLv.10-15OverworldRate 25%SnowingEast Lake AxewellLv.10-15OverworldRate 25%ThunderstormNorth Lake MilochLv.14-16GrassRate 20%OvercastEast Lake AxewellLv.10-15OverworldRate 10%SandstormEast Lake AxewellLv.10-15OverworldRate 10%Intense SunNorth Lake MilochLv.14-16GrassRate 10%RainingNorth Lake MilochLv.14-16GrassRate 10%SnowingNorth Lake MilochLv.14-16GrassRate 10%Intense SunNorth Lake MilochLv.14-16GrassRate 10%ThunderstormEast Lake AxewellLv.8-12CaveRate 5%SnowstormEast Lake AxewellLv.8-12CaveRate 5%Normal WeatherEast Lake AxewellLv.8-12CaveRate 5%OvercastEast Lake AxewellLv.8-12CaveRate 5%Heavy FogEast Lake AxewellLv.8-12CaveRate 5%RainingEast Lake AxewellLv.8-12CaveRate 5%SandstormEast Lake AxewellLv.8-12CaveRate 5%SnowingEast Lake AxewellLv.8-12CaveRate 5%Intense SunEast Lake AxewellLv.8-12CaveRate 5%ThunderstormHammerlocke HillsLv.29-31OverworldRate 45%OvercastRoute 5Lv.19-21OverworldRate 35%All WeatherBridge FieldLv.27-29OverworldRate 35%ThunderstormBridge FieldLv.27-29OverworldRate 30%RainingHammerlocke HillsLv.29-31OverworldRate 29%Normal WeatherBridge FieldLv.27-29OverworldRate 10%SandstormBridge FieldLv.27-29OverworldRate 5%Heavy FogBridge FieldLv.27-29OverworldRate 5%SnowingGiant's SeatLv.33-38OverworldRate 5%Normal WeatherGiant's SeatLv.33-38OverworldRate 5%Sandstorm
 Step 2Bewear ✓Giant's SeatLv.30-35GrassRate 40%Normal WeatherGiant's SeatLv.30-35GrassRate 30%RainingGiant's SeatLv.30-35GrassRate 30%SnowingGiant's SeatLv.30-35GrassRate 30%ThunderstormGiant's SeatLv.30-35GrassSwordRate 30%Heavy FogGiant's SeatLv.30-35GrassRate 20%OvercastGiant's SeatLv.30-35GrassRate 20%SandstormGiant's SeatLv.30-35GrassRate 20%Intense SunGiant's SeatLv.30-35GrassRate 5%SnowstormGiant's SeatLv.30-35GrassShieldRate 5%Heavy FogAxew's EyeLv.36-40OverworldRate 60%Normal WeatherAxew's EyeLv.36-40OverworldRate 60%OvercastAxew's EyeLv.36-40OverworldRate 25%RainingAxew's EyeLv.36-40OverworldRate 25%SandstormAxew's EyeLv.36-40OverworldRate 25%Intense SunAxew's EyeLv.35-40GrassRate 20%Normal WeatherAxew's EyeLv.36-40OverworldRate 10%SnowstormAxew's EyeLv.36-40OverworldRate 10%SnowingAxew's EyeLv.36-40OverworldRate 5%Heavy FogAxew's EyeLv.36-40OverworldRate 5%ThunderstormLake of OutrageLv.50-52GrassRate 20%Normal Weatheror evolve from Stufful (Step 1)
Want the exact numbers? Work out your catch odds in Sword & Shield for Bewear.
After the Bewear show at the Hauoli City mall you can walk up to one waiting outside at level 28, while wild Bewear also lumber through the Poni Gauntlet near levels 58 to 61.
Where To Catch Bewear in USUM
Stufful is your first catch on the way to Bewear. You'll find walking and fixed encounters from Lv. 17-61 across 8 total spots in the chain.
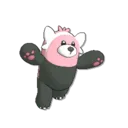 Step 2Bewear ✓Hau'oli City - Shopping DistrictLv.28Interact with PokemonOne-timePost-OliviaPoni GauntletLv.58-61GrassRate 10%or evolve from Stufful (Step 1)
Want the exact numbers? Work out your catch odds in Ultra Sun & Ultra Moon for Bewear.
The deceptively cuddly bruiser lumbers through the grass of the Poni Gauntlet, and one wrong hug from this powerhouse hits hard; expect to meet it between level 56 and level 59.
Where To Catch Bewear in SM
The path to Bewear starts with Stufful at Lv. 17-23 via walking encounters. 2 catchable stages total, with locations listed for each one below.
Want the exact numbers? Work out your catch odds in Sun & Moon for Bewear.
Base Stats
Raw Attack carries Bewear's bulk more than the defenses do. Sp. Atk barely registers. But that HP pool covers for it. A moderately hard to find Strong Arm Pokemon that yields 2 Attack EVs on a medium-fast 1M XP curve.
The moves it uses to take down its prey would make a martial artist jealous. It tucks subdued prey under its arms to carry them to its nest.
Bewear Event Distributions
Bewear is available only through a single Mystery Gift event distribution.
Emergency Capture! Bewear!SunMoonNot shiny
Bewear Guide
Bewear plays as a wallbreaker. Not the fastest, so pick your spots carefully.
Bewear pairs best with Terapagos, Ursaluna, and Lopunny Mega. Terapagos has Good synergy and covers what Bewear can't handle on its own.
Bewear's hidden ability is Unnerve. It prevents opposing Pokémon from eating held Berries. Situational compared to Fluffy and Klutz.
Adamant is the go-to nature for Bewear. That's +Attack / -Sp. Atk. Pair it with 252 HP / 252 Atk / 4 SpD EVs. Fits the wallbreaker role.
Game Availability
Bewear joined the series in Sun & Moon and has been available in 3 titles so far. With 3 generations of appearances, it's established itself despite the later start.
Click a game to view version-specific details
- Gen 1RB

 Red & Blue
- Gen 1Y
 Yellow
- Gen 2GS
 Gold & Silver
- Gen 2C
 Crystal
- Gen 3RS
 Ruby & Sapphire
- Gen 3E
 Emerald
- Gen 3FRLG
 FireRed & LeafGreen
- Gen 4DP
 Diamond & Pearl
- Gen 4Pt
 Platinum
- Gen 4HGSS
 HeartGold & SoulSilver
- Gen 5BW

 Black & White
- Gen 5B2W2
 Black 2 & White 2
- Gen 6XY
 X & Y
- Gen 6ORAS

 Omega Ruby & Alpha Sapphire
- Gen 7SMDebut
 Sun & Moon
- Gen 7USUM
 Ultra Sun & Ultra Moon
- Gen 7Let's Go

 Let's Go Pikachu & Eevee
- Gen 8SwSh
 Sword & Shield
- Gen 8BDSP

 Brilliant Diamond & Shining Pearl
- Gen 8PLA
 Legends: Arceus
- Gen 9SV
 Scarlet & Violet
- Gen 9LZA
 Legends: Z-A
- Gen 10WW

 Winds & Waves
Explore
Where to go next after Bewear.
Next stepPokedexBrowse the full Pokedex for every gameSee Pokedex