


Is Metapod Good in Sun & Moon Playthrough?
Metapod is on Route 1 too, but there's no reason to catch one when Caterpie evolves into it at level 7.
The Totem Gumshoos outpaces and outclasses Butterfree here.


Butterfree has the type edge here and should clean up Hala's team.


Butterfree trades roughly evenly with the Totem Wishiwashi.


Butterfree trades roughly evenly with the Totem Salazzle.


Butterfree trades roughly evenly with the Totem Lurantis.


Butterfree trades roughly evenly with Olivia's team.


Butterfree trades roughly evenly with the Totem Vikavolt.


The Totem Mimikyu's typing presses Butterfree's defenses.


Butterfree has the type edge here and should clean up Nanu's team.


Butterfree trades roughly evenly with Hapu's team.


Butterfree has the type edge here and should bring the Totem Kommo-o down.


Butterfree has the type edge here and should clean up Hala's team.





Olivia's team hits Butterfree's weaknesses hard.


Butterfree trades roughly evenly with Acerola's team.


Kahili's team hits Butterfree's weaknesses hard.


Kukui's team hits Butterfree's weaknesses hard.



Catchable
Catch Metapod on Route 1 (walking, Lv 3-5).

Catch Caterpie
Catch Caterpie on Route 1 (walking, Lv 2-3).
How to Get Metapod in Sun & Moon
Across a handful of early routes, Metapod hangs in the low brush, a slow-moving cocoon whose levels creep from a mere 3 up to 21.
Where To Catch Metapod in SM
The path to Metapod starts with Caterpie at Lv. 2-21 via walking encounters. 3 catchable stages total, with locations listed for each one below.
- Step 2Metapod ✓Route 1 - WestLv.3-5GrassRate 10%Route 1 - SouthLv.10-13GrassRate 10%Melemele MeadowLv.9-12GrassRate 9%Route 5Lv.13-16GrassRate 9%or evolve from Caterpie (Step 1)
- Step 3Catch or Evolve into ButterfreeMelemele MeadowLv.9-12GrassRate 1%Route 5Lv.13-16GrassRate 1%Lush Jungle - SouthLv.18-21GrassSOS from Metapodor evolve from Metapod (Step 2)
To plan your throws, open the Sun & Moon catch rate calculator with Metapod preloaded.
How to Get Shiny Metapod in Sun & Moon
Metapod turns up mid-chain in Lush Jungle, where holding a steady SOS battle stacks extra shiny rolls with every ally it summons. Compare Shiny Metapod odds across every game


Sun & Moon Shiny Metapod Calculator
3 MethodsThe best route is SOS Chaining at full boosts, about 1 in 274 on each try. Tune it below.
SOS Chaining: Leave one ally fainted and force endless calls. Bonus rolls step up at 11, 21, and 31 calls.
Masuda Method: Breed with a parent from a different-language game. Works on any breedable line.
Full Odds: Walk through grass, surf, or fish. Every encounter is its own independent shiny roll.
How many you have done, or plan to do.
| Chance | Encounters |
|---|---|
| 10%lucky few | 29 |
| 25%one in four | 79 |
| 50%coin flip | 190 |
| 90%very likely | 630 |
How is this calculated?
Every encounter has the same shiny chance, the Shiny Odds Per Try shown above. Each one is a separate roll that does not care how many you have already done, so the more you hunt, the higher your overall chance of at least one shiny. The formula below turns your odds and your number of tries into that combined chance.
chance after N tries = 1 − (1 − p)^N, where p = 1 / odds per try
Example at 1 in 8,192 (classic full odds): about 864 encounters for a 10 percent chance, 5,678 for 50 percent, and 18,862 for 90 percent.
The table above flips that around: it shows how many encounters it takes to reach a 10, 25, 50, and 90 percent chance at your current odds. Turning on boosts like the Shiny Charm, sandwiches, or chains improves your odds, so the encounter numbers drop.
These are estimates, not promises. Most games have no pity counter, meaning no guaranteed shiny no matter how many you hunt, so even Very Likely is not guaranteed: some hunters find one early, others go well past that point.
For time estimates and charm math, open the Sun & Moon shiny odds calculator with Metapod already selected.
Metapod Weakness
Metapod's Bug typing leaves it vulnerable to Fire, Flying, and Rock. Metapod's physical bulk (base 55 Def) helps cushion physical weakness hits, but special attackers are the bigger threat.
| Damage | Types |
|---|---|
| 2x (Weak) | Fire, Flying, Rock |
| 0.5x (Resist) | Grass, Fighting, Ground |
What is Metapod Weak Against
AvgBest Pokemon Against Metapod
 Salamence Dragon | B | |
Available Moves Moves
Damage vs Metapod View Salamence builds →Fly 2x168-198%KO Fire Fang 2x80-96% | ||
 Oricorio Fire | C | |
 Fearow Normal | C | |
 Torracat Fire | C | |
Obtain MethodEvolve Litten (Iki Town Gift) Available Moves Moves
Damage vs Metapod View Torracat builds →Fire Fang 2x86-102%KO Acrobatics 2x50-61% | ||
 Rufflet Normal | C | |
 Trumbeak Normal | C | |
Available Moves Moves
Damage vs Metapod View Trumbeak builds →Pluck 2x80-96% Rock Blast 2x23-29% | ||
 Quilava Fire | C | |
 Litwick GhostFire | C | |
 Drifloon Ghost | C | |
Butterfree Bug | C | |
 Carbink RockFairy | C | |
 Vullaby Dark | C | |
 Growlithe Fire | C | |
 Ledian Bug | C | |
Metapod Evolutions
Metapod sits between Caterpie and Butterfree in this three-stage line. Not the final form yet. For breeding, quick to hatch with plenty of partners via one egg group. So far, Defense got the biggest boost (+20 from Caterpie). The final form adds another 190 stats on top. View every chain in the Evolution Chart.
How to Evolve
Breeding
Breed with Metapod to get Caterpie eggs easily using 77 partners from the Bug egg group.



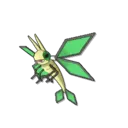

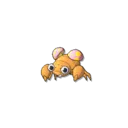

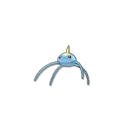

SM Metapod Best Moveset
Bug cocoon at 25 Sp. Atk. AbilityShed Skin clears status passively. MoveHarden is the only move besides Tackle. The moveset can't damage anything competitively. Butterfree one evolution away adds real Sp. Atk and MoveSleep Powder.
Best Build
Metapod best EVs are HP and Defense
Bulky Support Moveset
- Electroweb
- Iron Defense
- Bug Bite
- Snore
Recommended Teammates


Moves List
A compact toolkit overall. The offense runs through Bug Bite for Metapod, with Normal coverage doing what it can. Don't expect versatility from this one.
How to Read the Moves Table
Tabs
- Level-Up
- Learned by leveling up.
- TM
- Taught by a Technical Machine.
- Egg
- Inherited via breeding.
- Tutor
- NPC tutor (cost: items, BP, money).
- Reminder
- An NPC reteaches any move this Pokemon could have learned by leveling up.
- Transfer
- Carried over from an older game using Pokemon HOME.
- Event
- Given out through Mystery Gift events.
Visual Signals
CAT (Category)
How the move deals damage and which stats it uses.
A small dot on the icon's corner marks the move as contact. That triggers abilities like Static, Flame Body, Rough Skin, or Iron Barbs, plus items like Rocky Helmet and Sticky Barb.
Tier (S to D)
Each move's competitive rank in RankedBoost's system. TM, Egg, and Tutor sort by tier by default (best first). On Level-Up, click the Tier header to do the same.
PWR (Power)
Base damage. Numbers shown in a type color include STAB (base × 1.5). Hover any colored number to see the math.
— means no power (status moves) or variable power.
Sorting & Filter
Click any column header to sort. Level-Up opens with Lv 1 at the top. TM, Egg, and Tutor open with the highest-tier moves at the top.
Search filters by move name or type. The Filter button limits the list to STAB, Physical, Special, or Status moves.
Level-Up Moves
TM Moves
Egg Moves
Tutor Moves
Reminder Moves
Base Stats
Its shell is filled with its soft innards. It doesn’t move much because of the risk it might carelessly spill its innards out.
Its shell is hard, but it’s still just a bug shell. It’s been known to break, so intense battles with it should be avoided.
Metapod Sun & Moon Guide
In Sun & Moon, for a casual playthrough, Metapod works as a placeholder. Bug coverage is useful early. The real payoff is Butterfree. That's where the stats start mattering.
Game Availability
Present since Red & Blue, Metapod appears in 19 games spanning 9 generations. Gen 1 originals like Metapod have the longest track record of availability in the series.
Click a game to view version-specific details
- Gen 1RBDebut
 Red & Blue
- Gen 1Y
 Yellow
- Gen 2GS
 Gold & Silver
- Gen 2C
 Crystal
- Gen 3RS
 Ruby & Sapphire
- Gen 3E
 Emerald
- Gen 3FRLG
 FireRed & LeafGreen
- Gen 4DP
 Diamond & Pearl
- Gen 4Pt
 Platinum
- Gen 4HGSS
 HeartGold & SoulSilver
- Gen 5BW
 Black & White
- Gen 5B2W2
 Black 2 & White 2
- Gen 6XY
 X & Y
- Gen 6ORAS
 Omega Ruby & Alpha Sapphire
- Gen 7SM

 Sun & Moon
- Gen 7USUM
 Ultra Sun & Ultra Moon
- Gen 7Let's Go

 Let's Go Pikachu & Eevee
- Gen 8SwSh
 Sword & Shield
- Gen 8BDSP
 Brilliant Diamond & Shining Pearl
- Gen 8PLA
 Legends: Arceus
- Gen 9SV
 Scarlet & Violet
- Gen 9LZA
 Legends: Z-A
- Gen 10WW

 Winds & Waves
Explore
Where to go next after Metapod.
Keep playing · Sun & MoonSun & Moon Tier ListThe best Pokemon ranked tier by tierSee Sun & Moon Tier List