

Is Wormadam Good in Ultra Sun & Ultra Moon Playthrough?
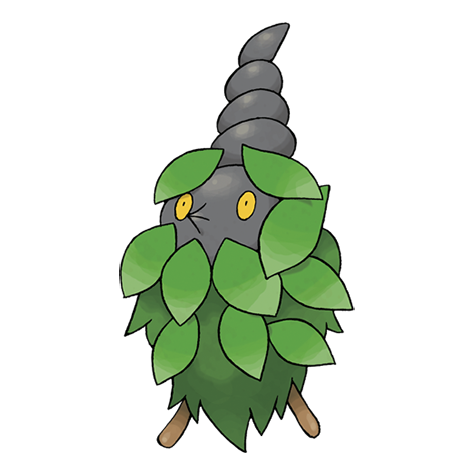
Bug/Grass Plant Cloak form. Breed-only and too slow and fragile to compete. All three forms are outclassed.
Ilima's typing presses Burmy's defenses.
Wormadam trades roughly evenly with Hala's team.
Wormadam trades roughly evenly with Hala's team.
Wormadam trades roughly evenly with Hala's team.
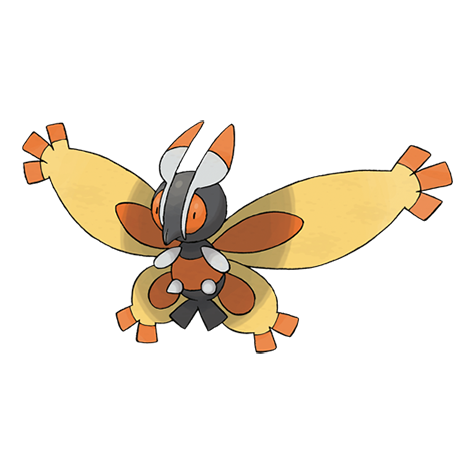
Mothim trades roughly evenly with Hala's team.
Your evolution path matters here. Pick a branch to see how it fares against Hala:
Wormadam has the type edge here and should clean up Lana's team.
 ElectricSteelReceived as a Totem-sized gift Pokemon by collecting enou... (Ultra Moon only)
 BugElectricReceived as a Totem-sized gift Pokemon by collecting enou... (Ultra Sun only)
 GrassReceived as a Totem-sized gift Pokemon by collecting enou... (Ultra Sun only)
 GhostFairyReceived as a Totem-sized gift Pokemon by collecting enou...
Wormadam has the type edge here and should clean up Lana's team.
- ElectricSteelReceived as a Totem-sized gift Pokemon by collecting enou... (Ultra Moon only)
- BugElectricReceived as a Totem-sized gift Pokemon by collecting enou... (Ultra Sun only)
- GrassReceived as a Totem-sized gift Pokemon by collecting enou... (Ultra Sun only)
- GhostFairyReceived as a Totem-sized gift Pokemon by collecting enou...
Mothim trades roughly evenly with Lana's team.
- ElectricSteelReceived as a Totem-sized gift Pokemon by collecting enou... (Ultra Moon only)
- BugElectricReceived as a Totem-sized gift Pokemon by collecting enou... (Ultra Sun only)
- GrassReceived as a Totem-sized gift Pokemon by collecting enou... (Ultra Sun only)
- GhostFairyReceived as a Totem-sized gift Pokemon by collecting enou...
Your evolution path matters here. Pick a branch to see how it fares against Lana:
Kiawe's Pokemon outpace and outclass Wormadam here.
Kiawe's Pokemon outpace and outclass Wormadam here.
Kiawe's Pokemon outpace and outclass Wormadam here.
Kiawe's Pokemon outpace and outclass Mothim here.
Your evolution path matters here. Pick a branch to see how it fares against Kiawe:
Wormadam trades roughly evenly with Mallow's team.
Wormadam trades roughly evenly with Mallow's team.
Wormadam trades roughly evenly with Mallow's team.
Mothim has the type edge here and should clean up Mallow's team.
Your evolution path matters here. Pick a branch to see how it fares against Mallow:
Wormadam has the type edge here and should clean up Olivia's team.
Wormadam has the type edge here and should clean up Olivia's team.
Wormadam has the type edge here and should clean up Olivia's team.
Mothim trades roughly evenly with Olivia's team.
Your evolution path matters here. Pick a branch to see how it fares against Olivia:
Sophocles's Pokemon outpace and outclass Wormadam here.
Sophocles's Pokemon outpace and outclass Wormadam here.
Sophocles's Pokemon outpace and outclass Wormadam here.
Sophocles's Pokemon outpace and outclass Mothim here.
Your evolution path matters here. Pick a branch to see how it fares against Sophocles:
Acerola's team hits Wormadam's weaknesses hard.
Acerola's team hits Wormadam's weaknesses hard.
Acerola's team hits Wormadam's weaknesses hard.
Acerola's typing presses Mothim's defenses.
Your evolution path matters here. Pick a branch to see how it fares against Acerola:
Wormadam trades roughly evenly with Nanu's team.
Wormadam trades roughly evenly with Nanu's team.
Wormadam trades roughly evenly with Nanu's team.
Mothim trades roughly evenly with Nanu's team.
Your evolution path matters here. Pick a branch to see how it fares against Nanu:
Mina's team hits Wormadam's weaknesses hard.
Mina's team hits Wormadam's weaknesses hard.
Mina's team hits Wormadam's weaknesses hard.
Mothim trades roughly evenly with Mina's team.
Your evolution path matters here. Pick a branch to see how it fares against Mina:
Wormadam has the type edge here and should clean up Hapu's team.
Wormadam has the type edge here and should clean up Hapu's team.
Wormadam has the type edge here and should clean up Hapu's team.
Mothim trades roughly evenly with Hapu's team.
Your evolution path matters here. Pick a branch to see how it fares against Hapu:
Molayne's team hits Wormadam's weaknesses hard.
Molayne's team hits Wormadam's weaknesses hard.
Molayne's team hits Wormadam's weaknesses hard.
Molayne's team hits Mothim's weaknesses hard.
Your evolution path matters here. Pick a branch to see how it fares against Molayne:
Wormadam trades roughly evenly with Olivia's team.
Wormadam trades roughly evenly with Olivia's team.
Wormadam trades roughly evenly with Olivia's team.
Olivia's team hits Mothim's weaknesses hard.
Your evolution path matters here. Pick a branch to see how it fares against Olivia:
Wormadam trades roughly evenly with Acerola's team.
Wormadam trades roughly evenly with Acerola's team.
Wormadam trades roughly evenly with Acerola's team.
Mothim trades roughly evenly with Acerola's team.
Your evolution path matters here. Pick a branch to see how it fares against Acerola:
Kahili's team hits Wormadam's weaknesses hard.
Kahili's team hits Wormadam's weaknesses hard.
Kahili's team hits Wormadam's weaknesses hard.
Kahili's team hits Mothim's weaknesses hard.
Your evolution path matters here. Pick a branch to see how it fares against Kahili:
Kukui's team hits Wormadam's weaknesses hard.
Kukui's team hits Wormadam's weaknesses hard.
Kukui's team hits Wormadam's weaknesses hard.
Kukui's team hits Mothim's weaknesses hard.
Your evolution path matters here. Pick a branch to see how it fares against Kukui:
Wormadam cannot be caught in this game. It must be traded in from a compatible game where it appears in the wild. Cross-region trading typically becomes available after defeating the Elite Four. Alternatively, transfer the pre-evolution and level it up to Lv 20.
Wormadam cannot be caught in this game. It must be traded in from a compatible game where it appears in the wild. Cross-region trading typically becomes available after defeating the Elite Four. Alternatively, transfer the pre-evolution and level it up to Lv 20.
Wormadam cannot be caught in this game. It must be traded in from a compatible game where it appears in the wild. Cross-region trading typically becomes available after defeating the Elite Four. Alternatively, transfer the pre-evolution and level it up to Lv 20.
Wormadam cannot be caught in this game. It must be traded in from a compatible game where it appears in the wild. Cross-region trading typically becomes available after defeating the Elite Four. Alternatively, transfer the pre-evolution and level it up to Lv 20.
Mothim cannot be caught in this game. It must be traded in from a compatible game where it appears in the wild. Cross-region trading typically becomes available after defeating the Elite Four. Alternatively, transfer the pre-evolution and level it up to Lv 20.
How to Get Wormadam in Ultra Sun & Ultra Moon
Wormadam isn't available in the wild in Ultra Sun & Ultra Moon. Start by transferring Burmy from Diamond & Pearl or Platinum. The evolution path from Burmy to Wormadam is covered in the steps below.
How to Obtain Wormadam in USUM
 Step 1Obtain BurmyLATER APPEARANCEfrom Diamond & PearlNot TradeableAppears in Diamond & Pearl via Honey tree · Route 210. Forward-only transfer — no path back to this game from a later one.LATER APPEARANCEfrom PlatinumNot TradeableAppears in Platinum via Honey tree · Valley Windworks. Forward-only transfer — no path back to this game from a later one.
- Step 2Wormadam ✓
Wormadam Weakness
Fire, Flying, Ice, Poison, Bug, and Rock moves hit Wormadam for super-effective damage. Fire and Flying hits land at 4x, so they're the biggest threat. The Bug/Grass typing picks up 5 resistances to work with.
| Damage | Types |
|---|---|
| 4x (Critical) | Fire, Flying |
| 2x (Weak) | Ice, Poison, Bug, Rock |
| 0.5x (Resist) | Water, Electric, Fighting |
| 0.25x (Resist) | Grass, Ground |
What is Wormadam Weak Against
FragileBest Pokemon Against Wormadam
Salamence Dragon | B | |
Available Moves Moves
Damage vs Wormadam View Salamence builds →Fly 4x224-264%KO Fire Fang 4x10⁸-128%KO | ||
Oricorio Fire | C | |
Hawlucha Fighting | A | |
Trumbeak Normal | C | |
Available Moves Moves
Damage vs Wormadam View Trumbeak builds →Pluck 4x112-132%KO Smack Down 2x34-40% | ||
Rufflet Normal | C | |
Salamence Dragon | B | |
Available Moves Moves
Damage vs Wormadam View Salamence builds →Fly 4x218-258%KO Fire Fang 4x10⁵-123%KO Rock Tomb 2x49-58% | ||
Flareon Fire | C | |
Obtain MethodEvolve Eevee (Paniola Ranch Gift) | ||
Oricorio Fire | C | |
Arcanine Fire | B | |
Hawlucha Fighting | A | |
Available Moves Moves
Damage vs Wormadam View Hawlucha builds →Wing Attack 4x10⁹-129%KO Rock Tomb 2x35-43% | ||
Salamence Dragon | B | |
Available Moves Moves
Damage vs Wormadam View Salamence builds →Fly 4x237-280%KO Fire Fang 4x113-133%KO Rock Tomb 2x53-63% | ||
Flareon Fire | C | |
Obtain MethodEvolve Eevee (Paniola Ranch Gift) | ||
Oricorio Fire | C | |
Arcanine Fire | B | |
Hawlucha Fighting | A | |
Available Moves Moves
Damage vs Wormadam View Hawlucha builds →Wing Attack 4x118-140%KO Rock Tomb 2x38-47% | ||
Noctowl Normal | C | |
Salamence Dragon | B | |
Available Moves Moves
Damage vs Wormadam View Salamence builds →Fly 4x219-257%KO Fire Fang 4x10⁶-126%KO Rock Tomb 2x50-60% | ||
Flareon Fire | C | |
Obtain MethodEvolve Eevee (Paniola Ranch Gift) | ||
Oricorio Fire | C | |
Salazzle PoisonFire | B | |
Obtain MethodHeahea Beach Gift Available Moves Moves
Damage vs Wormadam View Salazzle builds →Flame Burst 4x130-154%KO Smog 2x29-34% | ||
Noctowl Normal | C | |
Toucannon Normal | C | |
Available Moves Moves
Damage vs Wormadam View Toucannon builds →Beak Blast 4x229-270%KO Flame Charge 4x80-95% Smack Down 2x40-48% | ||
Flareon Fire | C | |
Obtain MethodEvolve Eevee (Paniola Ranch Gift) | ||
Salamence Dragon | B | |
Available Moves Moves
Damage vs Wormadam View Salamence builds →Fly 4x229-270%KO Fire Fang 4x110-130%KO Rock Tomb 2x50-60% | ||
Oricorio Fire | C | |
Salazzle PoisonFire | B | |
Obtain MethodHeahea Beach Gift Available Moves Moves
Damage vs Wormadam View Salazzle builds →Overheat 4x236-278%KO Venoshock 2x60-71% Leech Life 2x38-45% | ||
Talonflame Fire | C | |
Available Moves Moves
Damage vs Wormadam View Talonflame builds →Flare Blitz 4x199-235%KO Fly 4x152-179%KO U-turn 2x40-47% | ||
Flareon Fire | C | |
Obtain MethodEvolve Eevee (Paniola Ranch Gift) Available Moves Moves
Damage vs Wormadam View Flareon builds →Overheat 4x210-247%KO Smog 2x18-21% | ||
Noctowl Normal | C | |
Houndoom DarkFire | C | |
Available Moves Moves
Damage vs Wormadam View Houndoom builds →Overheat 4x236-278%KO Smog 2x19-23% | ||
Volcarona BugFire | A | |
Available Moves Moves
Damage vs Wormadam View Volcarona builds →Overheat 4x263-310%KO Hurricane 4x150-177%KO Bug Buzz 2x93-110%KO | ||
Charizard Fire | C | |
Available Moves Moves
Damage vs Wormadam View Charizard builds →Overheat 4x221-260%KO Air Slash 4x132-155%KO Rock Slide 2x43-50% | ||
Salazzle PoisonFire | B | |
Obtain MethodHeahea Beach Gift Available Moves Moves
Damage vs Wormadam View Salazzle builds →Overheat 4x225-265%KO Sludge Bomb 2x78-93% Acrobatics 4x51-60% Leech Life 2x37-43% | ||
Blaziken FireFighting | B | |
Available Moves Moves
Damage vs Wormadam View Blaziken builds →Overheat 4x225-265%KO Aerial Ace 4x90-107%KO Rock Slide 2x57-67% | ||
Talonflame Fire | C | |
Available Moves Moves
Damage vs Wormadam View Talonflame builds →Flare Blitz 4x191-225%KO Fly 4x144-170%KO U-turn 2x38-45% | ||
Volcarona BugFire | A | |
Available Moves Moves
Damage vs Wormadam View Volcarona builds →Overheat 4x263-310%KO Hurricane 4x150-177%KO Bug Buzz 2x93-110%KO | ||
Charizard Fire | C | |
Available Moves Moves
Damage vs Wormadam View Charizard builds →Overheat 4x221-261%KO Air Slash 4x130-153%KO Rock Slide 2x42-50% | ||
Chandelure GhostFire | B | |
Available Moves Moves
Damage vs Wormadam View Chandelure builds →Overheat 4x281-331%KO Smog 2x23-28% | ||
Flareon Fire | C | |
Obtain MethodEvolve Eevee (Paniola Ranch Gift) Available Moves Moves
Damage vs Wormadam View Flareon builds →Flare Blitz 4x285-335%KO Smog 2x16-19% | ||
Hawlucha Fighting | A | |
Available Moves Moves
Damage vs Wormadam View Hawlucha builds →Sky Attack 4x352-414%KO Stone Edge 2x59-70% X-Scissor 2x48-57% | ||
Volcarona BugFire | A | |
Available Moves Moves
Damage vs Wormadam View Volcarona builds →Overheat 4x271-319%KO Hurricane 4x153-180%KO Bug Buzz 2x94-111%KO Poison Jab 2x35-42% | ||
Charizard Fire | C | |
Available Moves Moves
Damage vs Wormadam View Charizard builds →Overheat 4x227-267%KO Air Slash 4x132-156%KO Rock Slide 2x42-50% | ||
Chandelure GhostFire | B | |
Available Moves Moves
Damage vs Wormadam View Chandelure builds →Overheat 4x288-340%KO Smog 2x23-28% | ||
Flareon Fire | C | |
Obtain MethodEvolve Eevee (Paniola Ranch Gift) Available Moves Moves
Damage vs Wormadam View Flareon builds →Flare Blitz 4x288-340%KO Smog 2x16-20% | ||
Hawlucha Fighting | A | |
Available Moves Moves
Damage vs Wormadam View Hawlucha builds →Sky Attack 4x357-420%KO Stone Edge 2x60-71% X-Scissor 2x48-57% Poison Jab 2x48-57% | ||
In Ultra Sun & Ultra Moon, Weavile's Ice Shard hits Wormadam for 82-97%. Salazzle's Fire Blast also KOs at 238-280%.
Volcarona BugFire | A | |
Recommended Build AbilityFlame Body ItemLeftovers NatureTimid Moves
Damage vs Wormadam View Volcarona builds →Giga Drain8-9% | ||
Weavile DarkIce | B | |
Recommended Build AbilityPressure ItemChoice Band NatureJolly Moves
Damage vs Wormadam View Weavile builds →Knock Off66-78% Ice Shard 2x82-97% Pursuit41-48% | ||
Salazzle PoisonFire | B | |
Recommended Build AbilityCorrosion ItemBlack Sludge NatureTimid Moves
Damage vs Wormadam View Salazzle builds →Flamethrower 4x195-230%KO Fire Blast 4x238-280%KO | ||
Genesect BugSteel | B | |
Recommended Build AbilityDownload ItemChoice Scarf NatureTimid Moves
Damage vs Wormadam View Genesect builds →U Turn 2x70-83% Flamethrower 4x137-161%KO | ||
Talonflame Fire | C | |
Recommended Build AbilityGalewings ItemLeftovers NatureJolly Moves
Damage vs Wormadam View Talonflame builds →Flare Blitz 4x252-297%KO | ||
Wormadam Evolutions
Wormadam is what Burmy becomes. Breed it for Burmy eggs (quick to hatch). Plenty of partners for breeding via one egg group. Eggs are quick to hatch. The evolution from Burmy pushed Wormadam to 424 total stats. Sp.Def saw the largest single gain at +60. View every chain in the Evolution Chart.
How to Evolve
Breeding
Breed with Wormadam to get Burmy eggs using 77 partners from the Bug egg group.


USUM Wormadam Best Moveset
Three forms with different secondary types: Plant (Bug/Grass), Sandy (Bug/Ground), Trash (Bug/Steel). 105 Sp. Def on all forms. AbilityOvercoat blocks weather damage as a hidden ability. But 79/59 offenses and 36 Speed leave the moveset too weak and too slow in every form.
Best Build
Wormadam best EVs are Sp. Atk and Speed
Special Setup Sweeper Moveset
- Bug Buzz
- Quiver Dance
- Giga Drain
- Shadow Ball
Recommended Teammates
Moves List
The level-up pool tells the story here. Wormadam learns Psychic and Leaf Storm naturally, plus enough variety that TMs feel like bonuses. Dark and Normal coverage and more extends the reach beyond that.
How to Read the Moves Table
Tabs
- Level-Up
- Learned by leveling up.
- TM
- Taught by a Technical Machine.
- Egg
- Inherited via breeding.
- Tutor
- NPC tutor (cost: items, BP, money).
- Reminder
- An NPC reteaches any move this Pokemon could have learned by leveling up.
- Transfer
- Carried over from an older game using Pokemon HOME.
- Event
- Given out through Mystery Gift events.
Visual Signals
CAT (Category)
How the move deals damage and which stats it uses.
A small dot on the icon's corner marks the move as contact. That triggers abilities like Static, Flame Body, Rough Skin, or Iron Barbs, plus items like Rocky Helmet and Sticky Barb.
Tier (S to D)
Each move's competitive rank in RankedBoost's system. TM, Egg, and Tutor sort by tier by default (best first). On Level-Up, click the Tier header to do the same.
PWR (Power)
Base damage. Numbers shown in a type color include STAB (base × 1.5). Hover any colored number to see the math.
— means no power (status moves) or variable power.
Sorting & Filter
Click any column header to sort. Level-Up opens with Lv 1 at the top. TM, Egg, and Tutor open with the highest-tier moves at the top.
Search filters by move name or type. The Filter button limits the list to STAB, Physical, Special, or Status moves.
Level-Up Moves
TM Moves
Egg Moves
Tutor Moves
Base Stats
Wormadam Ultra Sun & Ultra Moon Guide
In Ultra Sun & Ultra Moon, watch for Arcanine (Fire), Aerodactyl (Flying), and Cloyster (Ice) when using Wormadam. They all hit it super-effectively with STAB. Arcanine is the most dangerous since Fire moves deal 4x damage. Poison, Bug, and Rock-type attackers are also a problem. With 6 weakness types, most competitive teams carry at least one counter. At base 36 Speed, Wormadam won't outrun any of these threats so switching to a resist is usually the safer play.
For Ultra Sun & Ultra Moon, it depends on your team. Wormadam at 424 BST isn't a powerhouse, but the Bug/Grass coverage might be exactly what you're missing.
In Ultra Sun & Ultra Moon, Wormadam brings 424 BST to the table. C-Tier on our list: a niche pick in Ultra Sun & Ultra Moon's meta. Bugbuzz with Leftovers is the standard set.
Anticipation notifies all trainers upon entering battle if an opponent has a super-effective move, self destruct, explosion, or a one-hit KO move. That's the one you want on Wormadam. Overcoat is the hidden ability. Niche, but it has its uses.
Wormadam is a special attacker with base 79 Sp. Atk. Enough bulk to take a hit or two, too. Speed tells the real story. Base 36 Speed is low. Priority moves or Trick Room are the way to go.
Game Availability
Debuting in Diamond & Pearl, Wormadam appears in 11 games across 7 generations. A reliable presence in a solid number of games, typically found through wild encounters.
Click a game to view version-specific details
- Gen 1RB

 Red & Blue
 - Gen 1Y
 Yellow
 - Gen 2GS

 Gold & Silver
 - Gen 2C
 Crystal
 - Gen 3RS

 Ruby & Sapphire
 - Gen 3E
 Emerald
 - Gen 3FRLG

 FireRed & LeafGreen
 - Gen 4DPDebut

 Diamond & Pearl
 - Gen 4Pt
 Platinum
 - Gen 4HGSS

 HeartGold & SoulSilver
 - Gen 5BW

 Black & White
 - Gen 5B2W2

 Black 2 & White 2
 - Gen 6XY

 X & Y
X & Y - Gen 6ORAS

 Omega Ruby & Alpha Sapphire
 - Gen 7SM

 Sun & Moon
 - Gen 7USUM

 Ultra Sun & Ultra Moon
 - Gen 7LGPE

 Let's Go Pikachu & Eevee
 - Gen 8SwSh

 Sword & Shield
 - Gen 8BDSP

 Brilliant Diamond & Shining Pearl
 - Gen 8PLA
 Legends: Arceus
 - Gen 9SV

 Scarlet & Violet
 - Gen 9LZA
 Legends: Z-A
 - Gen 10WW

 Winds & Waves