
Zelda Tears of the Kingdom Central Hyrule Location
The Zelda Tears of the Kingdom Central Hyrule location guide, here you can use a interactive map to find up to 28 shrines, 4 mini bosses, and 37 Armor gear pieces. You can also find all of treasures chests, shops, stables and more in Central Hyrule area.
Central Hyrule Map Guide
| Location | Type | Subtype | Description | Show on map |
|---|
List Skyview Towers in Central Hyrule
| Skyview Tower | How To Unlock |
|---|---|
|
The Central Hyrule is situated in the heart of a enemy camp. Be sure to defeat the nearby enemies to ensure a safe passage to the tower. | |
|
You will unlock the Central Hyrule via following the main quest line. You will need to complete the "Crisis at Hyrule Castle" quest to unlock this tower. | |
|
The Central Hyrule is located on a big rock and it's all around water. You will need to use Ultrahand to make a walkway with the materials nearby that goes all the way to the bottom of the tower. When you're done, walk across your new walkway and turn on the tower. |
List Shrines in Central Hyrule
| # | Shrine | Rewards |
|---|---|---|
| 029 | ||
| 142 | Hasty Elixir | |
| 068 | ||
| 077 | ||
| 136 | Zonaite Sword | |
| 004 | Energizing Elixir | |
| 046 | ||
| 010 | ||
| 048 | ||
| 000 | Spiky Shield | |
| 032 | ||
| 124 | ||
| 042 | ||
| 123 | ||
| 005 | ||
| 106 | ||
| 115 | ||
| 108 | ||
| 023 | ||
| 030 | ||
| 028 | ||
| 065 | Construct Bow | |
| 020 | ||
| 059 | ||
| 091 | ||
| 133 | ||
| 025 | ||
| 100 |
Armor Found in the Central Hyrule
| Armor | Defense | Special Effects | How To Get | |
|---|---|---|---|---|
B Tier
|
Legwear
|
Base:
3 ★:
5 ★★:
8 ★★★:
12 ★★★★:
20 |
Ancient Tree Stump Bargainer Statue
| |
C Tier
|
Headgear
|
Base:
3 ★:
5 ★★:
8 ★★★:
12 ★★★★:
20 |
none
|
Bargainer Statue
|
C Tier
|
Legwear
|
Base:
3 ★:
5 ★★:
8 ★★★:
12 ★★★★:
20 |
none
|
Bargainer Statue
|
C Tier
|
Body Armor
|
Base:
3 ★:
5 ★★:
8 ★★★:
12 ★★★★:
20 |
none
|
Bargainer Statue
|
A Tier
|
Headgear
|
Base:
3 ★:
5 ★★:
8 ★★★:
12 ★★★★:
20 |
Bargainer Statue
| |
A Tier
|
Legwear
|
Base:
3 ★:
5 ★★:
8 ★★★:
12 ★★★★:
20 |
Bargainer Statue
| |
A Tier
|
Body Armor
|
Base:
3 ★:
5 ★★:
8 ★★★:
12 ★★★★:
20 |
Bargainer Statue
| |
? Tier
|
Body Armor
|
Base:
4 ★:
7 ★★:
12 ★★★:
18 ★★★★:
28 |
|
Bargainer Statue
|
C Tier
|
Headgear
|
Base:
3 ★:
★★:
★★★:
★★★★:
|
|
Bargainer Statue
|
C Tier
|
Legwear
|
Base:
3 ★:
★★:
★★★:
★★★★:
|
|
Bargainer Statue
|
C Tier
|
Body Armor
|
Base:
3 ★:
★★:
★★★:
★★★★:
|
|
Bargainer Statue
|
E Tier
|
Headgear
|
Base:
3 ★:
5 ★★:
8 ★★★:
12 ★★★★:
20 |
|
Bargainer Statue
|
E Tier
|
Legwear
|
Base:
3 ★:
5 ★★:
8 ★★★:
12 ★★★★:
20 |
|
Gerudo Canyon Mine Bargainer Statue
|
E Tier
|
Body Armor
|
Base:
3 ★:
5 ★★:
8 ★★★:
12 ★★★★:
20 |
|
Lindor Canyon Mine Bargainer Statue
|
E Tier
|
Headgear
|
Base:
3 ★:
5 ★★:
8 ★★★:
12 ★★★★:
20 |
|
Tingel Island Chasm Bargainer Statue
|
E Tier
|
Legwear
|
Base:
3 ★:
5 ★★:
8 ★★★:
12 ★★★★:
20 |
|
Bargainer Statue
|
E Tier
|
Body Armor
|
Base:
3 ★:
5 ★★:
8 ★★★:
12 ★★★★:
20 |
|
Bargainer Statue
|
E Tier
|
Headgear
|
Base:
3 ★:
5 ★★:
8 ★★★:
12 ★★★★:
20 |
|
Bargainer Statue
|
E Tier
|
Legwear
|
Base:
3 ★:
5 ★★:
8 ★★★:
12 ★★★★:
20 |
|
Bargainer Statue
|
E Tier
|
Body Armor
|
Base:
3 ★:
5 ★★:
8 ★★★:
12 ★★★★:
20 |
|
Bargainer Statue
|
E Tier
|
Headgear
|
Base:
3 ★:
5 ★★:
8 ★★★:
12 ★★★★:
20 |
|
Bargainer Statue
|
E Tier
|
Legwear
|
Base:
3 ★:
5 ★★:
8 ★★★:
12 ★★★★:
20 |
|
Bargainer Statue
|
E Tier
|
Body Armor
|
Base:
3 ★:
5 ★★:
8 ★★★:
12 ★★★★:
20 |
|
Bargainer Statue
|
E Tier
|
Headgear
|
Base:
2 ★:
4 ★★:
6 ★★★:
9 ★★★★:
16 |
Bargainer Statue
| |
B Tier
|
Headgear
|
Base:
3 ★:
5 ★★:
8 ★★★:
12 ★★★★:
20 |
Skull Lake Cave Bargainer Statue
| |
B Tier
|
Body Armor
|
Base:
3 ★:
5 ★★:
8 ★★★:
12 ★★★★:
20 |
Akkala Citadel Ruins Bargainer Statue
| |
C Tier
|
Headgear
|
Base:
3 ★:
5 ★★:
8 ★★★:
12 ★★★★:
20 |
Bargainer Statue
| |
C Tier
|
Legwear
|
Base:
3 ★:
5 ★★:
8 ★★★:
12 ★★★★:
20 |
Bargainer Statue
| |
C Tier
|
Body Armor
|
Base:
3 ★:
5 ★★:
8 ★★★:
12 ★★★★:
20 |
Bargainer Statue
| |
? Tier
|
Body Armor
|
Base:
5 ★:
8 ★★:
14 ★★★:
22 ★★★★:
32 |
|
Hyrule Castle
|
E Tier
|
Headgear
|
Base:
4 ★:
6 ★★:
10 ★★★:
15 ★★★★:
24 |
none
|
Hyrule Castle
|
E Tier
|
Legwear
|
Base:
4 ★:
6 ★★:
10 ★★★:
15 ★★★★:
24 |
none
|
Hyrule Castle
|
E Tier
|
Body Armor
|
Base:
4 ★:
6 ★★:
10 ★★★:
15 ★★★★:
24 |
none
|
Hyrule Castle
|
C Tier
|
Headgear
|
Base:
4 ★:
7 ★★:
12 ★★★:
18 ★★★★:
28 |
none
|
Royal Hidden Passage
|
C Tier
|
Legwear
|
Base:
4 ★:
7 ★★:
12 ★★★:
18 ★★★★:
28 |
none
|
Royal Hidden Passage
|
C Tier
|
Body Armor
|
Base:
4 ★:
7 ★★:
12 ★★★:
18 ★★★★:
28 |
none
|
Royal Hidden Passage
|
C Tier
|
Body Armor
|
Base:
3 ★:
5 ★★:
8 ★★★:
12 ★★★★:
20 |
|
North Hyrule Plain
|


Equipment found in the Central Hyrule
| Weapons | Stats | |
|---|---|---|
A Tier
|
Sword
|
Effect: Improved Flurry Rush (weapon deals 2x more damage during flurry rushes)
Attack:
36-15
Guard Break:
55
Durability:
40-20
|
B Tier
|
Spear
|
Effect: Improved Flurry Rush (weapon deals 2x more damage during flurry rushes)
Attack:
13-5
Guard Break:
32
Durability:
50-30
|
E Tier
|
Sword
|
Effect: Desperate Strength (weapon has 2x damage when Link has one heart or less)
Attack:
18-7
Guard Break:
26
Durability:
27-18
|
C Tier
|
Sword
|
Effect: Improved Flurry Rush (weapon deals 2x more damage during flurry rushes)
Attack:
24-10
Guard Break:
36
Durability:
35-20
|
E Tier
|
Spear
|
Effect: Quick Charge (Charged attacks charge twice faster)
Attack:
7-3
Guard Break:
8
Durability:
35-25
|
F Tier
|
Spear
|
Attack:
2
Guard Break:
4
Durability:
12
|
F Tier
|
Spear
|
Attack:
3
Guard Break:
4
Durability:
12
|
F Tier
|
Spear
|
Attack:
2
Guard Break:
2
Durability:
8
|
E Tier
|
Sword
|
Attack:
10-7
Guard Break:
10
Durability:
20-16
|
C Tier
|
Sword
|
Effect: Charge Atk. Stamina Up (Decrease Charge Attack Stamina Used)
Attack:
17-9
Guard Break:
20
Durability:
25-17
|
B Tier
|
Sword
|
Effect: Desperate Strength (weapon has 2x damage when Link has one heart or less)
Attack:
26-12
Guard Break:
38
Durability:
30-18
|
F Tier
|
Sword
|
Attack:
7
Guard Break:
8
Durability:
8
|
F Tier
|
Club
|
Attack:
7
Guard Break:
3
Durability:
6
|
S Tier
|
Boomerang
|
Attack:
25
Guard Break:
12
Durability:
40
|
F Tier
|
Club
|
Attack:
6
Guard Break:
6
Durability:
14
|
D Tier
|
Club
|
Effect: Extra Durable (Grants Extra Durability)
Attack:
8
Guard Break:
6
Durability:
26
|
F Tier
|
Sword
|
Attack:
7-5
Guard Break:
5
Durability:
20-16
|
E Tier
|
Sword
|
Effect: Quick Charge (Charged attacks charge twice faster)
Attack:
12-6
Guard Break:
14
Durability:
23-17
|
F Tier
|
Sword
|
Attack:
5
Guard Break:
5
Durability:
6
|
F Tier
|
Club
|
Attack:
4
Guard Break:
5
Durability:
5
|
B Tier
|
Sword
|
Effect: Improved Sneak Strike (x16 sneakstrikes instead of x8 for a sneak attack)
Attack:
15
Guard Break:
15
Durability:
26
|
F Tier
|
Club
|
Attack:
2
Guard Break:
2
Durability:
8
|
F Tier
|
Club
|
Attack:
2
Guard Break:
2
Durability:
4
|
F Tier
|
Club
|
Attack:
4
Guard Break:
4
Durability:
12
|
D Tier
|
Club
|
Effect: Extra Durable (Grants Extra Durability)
Attack:
5
Guard Break:
4
Durability:
24
|
E Tier
|
Bow
|
Attack:
5
Range:
20
Durability:
22
|
D Tier
|
Bow
|
Attack:
14
Range:
20
Durability:
36
|
D Tier
|
Bow
|
Attack:
12
Range:
20
Durability:
20
|
F Tier
|
Bow
|
Attack:
4
Range:
20
Durability:
16
|
A Tier
|
Bow
|
Attack:
38
Range:
20
Durability:
60
|
F Tier
|
Bow
|
Attack:
4
Range:
20
Durability:
20
|
B Tier
|
Bow
|
Attack:
14x2
Range:
40
Durability:
18
|
F Tier
|
Shield
|
Defense:
2
Durability:
12
|
C Tier
|
Shield
|
Defense:
16
Durability:
16
|
F Tier
|
Shield
|
Defense:
3
Durability:
5
|
E Tier
|
Shield
|
Defense:
10
Durability:
7
|
B Tier
|
Shield
|
Defense:
30
Durability:
12
|
F Tier
|
Shield
|
Defense:
3
Durability:
16
|
S Tier
|
Shield
|
Defense:
55
Durability:
29
|
F Tier
|
Shield
|
Defense:
4
Durability:
12
|
F Tier
|
Shield
|
Defense:
1
Durability:
10
|
B Tier
|
Spear
|
Effect: Fuse Recycling (Allows the reusage of certain one-time use fuse materials)
Attack:
10-4
Guard Break:
6
Durability:
35-24
|
F Tier
|
Club
|
Attack:
30
Guard Break:
8
Durability:
5
|
C Tier
|
Sword
|
Effect: Fuse Recycling (Allows the reusage of certain one-time use fuse materials)
Attack:
16-7
Guard Break:
8
Durability:
27-17
|
A Tier
|
Attack:
15x3
Range:
20
Durability:
35
| |
B Tier
|
Shield
|
Defense:
30
Durability:
18
|
A Tier
|
Sword
|
Effect: Wind Razor (Creates Wind Slashes)
Attack:
25
Guard Break:
32
Durability:
25
|


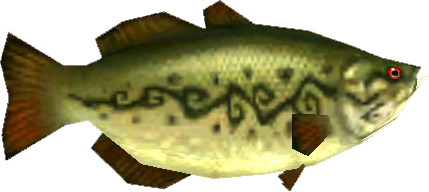
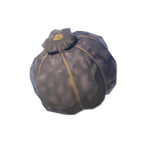
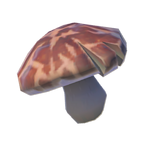
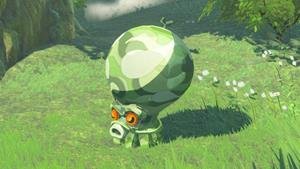
Materials found in the Central Hyrule
| Material | Effects |
|---|---|
|
Time Boost: 0:30
| |
|
| |
|
Elixir: Extra Stamina
| |
|
Elixir:
| |
|
| |
|
Cooking:
| |
|
Time Boost: 0:40
| |
|
Time Boost: 0:40
| |
|
Time Boost: 0:40
| |
|
Time Boost: 0:40
| |
|
Time Boost: 1:20
| |
|
Time Boost: 1:20
| |
|
Time Boost: 1:20
| |
|
Time Boost: 0:40
| |
|
Time Boost: 0:40
| |
|
Time Boost: 0:40
| |
|
Time Boost: 0:40
| |
|
Time Boost: 0:40
| |
|
Time Boost: 0:40
| |
|
Time Boost: 0:40
| |
|
| |
|
Cooking:
| |
|
| |
|
Time Boost: 0:20
| |
|
| |
|
Cooking: Extra Hearts
| |
|
| |
|
Cooking:
| |
|
| |
|
| |
|
Time Boost: 0:40
| |
|
Cooking: Extra Stamina
|


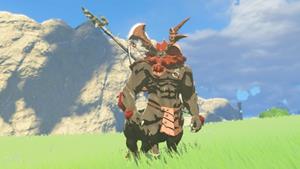
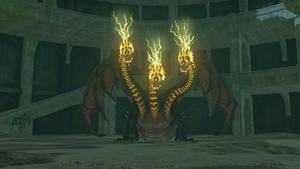
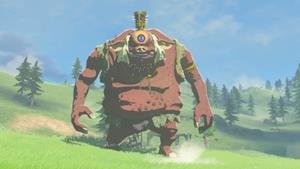
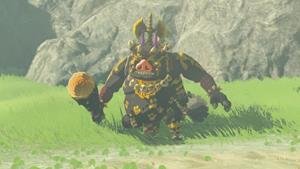
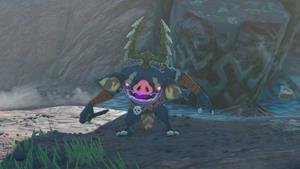
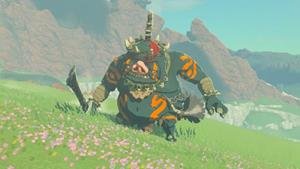
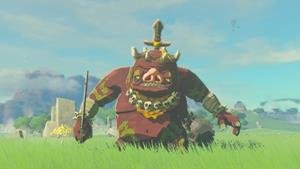
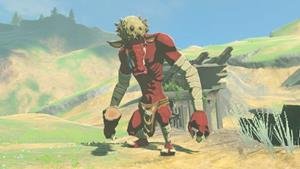
Bosses in the Central Hyrule Location
| Bosses | Stats | Drops |
|---|---|---|
|
Life: 2000
|
 | |
|
Life: 380
|
| |
|
Life: 8000
|
| |
|
Life: 600
|
|

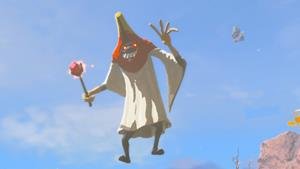
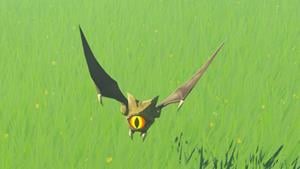
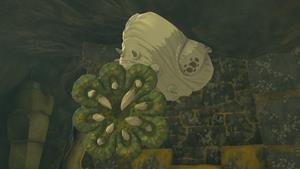
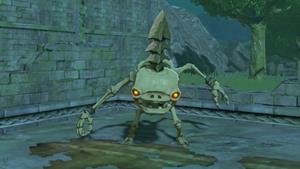
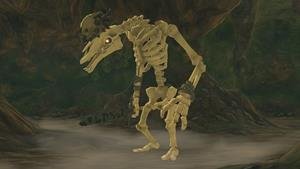
Enemies in the Central Hyrule Location
| Enemies | Stats | Drops |
|---|---|---|
|
Life: 750
|
| |
|
Life: 72
|
| |
|
Life: 400
|
| |
|
Life: 144
|
| |
|
Life: 25
|
| |
|
Life: 200
|
| |
|
Life: 10
|
| |
|
Life: 40
|
| |
|
Life: 150
|
| |
|
Life: 1
|
| |
|
Life: 200
|
| |
|
Life: 62
|
| |
|
Life: 400
|
| |
|
Life: 2
|
| |
|
Life: 3
|
| |
|
Life: 8
|
|


All Locations in Zelda Tears of the Kingdom.
Popular Guides