Zelda Tears of the Kingdom Attack Up
The Zelda Tears of the Kingdom Attack Up Stat Increases Attack Power. We list all the Armor, Weapons, and Recipes that provide the Attack Up Effect Bonus.
Where To Find Attack Up Armor and Food
You can find Attack Up Armor, Ingredients used in recipes, and more using the map below.
| Location | Type | Subtype | Description | Show on map |
|---|
Attack Up Recipes and Ingredients
You can make 2 Recipes that provide the Attack Up Bonus In Zelda TotK. Recipes such as Mighty Fried Bananas, Mighty Elixir. You can also use different ingredients which will add the Attack Up to any dish and or elixir you make.


Attack Up Armor
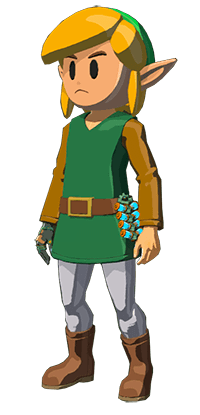
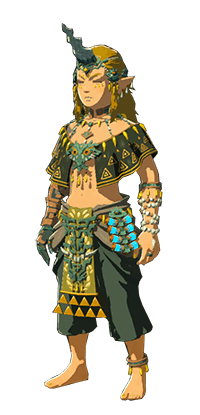
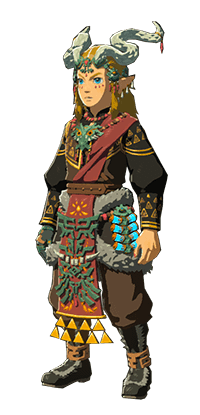
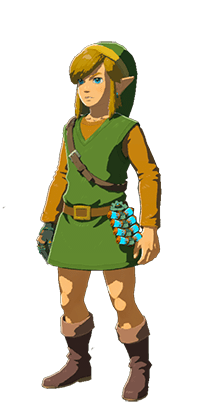
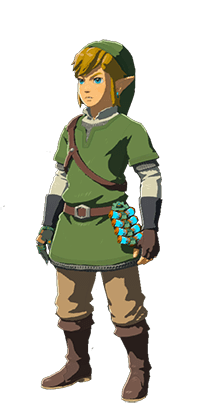
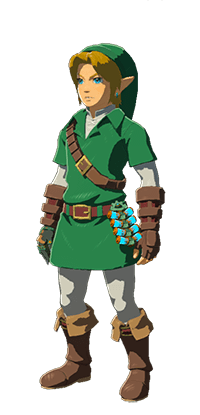
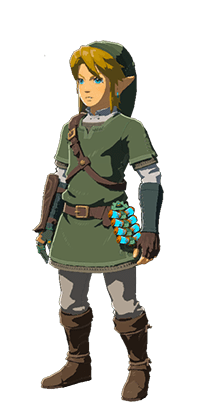
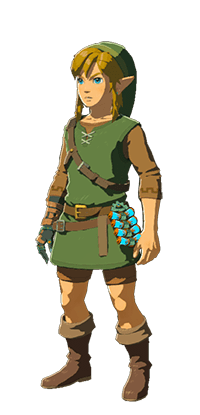
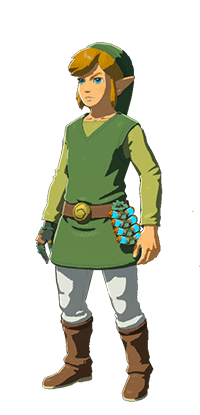
You can equip 22 different Armor that will give you Attack Up Stat. Armor pieces such as Diamond Circlet, Barbarian Helm, Barbarian Leg Wraps, Barbarian Armor, Ember Headdress, Ember Trousers, Ember Shirt, Charged Headdress, Charged Trousers, Charged Shirt, Frostbite Headdress, Frostbite Trousers, Frostbite Shirt, Phantom Helmet, Phantom Greaves, Phantom Armor, Fierce Deity Mask, Fierce Deity Boots, Fierce Deity Armor, Cap of the Hero, Trousers of the Hero, Tunic of the Hero. You can also equip the Awakening Set, Charged Set, Ember Set, Hero Set, Sky Set, Time Set, Twilight Set, Wild Set, Wind Set, Frostbite Set Armor Set which will give you a Attack Up Bonus.
| Tier | Set Armor | Pieces | Effects |
|---|---|---|---|
E Tier
|
|
Full Set Bonus:
| |
S Tier
|
|
Full Set Bonus: Stormy Weather Charge (Charge Attack faster during stormy weather and cuase a Electric Burst at end of combo or Charge Attack)
| |
S Tier
|
|
Full Set Bonus: Hot Weather Charge (Charge Attack faster during hot weather and cuase a Fire Burst at end of combo or Charge Attack)
| |
D Tier
|
|
Full Set Bonus:
| |
D Tier
|
|
Full Set Bonus:
| |
D Tier
|
|
Full Set Bonus:
| |
D Tier
|
|
Full Set Bonus:
| |
D Tier
|
|
Full Set Bonus:
| |
D Tier
|
|
Full Set Bonus:
| |
S Tier
|
|
Full Set Bonus: Cold Weather Charge (Charge Attack faster during cold weather and cuase a Ice Burst at end of combo or Charge Attack)
|

| Tier | Attack Up | Defense | Special Effects | How To Get |
|---|---|---|---|---|
B Tier
|
Headgear
|
Base:
4 ★:
7 ★★:
12 ★★★:
18 ★★★★:
28 |
Gerudo Town Starlight Memories
| |
A Tier
|
Headgear
|
Base:
3 ★:
5 ★★:
8 ★★★:
12 ★★★★:
20 |
Robred Dropoff Cave
| |
A Tier
|
Legwear
|
Base:
3 ★:
5 ★★:
8 ★★★:
12 ★★★★:
20 |
Walnot Mountain Cave
| |
A Tier
|
Body Armor
|
Base:
3 ★:
5 ★★:
8 ★★★:
12 ★★★★:
20 |
Crenel Hills Cave
| |
A Tier
|
Headgear
|
Base:
2 ★:
4 ★★:
6 ★★★:
9 ★★★★:
16 |
|
YunoboCo HQ South Cave
|
A Tier
|
Legwear
|
Base:
2 ★:
4 ★★:
6 ★★★:
9 ★★★★:
16 |
|
Goronbi River Cave
|
A Tier
|
Body Armor
|
Base:
2 ★:
4 ★★:
6 ★★★:
9 ★★★★:
16 |
|
Cephla Lake Cave
|
A Tier
|
Headgear
|
Base:
3 ★:
5 ★★:
8 ★★★:
12 ★★★★:
20 |
|
Blocked Ruin
|
A Tier
|
Legwear
|
Base:
3 ★:
5 ★★:
8 ★★★:
12 ★★★★:
20 |
|
Damel Forest
|
A Tier
|
Body Armor
|
Base:
3 ★:
5 ★★:
8 ★★★:
12 ★★★★:
20 |
|
Dracozu Lake
|
A Tier
|
Headgear
|
Base:
2 ★:
4 ★★:
6 ★★★:
9 ★★★★:
16 |
|
Lake Kilsie Cave
|
A Tier
|
Legwear
|
Base:
2 ★:
4 ★★:
6 ★★★:
9 ★★★★:
16 |
|
Hebra Headspring Cave
|
A Tier
|
Body Armor
|
Base:
2 ★:
4 ★★:
6 ★★★:
9 ★★★★:
16 |
|
Brightcap Cave
|
A Tier
|
Headgear
|
Base:
8 ★:
★★:
★★★:
★★★★:
|
Puffer Beach Overhead Cave
| |
A Tier
|
Legwear
|
Base:
8 ★:
★★:
★★★:
★★★★:
|
Ancient Altar Ruins
| |
A Tier
|
Body Armor
|
Base:
8 ★:
★★:
★★★:
★★★★:
|
Tamio River Downstream Cave
| |
B Tier
|
Headgear
|
Base:
3 ★:
5 ★★:
8 ★★★:
12 ★★★★:
20 |
Skull Lake Cave Bargainer Statue
| |
B Tier
|
Legwear
|
Base:
3 ★:
5 ★★:
8 ★★★:
12 ★★★★:
20 |
Ancient Tree Stump Bargainer Statue
| |
B Tier
|
Body Armor
|
Base:
3 ★:
5 ★★:
8 ★★★:
12 ★★★★:
20 |
Akkala Citadel Ruins Bargainer Statue
| |
C Tier
|
Headgear
|
Base:
3 ★:
5 ★★:
8 ★★★:
12 ★★★★:
20 |
Bargainer Statue
| |
C Tier
|
Legwear
|
Base:
3 ★:
5 ★★:
8 ★★★:
12 ★★★★:
20 |
Bargainer Statue
| |
C Tier
|
Body Armor
|
Base:
3 ★:
5 ★★:
8 ★★★:
12 ★★★★:
20 |
Bargainer Statue
|


All Stat Effects in Zelda Tears of the Kingdom.
Popular Guides