
Is Tentacruel Good in Omega Ruby & Alpha Sapphire Playthrough?
One of the most reliable Water-types you can run in ORAS. Tentacruel's Special Defense absorbs hits from Wallace and Phoebe, and the speed keeps it ahead of most mid-game threats. A better pick than it looks on paper.
Tentacool resists most of Roxanne's coverage and hits back hard.
Tentacool has the type edge here and should clean up Brawly's team.
Tentacool trades roughly evenly with Wattson's team.
Tentacool has the type edge here and should clean up Flannery's team.
Norman's typing presses Tentacool's defenses.
Tentacruel trades roughly evenly with Winona's team.
Tentacruel has the type edge here and should clean up Tate & Liza's team.
Tentacruel trades roughly evenly with Wallace's team.
Tentacruel trades roughly evenly with Sidney's team.
Tentacruel trades roughly evenly with Phoebe's team.
Tentacruel trades roughly evenly with Glacia's team.
Tentacruel trades roughly evenly with Drake's team.
Tentacruel trades roughly evenly with Steven's team.
Catch Tentacool on Route 103 (Surf, Lv 20-25, common).
Your Tentacool should hit Level 30 before you reach Winona, at typical leveling pace.
How to Get Tentacruel in Omega Ruby & Alpha Sapphire
44 encounter spots for Tentacruel at high spawn rates starting from mid-game water routes. Best and Earliest sort options below help narrow down your approach based on odds vs. Accessibility.
Where To Catch Tentacruel in ORAS
To get Tentacruel, start by catching Tentacool through fishing and surfing encounters at Lv. 5-35. The chain covers 2 catchable stages before reaching the final form.
 Step 1Catch TentacoolSea Mauville - Area 2Lv.15-25Surfing on waterRate 100%Sea Mauville - Area 3Lv.15-25Surfing on waterRate 100%Sea Mauville - Area 4Lv.15-25Surfing on waterRate 100%Sea Mauville - Area 1Lv.15-20Surfing on waterRate 65%Battle ResortLv.5Old RodRate 35%Dewford TownLv.5Old RodRate 35%Ever Grande CityLv.5Old RodRate 35%Lilycove CityLv.5Old RodRate 35%Mossdeep CityLv.5Old RodRate 35%Pacifidlog TownLv.5Old RodRate 35%Route 103Lv.5Old RodRate 35%Route 105 - OutsideLv.5Old RodRate 35%Route 106Lv.5Old RodRate 35%Route 107Lv.5Old RodRate 35%Route 108Lv.5Old RodRate 35%Route 109Lv.5Old RodRate 35%Route 110Lv.5Old RodRate 35%Route 115Lv.5Old RodRate 35%Route 118Lv.5Old RodRate 35%Route 119Lv.5Old RodRate 35%Route 120 - EastLv.5Old RodRate 35%Route 122Lv.5Old RodRate 35%Route 124Lv.5Old RodRate 35%Route 125Lv.5Old RodRate 35%Route 126Lv.5Old RodRate 35%Route 127Lv.5Old RodRate 35%Route 128Lv.5Old RodRate 35%Route 129Lv.5Old RodRate 35%Route 130Lv.5Old RodRate 35%Route 131Lv.5Old RodRate 35%Route 132Lv.5Old RodRate 35%Route 133Lv.5Old RodRate 35%Route 134Lv.5Old RodRate 35%Sea Mauville - Area 1Lv.5Old RodRate 35%Sea Mauville - Area 2Lv.5Old RodRate 35%Sea Mauville - Area 3Lv.5Old RodRate 35%Sea Mauville - Area 4Lv.5Old RodRate 35%Seafloor Cavern - Area 4Lv.5Old RodRate 35%Seafloor Cavern - Area 5Lv.5Old RodRate 35%Sealed ChamberLv.5Old RodRate 35%Shoal Cave - Area 5Lv.5Old RodRate 35%Shoal Cave - Area 6Lv.5Old RodRate 35%Slateport CityLv.5Old RodRate 35%Team Magma/Aqua HideoutLv.5Old RodRate 35%Victory Road - Area 1Lv.5Old RodRate 35%Victory Road - Area 2Lv.5Old RodRate 35%Victory Road - Area 3Lv.5Old RodRate 35%Seafloor Cavern - Area 1Lv.10Old RodRate 35%Team Magma/Aqua HideoutLv.20-30Surfing on waterRate 100%Dewford TownLv.20-25Surfing on waterRate 65%Lilycove CityLv.20-25Surfing on waterRate 65%Route 103Lv.20-25Surfing on waterRate 65%Route 105 - OutsideLv.20-25Surfing on waterRate 65%Route 106Lv.20-25Surfing on waterRate 65%Route 107Lv.20-25Surfing on waterRate 65%Route 108Lv.20-25Surfing on waterRate 65%Route 109Lv.20-25Surfing on waterRate 65%Route 110Lv.20-25Surfing on waterRate 65%Route 115Lv.20-25Surfing on waterRate 65%Route 118Lv.20-25Surfing on waterRate 65%Route 119Lv.20-25Surfing on waterRate 65%Route 122Lv.20-25Surfing on waterRate 65%Route 134Lv.20-25Surfing on waterRate 65%Sealed ChamberLv.20-25Surfing on waterRate 65%Slateport CityLv.20-25Surfing on waterRate 65%Ever Grande CityLv.25Surfing on waterRate 60%Mossdeep CityLv.25Surfing on waterRate 60%Pacifidlog TownLv.25Surfing on waterRate 60%Route 124Lv.25Surfing on waterRate 60%Route 125Lv.25Surfing on waterRate 60%Route 126Lv.25Surfing on waterRate 60%Route 127Lv.25Surfing on waterRate 60%Route 128Lv.25Surfing on waterRate 60%Route 129Lv.25Surfing on waterRate 60%Route 130Lv.25Surfing on waterRate 60%Route 131Lv.25Surfing on waterRate 60%Route 132Lv.25Surfing on waterRate 60%Route 133Lv.25Surfing on waterRate 60%Shoal Cave - Area 5Lv.25Surfing on waterRate 60%Shoal Cave - Area 6Lv.25Surfing on waterRate 60%Victory Road - Area 1Lv.25Surfing on waterRate 60%Victory Road - Area 2Lv.25Surfing on waterRate 60%Victory Road - Area 3Lv.25Surfing on waterRate 60%Battle ResortLv.25Good RodRate 35%Dewford TownLv.25Good RodRate 35%Lilycove CityLv.25Good RodRate 35%Mossdeep CityLv.25Good RodRate 35%Pacifidlog TownLv.25Good RodRate 35%Route 103Lv.25Good RodRate 35%Route 105 - OutsideLv.25Good RodRate 35%Route 106Lv.25Good RodRate 35%Route 107Lv.25Good RodRate 35%Route 108Lv.25Good RodRate 35%Route 109Lv.25Good RodRate 35%Route 110Lv.25Good RodRate 35%Route 115Lv.25Good RodRate 35%Route 118Lv.25Good RodRate 35%Route 120 - EastLv.25Good RodRate 35%Route 122Lv.25Good RodRate 35%Route 124Lv.25Good RodRate 35%Route 125Lv.25Good RodRate 35%Route 126Lv.25Good RodRate 35%Route 127Lv.25Good RodRate 35%Route 129Lv.25Good RodRate 35%Route 130Lv.25Good RodRate 35%Route 131Lv.25Good RodRate 35%Route 132Lv.25Good RodRate 35%Route 133Lv.25Good RodRate 35%Route 134Lv.25Good RodRate 35%Sea Mauville - Area 1Lv.25Good RodRate 35%Sea Mauville - Area 2Lv.25Good RodRate 35%Sea Mauville - Area 3Lv.25Good RodRate 35%Sea Mauville - Area 4Lv.25Good RodRate 35%Seafloor Cavern - Area 4Lv.25Good RodRate 35%Seafloor Cavern - Area 5Lv.25Good RodRate 35%Sealed ChamberLv.25Good RodRate 35%Shoal Cave - Area 5Lv.25Good RodRate 35%Shoal Cave - Area 6Lv.25Good RodRate 35%Slateport CityLv.25Good RodRate 35%Team Magma/Aqua HideoutLv.25Good RodRate 35%Seafloor Cavern - Area 1Lv.30Good RodRate 35%
 Step 2Tentacruel ✓Seafloor Cavern - Area 4Lv.25-30Surfing on waterRate 65%Seafloor Cavern - Area 5Lv.25-30Surfing on waterRate 65%Seafloor Cavern - Area 1Lv.30-35Surfing on waterRate 35%Ever Grande CityLv.30Surfing on waterRate 5%Mossdeep CityLv.30Surfing on waterRate 5%Pacifidlog TownLv.30Surfing on waterRate 5%Route 124Lv.30Surfing on waterRate 5%Route 125Lv.30Surfing on waterRate 5%Route 126Lv.30Surfing on waterRate 5%Route 127Lv.30Surfing on waterRate 5%Route 128Lv.30Surfing on waterRate 5%Route 129Lv.30Surfing on waterRate 5%Route 130Lv.30Surfing on waterRate 5%Route 131Lv.30Surfing on waterRate 5%Route 132Lv.30Surfing on waterRate 5%Route 133Lv.30Surfing on waterRate 5%Shoal Cave - Area 5Lv.30Surfing on waterRate 5%Shoal Cave - Area 6Lv.30Surfing on waterRate 5%Battle ResortLv.35Surfing on waterRate 60%Victory Road - Area 1Lv.35Surfing on waterRate 5%Victory Road - Area 2Lv.35Surfing on waterRate 5%Victory Road - Area 3Lv.35Surfing on waterRate 5%or evolve from Tentacool (Step 1)
Tentacruel Weakness
Electric, Ground, and Psychic moves hit Tentacruel for super-effective damage. With 8 resistances, the defensive profile is strong. Tentacruel's special bulk (base 120 Sp.Def) helps absorb special-type weaknesses, though physical moves exploit the lower Defense.
| Damage | Types |
|---|---|
| 2x (Weak) | Electric, Ground, Psychic |
| 0.5x (Resist) | Fire, Water, Ice, Fighting, Poison, Bug, Steel, Fairy |
What is Tentacruel Weak Against
GoodBest Pokemon Against Tentacruel
Gardevoir PsychicFairy | B | |
Available Moves Moves
Damage vs Tentacruel View Gardevoir builds →Psychic 2x71-84% Thunderbolt 2x47-56% | ||
Magnezone ElectricSteel | B | |
Gastrodon WaterGround | C | |
Kadabra Psychic | A | |
Available Moves Moves
Damage vs Tentacruel View Kadabra builds →Psychic 2x68-81% Charge Beam 2x27-32% | ||
Sandslash Ground | C | |
Latios DragonPsychic | B | |
Obtain MethodSouthern Island Interact Encounter Available Moves Moves
Damage vs Tentacruel View Latios builds →Psychic 2x75-88% Thunderbolt 2x49-58% Bulldoze 2x38-45% | ||
Latias DragonPsychic | B | |
Obtain MethodSouthern Island Gift Available Moves Moves
Damage vs Tentacruel View Latias builds →Psychic 2x62-74% Thunderbolt 2x42-49% Bulldoze 2x37-43% | ||
Torterra GrassGround | C | |
Available Move Moves
Damage vs Tentacruel View Torterra builds →Earthquake 2x112-133%KO | ||
Gardevoir PsychicFairy | B | |
Available Moves Moves
Damage vs Tentacruel View Gardevoir builds →Psychic 2x69-82% Thunderbolt 2x46-55% | ||
Gastrodon WaterGround | C | |
Latios DragonPsychic | B | |
Obtain MethodSouthern Island Interact Encounter Available Moves Moves
Damage vs Tentacruel View Latios builds →Psychic 2x73-86% Thunderbolt 2x49-57% Bulldoze 2x39-46% | ||
Latias DragonPsychic | B | |
Obtain MethodSouthern Island Gift Available Moves Moves
Damage vs Tentacruel View Latias builds →Psychic 2x64-75% Thunderbolt 2x42-50% Bulldoze 2x36-43% | ||
Gardevoir PsychicFairy | B | |
Available Moves Moves
Damage vs Tentacruel View Gardevoir builds →Future Sight 2x93-109%KO Thunderbolt 2x47-56% | ||
Kadabra Psychic | A | |
Available Moves Moves
Damage vs Tentacruel View Kadabra builds →Future Sight 2x91-107%KO Charge Beam 2x26-31% | ||
Gothitelle Psychic | C | |
Available Moves Moves
Damage vs Tentacruel View Gothitelle builds →Future Sight 2x74-88% Thunderbolt 2x37-44% | ||
Latios DragonPsychic | B | |
Obtain MethodSouthern Island Interact Encounter Available Moves Moves
Damage vs Tentacruel View Latios builds →Psychic 2x71-84% Thunderbolt 2x48-56% Earthquake 2x63-74% | ||
Latias DragonPsychic | B | |
Obtain MethodSouthern Island Gift Available Moves Moves
Damage vs Tentacruel View Latias builds →Psychic 2x62-73% Thunderbolt 2x41-49% Earthquake 2x57-67% | ||
Gardevoir PsychicFairy | B | |
Available Moves Moves
Damage vs Tentacruel View Gardevoir builds →Future Sight 2x91-107%KO Thunderbolt 2x46-55% | ||
Kadabra Psychic | A | |
Available Moves Moves
Damage vs Tentacruel View Kadabra builds →Future Sight 2x89-105%KO Charge Beam 2x26-31% | ||
Gothitelle Psychic | C | |
Available Moves Moves
Damage vs Tentacruel View Gothitelle builds →Future Sight 2x73-86% Thunderbolt 2x36-43% | ||
Latios DragonPsychic | B | |
Obtain MethodSouthern Island Interact Encounter Available Moves Moves
Damage vs Tentacruel View Latios builds →Dream Eater 2x78-92% Thunderbolt 2x47-55% Earthquake 2x63-74% | ||
Latias DragonPsychic | B | |
Obtain MethodSouthern Island Gift Available Moves Moves
Damage vs Tentacruel View Latias builds →Dream Eater 2x68-81% Thunderbolt 2x40-48% Earthquake 2x57-68% | ||
Deoxys Psychic | A | |
Obtain MethodSky Pillar Interact Encounter Available Moves Moves
Damage vs Tentacruel View Deoxys builds →Psycho Boost 2x123-145%KO Thunderbolt 2x53-63% | ||
Garchomp DragonGround | S | |
Beheeyem Psychic | C | |
Available Moves Moves
Damage vs Tentacruel View Beheeyem builds →Synchronoise 2x90-107%KO Thunderbolt 2x45-54% | ||
A | ||
Recommended Build AbilityFlashfire ItemLeftovers NatureCalm Moves View Heatran builds →
| ||
A | ||
Recommended Build AbilityMagic Guard ItemLeftovers NatureBold Moves
Damage vs Tentacruel View Clefable builds →Moonblast7-9% | ||
A | ||
Recommended Build AbilityWaterabsorb ItemLeftovers NatureTimid Moves
Damage vs Tentacruel View Volcanion builds →Flamethrower11-13% Sludge Bomb11-13% | ||
B | ||
Recommended Build AbilitySturdy ItemRocky Helmet NatureImpish Moves View Skarmory builds →
| ||
C | ||
Recommended Build AbilityHuge Power ItemSitrus Berry NatureAdamant Moves
Damage vs Tentacruel View Azumarill builds →Aqua Jet4-5% Play Rough9-10% Knock Off13-15% Waterfall8-9% | ||
Tentacruel Evolutions
Evolved from Tentacool. Tentacruel is the final form in this two-stage line. A decent partner pool for breeding via one egg group. Eggs are average hatch time. HP grew the most through evolution (+40 over Tentacool), and Tentacruel peaks at 515 total stats. View every chain in the Evolution Chart.
How to Evolve
Breeding
Breed with Tentacruel to get Tentacool eggs easily using 29 partners from the Water3 egg group. Notable egg moves include Acupressure, Aqua Ring, Aurora Beam and 8 more.


ORAS Tentacruel Best Moveset
120 Sp. Def absorbs special attacks at one of the highest levels available, and 100 Speed means acting before most threats. Water/Poison TermStab with Poison hitting Fairy super-effectively. The moveset earns A-tier through special bulk that also clears hazards with MoveRapid Spin.
Best Build
Tentacruel best EVs are HP and Defense
Hazard Setter Moveset
- Scald
- Rapid Spin
- Toxic Spikes
- Knock Off
Moves List
Don't skip the egg moves. Tentacruel picks up Acupressure and Aqua Ring only through breeding, and both fill gaps the natural movepool can't. STAB runs through Hydro Pump and Sludge Wave while coverage across 8 types adds range.
How to Read the Moves Table
Tabs
- Level-Up
- Learned by leveling up.
- TM
- Taught by a Technical Machine.
- Egg
- Inherited via breeding.
- Tutor
- NPC tutor (cost: items, BP, money).
- Reminder
- An NPC reteaches any move this Pokemon could have learned by leveling up.
- Transfer
- Carried over from an older game using Pokemon HOME.
- Event
- Given out through Mystery Gift events.
Visual Signals
CAT (Category)
How the move deals damage and which stats it uses.
A small dot on the icon's corner marks the move as contact. That triggers abilities like Static, Flame Body, Rough Skin, or Iron Barbs, plus items like Rocky Helmet and Sticky Barb.
Tier (S to D)
Each move's competitive rank in RankedBoost's system. TM, Egg, and Tutor sort by tier by default (best first). On Level-Up, click the Tier header to do the same.
PWR (Power)
Base damage. Numbers shown in a type color include STAB (base × 1.5). Hover any colored number to see the math.
— means no power (status moves) or variable power.
Sorting & Filter
Click any column header to sort. Level-Up opens with Lv 1 at the top. TM, Egg, and Tutor open with the highest-tier moves at the top.
Search filters by move name or type. The Filter button limits the list to STAB, Physical, Special, or Status moves.
Level-Up Moves
TM Moves
Egg Moves
Tutor Moves
Transfer Moves
Base Stats
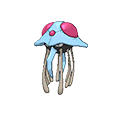
Tentacruel has large red orbs on its head. The orbs glow before lashing the vicinity with a harsh ultrasonic blast. This Pokémon’s outburst creates rough waves around it.
Tentacruel has tentacles that can be freely elongated and shortened at will. It ensnares prey with its tentacles and weakens the prey by dosing it with a harsh toxin. It can catch up to 80 prey at the same time.
Tentacruel Omega Ruby & Alpha Sapphire Guide
For Omega Ruby & Alpha Sapphire, we rate Tentacruel B-Tier: a solid option in Omega Ruby & Alpha Sapphire for the right team. At 515 BST, it fits the pivot role. Scald with Black Sludge is the standard set.
Clear Body prevents stats from being lowered by other Pokémon. That's the one you want on Tentacruel. Rain Dish is the hidden ability. Niche, but it has its uses. Liquid Ooze works too if your team needs something different.
Base 100 Speed lets it outrun most of the field. On offense, Tentacruel is a mixed attacker with base 70 Attack and 80 Sp. Atk. Defensively? Enough bulk to take a hit or two. Best used as a pivot.
In Omega Ruby & Alpha Sapphire, run Scald, Rapid Spin, Toxic Spikes, and Knock Off on Tentacruel. Scald is the most common pick at 0% usage. Scald provides reliable STAB damage.
Game Availability
One of the original 151, Tentacruel has appeared in 21 games — nearly every mainline game. From Red & Blue through the latest titles, it's rarely been left out of a regional Pokedex.
Click a game to view version-specific details
- Gen 1RBDebut

 Red & Blue
 - Gen 1Y
 Yellow
 - Gen 2GS

 Gold & Silver
 - Gen 2C
 Crystal
 - Gen 3RS

 Ruby & Sapphire
 - Gen 3E
 Emerald
 - Gen 3FRLG

 FireRed & LeafGreen
 - Gen 4DP

 Diamond & Pearl
 - Gen 4Pt
 Platinum
 - Gen 4HGSS

 HeartGold & SoulSilver
 - Gen 5BW

 Black & White
 - Gen 5B2W2

 Black 2 & White 2
 - Gen 6XY

 X & Y
X & Y - Gen 6ORAS

 Omega Ruby & Alpha Sapphire
 - Gen 7SM

 Sun & Moon
 - Gen 7USUM

 Ultra Sun & Ultra Moon
 - Gen 7LGPE

 Let's Go Pikachu & Eevee
 - Gen 8SwSh

 Sword & Shield
 - Gen 8BDSP

 Brilliant Diamond & Shining Pearl
 - Gen 8PLA
 Legends: Arceus
 - Gen 9SV

 Scarlet & Violet
 - Gen 9LZA
 Legends: Z-A
 - Gen 10WW

 Winds & Waves