
Stats & Training
The stat bars tell the story: Defense carries everything and Speed's dead weight. But this Iron Armor Pokemon still yields 2 Defense EVs per fight on a slow 1.25M XP grind.
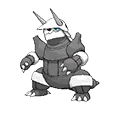
Lairon tempers its steel body by drinking highly nutritious mineral springwater until it is bloated. This Pokémon makes its nest close to springs of delicious water.
Lairon feeds on iron contained in rocks and water. It makes its nest on mountains where iron ore is buried. As a result, the Pokémon often clashes with humans mining the iron ore.
Lairon Weakness
Fighting, Ground, and Water moves hit Lairon for super-effective damage. Fighting and Ground hits land at 4x, so they're the biggest threat. The upside? Poison-type moves can't touch it at all. It resists 8 types, so it can switch into a lot of moves safely. Lairon's physical bulk (base 140 Def) helps cushion physical weakness hits, but special attackers are the bigger threat.
| Damage | Types |
|---|---|
| 4x (Critical) | Fighting, Ground |
| 2x (Weak) | Water |
| 0.5x (Resist) | Ice, Psychic, Bug, Rock, Dragon, Fairy |
| 0.25x (Resist) | Normal, Flying |
| 0x (Immune) | Poison |
Omanyte RockWater | D | |
Obtain MethodRustboro City Gift Available Moves Moves
Damage vs Lairon View Omanyte builds →Surf 2x113-133%KO Water Gun 2x56-67% | ||
Kabuto RockWater | D | |
Obtain MethodRustboro City Gift | ||
Tirtouga WaterRock | D | |
Obtain MethodRustboro City Gift Available Moves Moves
Damage vs Lairon View Tirtouga builds →Surf 2x84-100%KO Water Gun 2x38-47% | ||
Shellos Water | D | |
Available Moves Moves
Damage vs Lairon View Shellos builds →Surf 2x84-100%KO Mud Bomb 4x82-98% Water Pulse 2x62-73% Mud-Slap 4x38-44% | ||
Totodile Water | D | |
Obtain MethodRoute 101 Gift Available Moves Moves
Damage vs Lairon View Totodile builds →Surf 2x73-87% Water Gun 2x38-47% | ||
Relicanth WaterRock | C | |
Available Moves Moves
Damage vs Lairon View Relicanth builds →Surf 2x76-90% Water Gun 2x40-48% | ||
Lanturn WaterElectric | C | |
Available Moves Moves
Damage vs Lairon View Lanturn builds →Surf 2x10⁶-126%KO Bubble 2x50-60% Water Gun 2x50-60% | ||
Makuhita Fighting | D | |
Available Moves Moves
Damage vs Lairon View Makuhita builds →Surf 2x36-44% Force Palm 4x70-84% Arm Thrust 4x30-36% | ||
Omanyte RockWater | D | |
Obtain MethodRustboro City Gift Available Moves Moves
Damage vs Lairon View Omanyte builds →Surf 2x116-138%KO Water Gun 2x56-66% | ||
Kabuto RockWater | D | |
Obtain MethodRustboro City Gift Available Moves Moves
Damage vs Lairon View Kabuto builds →Surf 2x86-102%KO Mud Shot 4x74-88% | ||
Geodude RockGround | C | |
Relicanth WaterRock | C | |
Available Moves Moves
Damage vs Lairon View Relicanth builds →Surf 2x73-86% Water Gun 2x36-43% | ||
Timburr Fighting | D | |
Nincada BugGround | D | |
Makuhita Fighting | D | |
Available Moves Moves
Damage vs Lairon View Makuhita builds →Surf 2x33-40% Vital Throw 4x64-77% Force Palm 4x57-69% Arm Thrust 4x21-26% | ||
Trapinch Ground | C | |
Available Moves Moves
Damage vs Lairon View Trapinch builds →Earth Power 4x149-176%KO Dig 4x10⁵-124%KO Bulldoze 4x80-95% Rock Smash 4x37-44% | ||
Numel FireGround | D | |
Available Moves Moves
Damage vs Lairon View Numel builds →Earth Power 4x187-220%KO Dig 4x74-88% Bulldoze 4x55-66% Rock Smash 4x28-34% | ||
Sandshrew Ground | D | |
Available Moves Moves
Damage vs Lairon View Sandshrew builds →Dig 4x87-102%KO Bulldoze 4x68-80% Rock Smash 4x33-39% Sand Tomb 4x43-51% | ||
Sandile GroundDark | D | |
Available Moves Moves
Damage vs Lairon View Sandile builds →Dig 4x87-102%KO Bulldoze 4x68-80% Sand Tomb 4x43-51% Mud-Slap 4x37-44% | ||
Diglett Ground | D | |
Available Moves Moves
Damage vs Lairon View Diglett builds →Earth Power 4x124-146%KO Dig 4x68-80% Mud Bomb 4x93-110%KO Bulldoze 4x55-66% | ||
Trapinch Ground | C | |
Available Moves Moves
Damage vs Lairon View Trapinch builds →Earth Power 4x146-172%KO Dig 4x10⁵-124%KO Bulldoze 4x82-97% Rock Smash 4x39-46% | ||
Numel FireGround | D | |
Available Moves Moves
Damage vs Lairon View Numel builds →Earth Power 4x187-221%KO Dig 4x76-90% Bulldoze 4x59-69% Rock Smash 4x26-32% | ||
Scraggy DarkFighting | D | |
Available Moves Moves
Damage vs Lairon View Scraggy builds →High Jump Kick 4x134-159%KO Dig 4x59-69% Brick Break 4x82-97% Low Sweep 4x70-83% | ||
Sandshrew Ground | D | |
Available Moves Moves
Damage vs Lairon View Sandshrew builds →Dig 4x87-103%KO Bulldoze 4x70-83% Rock Smash 4x31-37% Sand Tomb 4x40-48% | ||
Sandile GroundDark | D | |
Available Moves Moves
Damage vs Lairon View Sandile builds →Dig 4x87-103%KO Bulldoze 4x64-76% Sand Tomb 4x40-48% Mud-Slap 4x34-41% | ||
Numel FireGround | D | |
Available Moves Moves
Damage vs Lairon View Numel builds →Earth Power 4x188-222%KO Dig 4x77-91% Bulldoze 4x61-72% Rock Smash 4x29-35% | ||
Scraggy DarkFighting | D | |
Available Moves Moves
Damage vs Lairon View Scraggy builds →High Jump Kick 4x138-163%KO Dig 4x59-70% Brick Break 4x83-98% Low Sweep 4x72-85% | ||
Machop Fighting | D | |
Available Moves Moves
Damage vs Lairon View Machop builds →Submission 4x93-111%KO Dig 4x62-74% Vital Throw 4x83-98% Wake-Up Slap 4x83-98% | ||
Sandshrew Ground | D | |
Available Moves Moves
Damage vs Lairon View Sandshrew builds →Dig 4x88-104%KO Bulldoze 4x66-78% Rock Smash 4x33-39% Sand Tomb 4x43-52% | ||
Sandile GroundDark | D | |
Available Moves Moves
Damage vs Lairon View Sandile builds →Dig 4x83-98% Bulldoze 4x66-78% Sand Tomb 4x43-52% Mud-Slap 4x33-39% | ||
Donphan Ground | C | |
Available Moves Moves
Damage vs Lairon View Donphan builds →Earthquake 4x154-182%KO Bulldoze 4x96-113%KO Rock Smash 4x44-52% | ||
Throh Fighting | C | |
Available Moves Moves
Damage vs Lairon View Throh builds →Focus Blast 4x150-177%KO Dig 4x72-85% Vital Throw 4x96-113%KO Low Sweep 4x88-103%KO | ||
Sawk Fighting | C | |
Available Moves Moves
Damage vs Lairon View Sawk builds →Focus Blast 4x150-177%KO Dig 4x86-102%KO Brick Break 4x120-143%KO Low Sweep 4x10⁴-123%KO | ||
Numel FireGround | D | |
Available Moves Moves
Damage vs Lairon View Numel builds →Earthquake 4x92-108%KO Earth Power 4x192-226%KO Dig 4x75-89% Bulldoze 4x58-69% | ||
Scraggy DarkFighting | D | |
Available Moves Moves
Damage vs Lairon View Scraggy builds →High Jump Kick 4x138-162%KO Focus Blast 4x167-197%KO Dig 4x58-69% Brick Break 4x79-93% | ||
Donphan Ground | C | |
Available Moves Moves
Damage vs Lairon View Donphan builds →Earthquake 4x146-173%KO Bulldoze 4x90-106%KO Rock Smash 4x41-48% | ||
Throh Fighting | C | |
Available Moves Moves
Damage vs Lairon View Throh builds →Focus Blast 4x142-168%KO Earthquake 4x86-102%KO Dig 4x70-83% Brick Break 4x98-115%KO | ||
Sawk Fighting | C | |
Available Moves Moves
Damage vs Lairon View Sawk builds →Focus Blast 4x142-168%KO Earthquake 4x10³-122%KO Dig 4x82-96% Brick Break 4x118-139%KO | ||
Numel FireGround | D | |
Available Moves Moves
Damage vs Lairon View Numel builds →Earthquake 4x90-106%KO Earth Power 4x183-216%KO Dig 4x73-86% Bulldoze 4x57-67% | ||
Scraggy DarkFighting | D | |
Available Moves Moves
Damage vs Lairon View Scraggy builds →High Jump Kick 4x130-154%KO Focus Blast 4x158-187%KO Dig 4x57-67% Brick Break 4x77-91% | ||
In Omega Ruby & Alpha Sapphire, Garchomp can KO Lairon with Earthquake (189-223%). Breloom's Mach Punch hits Lairon for 78-92%. Gastrodon's Scald also KOs at 127-149%.
Garchomp DragonGround | A | |
Recommended Build AbilityRough Skin ItemRocky Helmet NatureJolly Moves
Damage vs Lairon View Garchomp builds →Earthquake 4x189-223%KO | ||
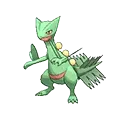
Breloom GrassFighting | B | |
Recommended Build AbilityTechnician ItemMiracleseed NatureJolly Moves
Damage vs Lairon View Breloom builds →Bullet Seed12-14% Mach Punch 4x78-92% | ||
Gastrodon WaterGround | B | |
Recommended Build AbilityStormdrain ItemLeftovers NatureQuiet Moves
Damage vs Lairon View Gastrodon builds →Scald 2x127-149%KO | ||
Landorus Ground | B | |
Recommended Build AbilitySheerforce ItemLife Orb NatureTimid Moves
Damage vs Lairon View Landorus builds →Focus Blast 4x415-488%KO Earthquake 4x178-209%KO | ||
Lucario FightingSteel | C | |
Recommended Build AbilitySteadfast ItemLife Orb NatureJolly Moves
Damage vs Lairon View Lucario builds →Close Combat 4x261-308%KO Extreme Speed7-8% Aura Sphere 4x305-359%KO Flash Cannon76-90% | ||
Omega Ruby & Alpha Sapphire Evolution
Lairon sits between Aron and Aggron in this three-stage line. Not the final form yet. For breeding, slow to hatch with plenty of partners via one egg group. So far, Defense got the biggest boost (+40 from Aron). The final form adds another 100 stats on top. View every chain in the Evolution Chart.
How to Evolve
Breeding
Breed with Lairon to get Aron eggs using 75 partners from the Monster egg group. Notable egg moves include Body Slam, Curse, Dragon Rush and 9 more.


Omega Ruby & Alpha Sapphire Lairon Best Moveset
Best Build
No build content available for this Pokemon in Gen 6.
Try selecting a different game/generation filter, or check back later.
Moves
Don't skip the egg moves. Lairon picks up Body Slam and Curse only through breeding, and both fill gaps the natural movepool can't. STAB runs through Head Smash and Iron Tail while coverage across 9 types adds range.
Level-Up Moves
TM Moves
Egg Moves
Tutor Moves
Transfer Moves
How to Get Lairon in Omega Ruby & Alpha Sapphire
decent spawn rates for Lairon across 6 locations in late-game routes. Nothing complicated. Check the sorted list below, compare the top few options, and head to whichever is closest.
Where To Catch Lairon in Omega Ruby & Alpha Sapphire
The path to Lairon starts with Aron at Lv. 6-39 via walking encounters. 2 catchable stages total, with locations listed for each one below.
 Step 1Catch AronGranite Cave - Area 2Alpha SapphireGrass Lv.6 Cave35%EarlyHorde battleGranite Cave - Area 2Omega RubyGrass Lv.6 Cave35%EarlyHorde battleGranite Cave - Area 3Omega RubyGrass Lv.6 Cave35%EarlyHorde battleGranite Cave - Area 3Alpha SapphireGrass Lv.6 Cave35%EarlyHorde battleGranite Cave - Area 2Alpha SapphireGrass Lv.10-12 Cave30%EarlyGranite Cave - Area 2Omega RubyGrass Lv.10-12 Cave30%EarlyGranite Cave - Area 3Omega RubyGrass Lv.10-12 Cave30%EarlyGranite Cave - Area 3Alpha SapphireGrass Lv.10-12 Cave30%EarlyVictory Road - Area 1Omega RubyGrass Lv.20 Cave35%MidHorde battleVictory Road - Area 1Alpha SapphireGrass Lv.20 Cave35%MidHorde battleVictory Road - Area 2Alpha SapphireGrass Lv.20 Cave35%MidHorde battleVictory Road - Area 2Omega RubyGrass Lv.20 Cave35%MidHorde battleVictory Road - Area 3Alpha SapphireGrass Lv.20 Cave35%MidHorde battleVictory Road - Area 3Omega RubyGrass Lv.20 Cave35%MidHorde battle
 Step 2Lairon ✓Victory Road - Area 1Alpha SapphireGrass Lv.37-39 Cave20%LateVictory Road - Area 1Omega RubyGrass Lv.37-39 Cave20%LateVictory Road - Area 2Alpha SapphireGrass Lv.37-39 Cave20%LateVictory Road - Area 2Omega RubyGrass Lv.37-39 Cave20%LateVictory Road - Area 3Omega RubyGrass Lv.37-39 Cave20%LateVictory Road - Area 3Alpha SapphireGrass Lv.37-39 Cave20%Lateor evolve from Aron (Step 1)
Lairon Guide
At 430 BST, Lairon is firmly in pre-evolution territory. Evolve it into Aggron before bringing it to any serious fight.
In Omega Ruby & Alpha Sapphire, watch for Blaziken (Fighting), Swampert (Ground), and Starmie (Water) when using Lairon. They all hit it super-effectively with STAB. Blaziken is the most dangerous since Fighting moves deal 4x damage. At base 40 Speed, Lairon won't outrun any of these threats so switching to a resist is usually the safer play.
Sturdy prevents being KOed from full HP, leaving 1 HP instead. That's the one you want on Lairon. Heavy Metal is the hidden ability. Niche, but it has its uses. Rock Head works too if your team needs something different.
Lairon is a physical attacker with base 90 Attack. Enough bulk to take a hit or two, too. Speed tells the real story. Base 40 Speed is low. Priority moves or Trick Room are the way to go. Fits the trick room role.
Game Availability
Debuting in Ruby & Sapphire, Lairon appears in 15 games across 8 generations. A reliable presence in most mainline games, typically found through catching or hatching as a base form.
Click a game to view version-specific details
- Gen 1Y
 Yellow
 - Gen 1RB

 Red & Blue
 - Gen 2GS

 Gold & Silver
 - Gen 2C
 Crystal
 - Gen 3RSDebut

 Ruby & Sapphire
 - Gen 3FRLG

 FireRed & LeafGreen
 - Gen 3E
 Emerald
 - Gen 4Pt
 Platinum
 - Gen 4HGSS

 HeartGold & SoulSilver
 - Gen 4DP

 Diamond & Pearl
 - Gen 5BW

 Black & White
 - Gen 5B2W2

 Black 2 & White 2
 - Gen 6XY

 X & Y
X & Y - Gen 6ORAS

 Omega Ruby & Alpha Sapphire
 - Gen 7USUM

 Ultra Sun & Ultra Moon
 - Gen 7SM

 Sun & Moon
 - Gen 7LGPE

 Let's Go Pikachu & Eevee
 - Gen 8SwSh

 Sword & Shield
 - Gen 8PLA
 Legends: Arceus
 - Gen 8BDSP

 Brilliant Diamond & Shining Pearl
 - Gen 9SV

 Scarlet & Violet
 - Gen 9LZA
 Legends: Z-A
 - Gen 10WW

 Winds & Waves