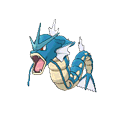

Is Gyarados Good in Omega Ruby & Alpha Sapphire Playthrough?
Even better in ORAS than in the original Ruby and Sapphire. Physical MoveWaterfall now matches Gyarados's 125 Attack thanks to the per-move split, and Mega Gyarados adds Dark typing with AbilityMold Breaker. Handles Flannery, Wallace, Phoebe, and half of Steven's team. One of the best Pokemon in the game.
Roxanne's typing presses Magikarp's defenses.
Magikarp trades roughly evenly with Brawly's team.
Wattson's team hits Magikarp's weaknesses hard.
Flannery's typing presses Magikarp's defenses.
Norman's typing presses Magikarp's defenses.
Winona's typing presses Magikarp's defenses.
Tate & Liza's Pokemon outpace and outclass Magikarp here.
Gyarados trades roughly evenly with Wallace's team.
Gyarados trades roughly evenly with Sidney's team.
Gyarados has the type edge here and should clean up Phoebe's team.
Gyarados trades roughly evenly with Glacia's team.
Gyarados trades roughly evenly with Drake's team.
Gyarados has the type edge here and should clean up Steven's team.
Catch Gyarados on Sootopolis City (Super Rod fishing, Lv 40, semi-rare).
Catch Magikarp on Sootopolis City (Surf, Lv 25-35, common).
How to Get Gyarados in Omega Ruby & Alpha Sapphire
Finding Gyarados at moderate rates takes patience. 4 spots are available in late-game fishing spots, but the rate difference between them matters. Lock in the top one from the sorted list below.
Where To Catch Gyarados in ORAS
Magikarp is your first catch on the way to Gyarados. You'll find fishing and surfing encounters from Lv. 5-40 across 280 total spots in the chain.
 Step 1Catch MagikarpRoute 104 - Area 1Lv.5-15Old RodRate 100%Route 104 - Area 2Lv.5-15Old RodRate 100%Sootopolis City - Area 1Lv.5-15Old RodRate 100%Sootopolis City - Area 2Lv.5-15Old RodRate 100%Meteor Falls - Area 2Lv.5-10Old RodRate 65%Meteor Falls - Area 3Lv.5-10Old RodRate 65%Meteor Falls - Area 4Lv.5-10Old RodRate 65%Seafloor Cavern - Area 1Lv.5-10Old RodRate 65%Battle ResortLv.10-15Old RodRate 65%Dewford TownLv.10-15Old RodRate 65%Ever Grande CityLv.10-15Old RodRate 65%Lilycove CityLv.10-15Old RodRate 65%Meteor Falls - Area 1Lv.10-15Old RodRate 65%Mossdeep CityLv.10-15Old RodRate 65%Pacifidlog TownLv.10-15Old RodRate 65%Petalburg CityLv.10-15Old RodRate 65%Route 102Lv.10-15Old RodRate 65%Route 103Lv.10-15Old RodRate 65%Route 105 - OutsideLv.10-15Old RodRate 65%Route 106Lv.10-15Old RodRate 65%Route 107Lv.10-15Old RodRate 65%Route 108Lv.10-15Old RodRate 65%Route 109Lv.10-15Old RodRate 65%Route 110Lv.10-15Old RodRate 65%Route 111 - SouthLv.10-15Old RodRate 65%Route 114Lv.10-15Old RodRate 65%Route 115Lv.10-15Old RodRate 65%Route 117Lv.10-15Old RodRate 65%Route 118Lv.10-15Old RodRate 65%Route 120 - EastLv.10-15Old RodRate 65%Route 120 - WestLv.10-15Old RodRate 65%Route 122Lv.10-15Old RodRate 65%Route 123Lv.10-15Old RodRate 65%Route 124Lv.10-15Old RodRate 65%Route 125Lv.10-15Old RodRate 65%Route 126Lv.10-15Old RodRate 65%Route 127Lv.10-15Old RodRate 65%Route 128Lv.10-15Old RodRate 65%Route 129Lv.10-15Old RodRate 65%Route 130Lv.10-15Old RodRate 65%Route 131Lv.10-15Old RodRate 65%Route 132Lv.10-15Old RodRate 65%Route 133Lv.10-15Old RodRate 65%Route 134Lv.10-15Old RodRate 65%Safari Zone - Area 1Lv.10-15Old RodRate 65%Safari Zone - Area 2Lv.10-15Old RodRate 65%Safari Zone - Area 3Lv.10-15Old RodRate 65%Safari Zone - Area 4Lv.10-15Old RodRate 65%Scorched Slab - 1FLv.10-15Old RodRate 65%Scorched Slab - B1FLv.10Old RodRate 65%Sea Mauville - Area 1Lv.10-15Old RodRate 65%Sea Mauville - Area 2Lv.10-15Old RodRate 65%Sea Mauville - Area 3Lv.10-15Old RodRate 65%Sea Mauville - Area 4Lv.10-15Old RodRate 65%Seafloor Cavern - Area 4Lv.10Old RodRate 65%Seafloor Cavern - Area 5Lv.10Old RodRate 65%Sealed ChamberLv.10-15Old RodRate 65%Shoal Cave - Area 5Lv.10-15Old RodRate 65%Shoal Cave - Area 6Lv.10-15Old RodRate 65%Slateport CityLv.10-15Old RodRate 65%Team Magma/Aqua HideoutLv.10-15Old RodRate 65%Victory Road - Area 1Lv.10-15Old RodRate 65%Victory Road - Area 2Lv.10-15Old RodRate 65%Victory Road - Area 3Lv.10-15Old RodRate 65%Victory Road - Area 4Lv.10-15Old RodRate 65%Route 119Lv.10Old RodRate 60%Route 104 - Area 1Lv.25Good RodRate 100%Route 104 - Area 2Lv.25Good RodRate 100%Sootopolis City - Area 1Lv.25-35Surfing on waterRate 100%Sootopolis City - Area 1Lv.25Good RodRate 100%Sootopolis City - Area 2Lv.25-35Surfing on waterRate 100%Sootopolis City - Area 2Lv.25Good RodRate 100%Route 104 - Area 1Lv.30-40Super RodRate 100%Route 104 - Area 2Lv.30-40Super RodRate 100%Sootopolis City - Area 1Lv.30-35Super RodRate 95%Sootopolis City - Area 2Lv.30-35Super RodRate 95%Safari Zone - Area 1Lv.25Good RodRate 65%Safari Zone - Area 2Lv.25Good RodRate 65%Safari Zone - Area 3Lv.25Good RodRate 65%Safari Zone - Area 4Lv.25Good RodRate 65%Battle ResortLv.25Good RodRate 60%Dewford TownLv.25Good RodRate 60%Ever Grande CityLv.25Good RodRate 60%Lilycove CityLv.25Good RodRate 60%Meteor Falls - Area 1Lv.25Good RodRate 60%Mossdeep CityLv.25Good RodRate 60%Pacifidlog TownLv.25Good RodRate 60%Petalburg CityLv.25Good RodRate 60%Route 102Lv.25Good RodRate 60%Route 103Lv.25Good RodRate 60%Route 105 - OutsideLv.25Good RodRate 60%Route 106Lv.25Good RodRate 60%Route 107Lv.25Good RodRate 60%Route 108Lv.25Good RodRate 60%Route 109Lv.25Good RodRate 60%Route 110Lv.25Good RodRate 60%Route 111 - SouthLv.25Good RodRate 60%Route 114Lv.25Good RodRate 60%Route 115Lv.25Good RodRate 60%Route 117Lv.25Good RodRate 60%Route 118Lv.25Good RodRate 60%Route 119Lv.25Good RodRate 60%Route 120 - EastLv.25Good RodRate 60%Route 120 - WestLv.25Good RodRate 60%Route 122Lv.25Good RodRate 60%Route 123Lv.25Good RodRate 60%Route 124Lv.25Good RodRate 60%Route 125Lv.25Good RodRate 60%Route 126Lv.25Good RodRate 60%Route 127Lv.25Good RodRate 60%Route 128Lv.25Good RodRate 60%Route 129Lv.25Good RodRate 60%Route 130Lv.25Good RodRate 60%Route 131Lv.25Good RodRate 60%Route 132Lv.25Good RodRate 60%Route 133Lv.25Good RodRate 60%Route 134Lv.25Good RodRate 60%Scorched Slab - 1FLv.25Good RodRate 60%Scorched Slab - B1FLv.25Good RodRate 60%Sea Mauville - Area 1Lv.25Good RodRate 60%Sea Mauville - Area 2Lv.25Good RodRate 60%Sea Mauville - Area 3Lv.25Good RodRate 60%Sea Mauville - Area 4Lv.25Good RodRate 60%Seafloor Cavern - Area 4Lv.25Good RodRate 60%Seafloor Cavern - Area 5Lv.25Good RodRate 60%Sealed ChamberLv.25Good RodRate 60%Shoal Cave - Area 5Lv.25Good RodRate 60%Shoal Cave - Area 6Lv.25Good RodRate 60%Slateport CityLv.25Good RodRate 60%Team Magma/Aqua HideoutLv.25Good RodRate 60%Victory Road - Area 1Lv.25Good RodRate 60%Victory Road - Area 2Lv.25Good RodRate 60%Victory Road - Area 3Lv.25Good RodRate 60%Victory Road - Area 4Lv.25Good RodRate 60%Meteor Falls - Area 2Lv.30Good RodRate 60%Meteor Falls - Area 3Lv.30Good RodRate 60%Meteor Falls - Area 4Lv.30Good RodRate 60%Seafloor Cavern - Area 1Lv.30Good RodRate 60%
 Step 2Gyarados ✓Sootopolis City - Area 1Lv.40Super RodRate 5%Sootopolis City - Area 2Lv.40Super RodRate 5%or evolve from Magikarp (Step 1)
Gyarados Weakness
Type-wise, Gyarados takes extra damage from Electric and Rock. Watch out for Electric attacks, those deal 4x damage. Ground moves do nothing thanks to a full immunity. 5 resistances help offset the weaknesses. With 95 HP and balanced defenses, Gyarados can afford to eat a neutral hit or two.
| Damage | Types |
|---|---|
| 4x (Critical) | Electric |
| 2x (Weak) | Rock |
| 0.5x (Resist) | Fire, Water, Fighting, Bug, Steel |
| 0x (Immune) | Ground |
What is Gyarados Weak Against
ExcellentBest Pokemon Against Gyarados
Joltik BugElectric | C | |
Aerodactyl Rock | B | |
Obtain MethodRustboro City Gift Available Moves Moves
Damage vs Gyarados View Aerodactyl builds →Thunder Fang 4x74-87% Rock Tomb 2x52-62% | ||
Tyrunt RockDragon | C | |
Obtain MethodRustboro City Gift | ||
Plusle Electric | C | |
Archen Rock | C | |
Obtain MethodRustboro City Gift | ||
Minun Electric | C | |
Plusle Electric | C | |
Magnemite ElectricSteel | C | |
Chinchou WaterElectric | C | |
Minun Electric | C | |
Aerodactyl Rock | B | |
Obtain MethodRustboro City Gift Available Moves Moves
Damage vs Gyarados View Aerodactyl builds →Thunder Fang 4x76-89% Rock Tomb 2x51-61% | ||
Eelektross Electric | C | |
Available Moves Moves
Damage vs Gyarados View Eelektross builds →Wild Charge 4x163-192%KO Rock Slide 2x45-53% | ||
Magnezone ElectricSteel | B | |
Rampardos Rock | B | |
Obtain MethodEvolve Cranidos (Rustboro City Gift) Available Moves Moves
Damage vs Gyarados View Rampardos builds →Head Smash 2x185-218%KO Thunderbolt 4x58-68% | ||
Tyrantrum RockDragon | B | |
Obtain MethodEvolve Tyrunt (Rustboro City Gift) | ||
Lanturn WaterElectric | C | |
S | ||
Recommended Build AbilityMold Breaker ItemLeftovers NatureJolly Moves
Damage vs Gyarados View Excadrill builds →Rapid Spin21-24% | ||
A | ||
Recommended Build AbilityFlashfire ItemLeftovers NatureCalm Moves View Heatran builds →
| ||
A | ||
Recommended Build AbilityWaterabsorb ItemLeftovers NatureTimid Moves
Damage vs Gyarados View Volcanion builds →Flamethrower15-18% Sludge Bomb30-35% | ||
B | ||
Recommended Build AbilityPoisonheal ItemToxic Orb NatureCareful Moves
Damage vs Gyarados View Gliscor builds →Knock Off17-20% | ||
B | ||
Recommended Build AbilityFlame Body ItemLum Berry NatureModest Moves
Damage vs Gyarados View Volcarona builds →Giga Drain28-33% Flamethrower17-20% | ||
Gyarados Evolutions
Evolved from Magikarp. Gyarados is the final form in this two-stage line. A decent partner pool for breeding via two egg groups. Eggs are hatches fast. Attack grew the most through evolution (+115 over Magikarp), and Gyarados peaks at 540 total stats. View every chain in the Evolution Chart.
How to Evolve


ORAS Gyarados Best Moveset
Mega Gyarados shifts to Water/Dark with AbilityMold Breaker ignoring abilities. AbilityIntimidate on the base form drops Attack on entry. 125 Attack fires physical Water and Dark TermStab. The moveset earns A-tier through Intimidate utility that transitions into Mega offensive power.
Best Build
Gyarados best EVs are Attack and Speed
Physical Setup Sweeper Moveset
- Waterfall
- Dragon Dance
- Substitute
- Earthquake
Recommended Teammates
Moves List
Hard to wall, honestly. Gyarados threatens 10 types beyond its own STAB, with Normal and Dark standing out. Pair that with Hydro Pump and Aqua Tail and switchins need to think twice.
How to Read the Moves Table
Tabs
- Level-Up
- Learned by leveling up.
- TM
- Taught by a Technical Machine.
- Egg
- Inherited via breeding.
- Tutor
- NPC tutor (cost: items, BP, money).
- Reminder
- An NPC reteaches any move this Pokemon could have learned by leveling up.
- Transfer
- Carried over from an older game using Pokemon HOME.
- Event
- Given out through Mystery Gift events.
Visual Signals
CAT (Category)
How the move deals damage and which stats it uses.
A small dot on the icon's corner marks the move as contact. That triggers abilities like Static, Flame Body, Rough Skin, or Iron Barbs, plus items like Rocky Helmet and Sticky Barb.
Tier (S to D)
Each move's competitive rank in RankedBoost's system. TM, Egg, and Tutor sort by tier by default (best first). On Level-Up, click the Tier header to do the same.
PWR (Power)
Base damage. Numbers shown in a type color include STAB (base × 1.5). Hover any colored number to see the math.
— means no power (status moves) or variable power.
Sorting & Filter
Click any column header to sort. Level-Up opens with Lv 1 at the top. TM, Egg, and Tutor open with the highest-tier moves at the top.
Search filters by move name or type. The Filter button limits the list to STAB, Physical, Special, or Status moves.
Level-Up Moves
TM Moves
Egg Moves
Tutor Moves
Reminder Moves
Transfer Moves
Base Stats
When Magikarp evolves into Gyarados, its brain cells undergo a structural transformation. It is said that this transformation is to blame for this Pokémon’s wildly violent nature.
Once Gyarados goes on a rampage, its ferociously violent blood doesn’t calm until it has burned everything down. There are records of this Pokémon’s rampages lasting a whole month.
Gyarados Omega Ruby & Alpha Sapphire Guide
In Omega Ruby & Alpha Sapphire, Intimidate changes the entire equation for Gyarados. The 540 BST doesn't tell the full story. Ranked B-Tier as a wallbreaker. Waterfall with Leftovers is the standard set.
In Omega Ruby & Alpha Sapphire, Gyarados can Mega Evolve into Mega Gyarados. That's 640 BST, up from 540. The stat redistribution often changes its best role. Mega Stone required, one per battle.
Intimidate is what you want on Gyarados. Every competitive set worth running is built with that ability in mind. The alternatives (Moxie) work on paper but Intimidate is what makes Gyarados worth using. Intimidate synergizes with Gyarados's base 100 Sp.Def, letting it soak special attacks as a pivot.
Base 81 Speed is workable. Faster than some, slower than many. On offense, Gyarados is a physical attacker with base 125 Attack. Defensively? Enough bulk to take a hit or two. Best used as a wallbreaker.
Game Availability
Since debuting in Red & Blue, Gyarados has appeared in 22 titles over 10 generations. Along the way, it received a Mega form in Generation 6, keeping it relevant across different competitive metas.
Click a game to view version-specific details
- Gen 1RBDebut

 Red & Blue
 - Gen 1Y
 Yellow
 - Gen 2GS

 Gold & Silver
 - Gen 2C
 Crystal
 - Gen 3RS

 Ruby & Sapphire
 - Gen 3E
 Emerald
 - Gen 3FRLG

 FireRed & LeafGreen
 - Gen 4DP

 Diamond & Pearl
 - Gen 4Pt
 Platinum
 - Gen 4HGSS

 HeartGold & SoulSilver
 - Gen 5BW

 Black & White
 - Gen 5B2W2

 Black 2 & White 2
 - Gen 6XY

 X & Y
X & Y - Gen 6ORASMega

 Omega Ruby & Alpha Sapphire
 - Gen 7SM

 Sun & Moon
 - Gen 7USUM

 Ultra Sun & Ultra Moon
 - Gen 7LGPE

 Let's Go Pikachu & Eevee
 - Gen 8SwSh

 Sword & Shield
 - Gen 8BDSP

 Brilliant Diamond & Shining Pearl
 - Gen 8PLA
 Legends: Arceus
 - Gen 9SV

 Scarlet & Violet
 - Gen 9LZA
 Legends: Z-A
 - Gen 10WW

 Winds & Waves