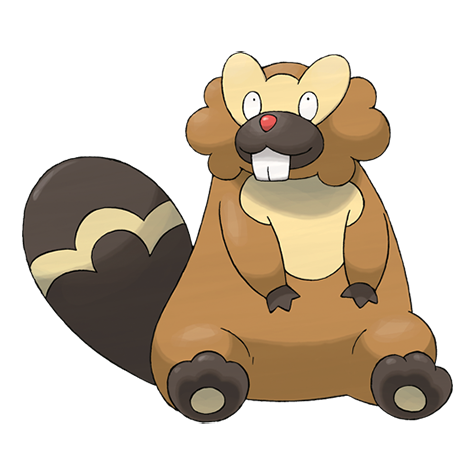

Is Bibarel Good in Ultra Sun & Ultra Moon Playthrough?
Normal/Water with AbilitySimple doubling boosts and drops. Can use MoveSwords Dance for a doubled Attack boost, but the base stats are too low for the strategy to hold up past mid-game.
Bidoof trades roughly evenly with Ilima's team.
Bibarel trades roughly evenly with Hala's team.
Bibarel trades roughly evenly with Lana's team.
 ElectricSteelReceived as a Totem-sized gift Pokemon by collecting enou... (Ultra Moon only)
 BugElectricReceived as a Totem-sized gift Pokemon by collecting enou... (Ultra Sun only)
 GrassReceived as a Totem-sized gift Pokemon by collecting enou... (Ultra Sun only)
 GhostFairyReceived as a Totem-sized gift Pokemon by collecting enou...
Bibarel has the type edge here and should clean up Kiawe's team.
Bibarel trades roughly evenly with Mallow's team.
Bibarel has the type edge here and should clean up Olivia's team.
Bibarel trades roughly evenly with Sophocles's team.
Bibarel trades roughly evenly with Acerola's team.
Bibarel has the type edge here and should clean up Nanu's team.
Bibarel trades roughly evenly with Mina's team.
Bibarel has the type edge here and should clean up Hapu's team.
Bibarel trades roughly evenly with Molayne's team.
Bibarel has the type edge here and should clean up Olivia's team.
Bibarel trades roughly evenly with Acerola's team.
Bibarel trades roughly evenly with Kahili's team.
Bibarel trades roughly evenly with Kukui's team.
Bibarel cannot be caught in this game. It must be traded in from a compatible game where it appears in the wild. Cross-region trading typically becomes available after defeating the Elite Four. Alternatively, transfer the pre-evolution and level it up to Lv 15.
How to Get Bibarel in Ultra Sun & Ultra Moon
No wild encounters for Bibarel in Ultra Sun & Ultra Moon. Bring Bidoof over from Diamond & Pearl, then level through the stages. Each step in the chain is laid out below.
How to Obtain Bibarel in USUM
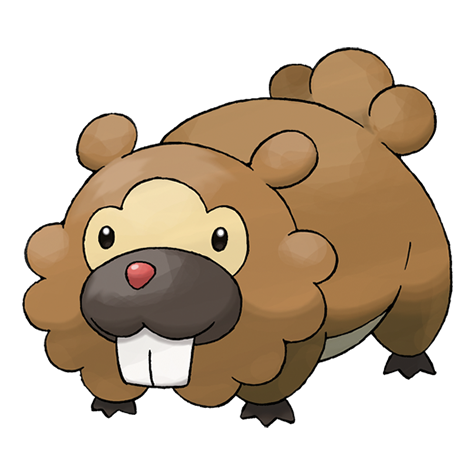 Step 1Obtain BidoofLATER APPEARANCEfrom Diamond & PearlNot TradeableAppears in Diamond & Pearl via Walking · Route 201. Forward-only transfer — no path back to this game from a later one.
- Step 2Bibarel ✓
Bibarel Weakness
Bibarel is weak to Electric, Grass, and Fighting. On the flip side, it's immune to Ghost-type moves entirely. 4 resistances help offset the weaknesses.
| Damage | Types |
|---|---|
| 2x (Weak) | Electric, Grass, Fighting |
| 0.5x (Resist) | Fire, Water, Ice, Steel |
| 0x (Immune) | Ghost |
What is Bibarel Weak Against
GoodBest Pokemon Against Bibarel
Hawlucha Fighting | A | |
Machop Fighting | C | |
Crabrawler Fighting | C | |
Pikachu Electric | C | |
Available Moves Moves
Damage vs Bibarel View Pikachu builds →Thunderbolt 2x63-75% Brick Break 2x39-46% | ||
Magnemite ElectricSteel | C | |
Vikavolt BugElectric | B | |
Obtain MethodHeahea Beach Gift | ||
Jolteon Electric | B | |
Obtain MethodEvolve Eevee (Paniola Ranch Gift) Available Moves Moves
Damage vs Bibarel View Jolteon builds →Thunderbolt 2x10⁴-123%KO Double Kick 2x18-22% | ||
Hawlucha Fighting | A | |
Raichu Electric | C | |
Available Moves Moves
Damage vs Bibarel View Raichu builds →Thunderbolt 2x90-107%KO Brick Break 2x51-60% | ||
Grovyle Grass | C | |
Available Moves Moves
Damage vs Bibarel View Grovyle builds →Mega Drain 2x73-86% Brick Break 2x38-47% | ||
Vikavolt BugElectric | B | |
Obtain MethodHeahea Beach Gift | ||
Jolteon Electric | B | |
Obtain MethodEvolve Eevee (Paniola Ranch Gift) Available Moves Moves
Damage vs Bibarel View Jolteon builds →Thunderbolt 2x113-134%KO Double Kick 2x19-24% | ||
Hawlucha Fighting | A | |
Raichu Electric | C | |
Available Moves Moves
Damage vs Bibarel View Raichu builds →Thunderbolt 2x99-116%KO Brick Break 2x55-66% | ||
Grovyle Grass | C | |
Available Moves Moves
Damage vs Bibarel View Grovyle builds →Mega Drain 2x79-94% Brick Break 2x42-51% | ||
Passimian Fighting | C | |
Available Moves Moves
Damage vs Bibarel View Passimian builds →Brick Break 2x96-114%KO Energy Ball 2x34-41% | ||
Jolteon Electric | B | |
Obtain MethodEvolve Eevee (Paniola Ranch Gift) Available Moves Moves
Damage vs Bibarel View Jolteon builds →Thunderbolt 2x10⁶-125%KO Double Kick 2x16-20% | ||
Vikavolt BugElectric | B | |
Obtain MethodHeahea Beach Gift Available Moves Moves
Damage vs Bibarel View Vikavolt builds →Thunderbolt 2x132-156%KO Energy Ball 2x87-104%KO | ||
Gallade PsychicFighting | C | |
Available Moves Moves
Damage vs Bibarel View Gallade builds →Brick Break 2x96-114%KO Leaf Blade 2x77-91% Thunderbolt 2x47-56% | ||
Hawlucha Fighting | A | |
Bewear NormalFighting | B | |
Obtain MethodHauoli City Interact Encounter | ||
Passimian Fighting | C | |
Available Moves Moves
Damage vs Bibarel View Passimian builds →Brick Break 2x99-117%KO Energy Ball 2x36-42% | ||
Hariyama Fighting | C | |
Jolteon Electric | B | |
Obtain MethodEvolve Eevee (Paniola Ranch Gift) Available Moves Moves
Damage vs Bibarel View Jolteon builds →Thunderbolt 2x110-130%KO Double Kick 2x19-22% | ||
Poliwrath WaterFighting | C | |
Decidueye GrassGhost | C | |
Obtain MethodEvolve Rowlet (Route 1 Gift) Available Moves Moves
Damage vs Bibarel View Decidueye builds →Leaf Storm 2x147-173%KO Low Sweep 2x51-61% | ||
Venusaur GrassPoison | C | |
Pangoro FightingDark | C | |
Bewear NormalFighting | B | |
Obtain MethodHauoli City Interact Encounter | ||
Passimian Fighting | C | |
Available Moves Moves
Damage vs Bibarel View Passimian builds →Brick Break 2x98-116%KO Energy Ball 2x35-41% | ||
Passimian Fighting | C | |
Available Moves Moves
Damage vs Bibarel View Passimian builds →Close Combat 2x150-177%KO Energy Ball 2x33-39% | ||
Decidueye GrassGhost | C | |
Obtain MethodEvolve Rowlet (Route 1 Gift) Available Moves Moves
Damage vs Bibarel View Decidueye builds →Leaf Storm 2x139-164%KO Low Sweep 2x50-58% | ||
Torterra GrassGround | C | |
Ivysaur GrassPoison | C | |
Bewear NormalFighting | B | |
Obtain MethodHauoli City Interact Encounter | ||
Decidueye GrassGhost | C | |
Obtain MethodEvolve Rowlet (Route 1 Gift) Available Moves Moves
Damage vs Bibarel View Decidueye builds →Solar Beam 2x215-253%KO Low Sweep 2x50-59% | ||
Lilligant Grass | C | |
Sceptile Grass | B | |
Available Moves Moves
Damage vs Bibarel View Sceptile builds →Solar Beam 2x224-264%KO Focus Blast 2x90-106%KO | ||
Venusaur GrassPoison | C | |
Exeggutor GrassPsychic | C | |
Exeggutor GrassPsychic | C | |
Decidueye GrassGhost | C | |
Obtain MethodEvolve Rowlet (Route 1 Gift) Available Moves Moves
Damage vs Bibarel View Decidueye builds →Solar Beam 2x220-259%KO Low Sweep 2x51-60% | ||
Xurkitree Electric | B | |
Obtain MethodUltra Space Interact Encounter Available Moves Moves
Damage vs Bibarel View Xurkitree builds →Solar Beam 2x236-277%KO Thunderbolt 2x160-189%KO | ||
Lilligant Grass | C | |
Venusaur GrassPoison | C | |
In Ultra Sun & Ultra Moon, Lanturn deals 45-53% with Volt Switch.
C | ||
Recommended Build AbilityLevitate ItemLeftovers NatureHardy Moves
Damage vs Bibarel View Claydol builds →Rapid Spin14-16% Psychic24-29% | ||
C | ||
Recommended Build AbilityRegenerator ItemLeftovers NatureCalm Moves View Audino builds →
| ||
C | ||
Recommended Build AbilityVoltabsorb ItemAssault Vest NatureModest Moves
Damage vs Bibarel View Lanturn builds →Volt Switch 2x45-53% Scald13-15% Ice Beam14-17% Surf14-17% | ||
C | ||
Recommended Build AbilitySnow Warning ItemFocus Sash NatureTimid Moves
Damage vs Bibarel View Aurorus builds →Blizzard25-29% | ||
C | ||
Recommended Build AbilityStamina ItemLeftovers NatureSassy Moves
Damage vs Bibarel View Mudsdale builds →Earthquake45-53% | ||
Bibarel Evolutions
Evolved from Bidoof. Bibarel is the final form in this two-stage line. A massive partner pool for breeding via two egg groups. Eggs are quick to hatch. Attack grew the most through evolution (+40 over Bidoof), and Bibarel peaks at 410 total stats. View every chain in the Evolution Chart.
How to Evolve
Breeding
Breed with Bibarel to get Bidoof eggs easily using 218 partners from the Ground and Water1 egg groups. Notable egg moves include Aqua Tail, Defense Curl, Double-Edge and 10 more.


USUM Bibarel Best Moveset
AbilitySimple doubles all stat changes, making MoveSwords Dance grant +4 Attack in one turn. Normal/Water TermStab from 85 Attack at +4 hits extremely hard. But 71 Speed acts after most threats and 79/60/60 bulk means the moveset rarely survives to set up. The combination promises devastating power it almost never gets to deliver.
Best Build
Bibarel best EVs are Attack and Speed
Physical Setup Sweeper Moveset
- Swords Dance
- Aqua Jet
- Quick Attack
- Liquidation
Recommended Teammates
Moves List
Breeding opens up real options for Bibarel. Aqua Tail and Defense Curl come exclusively from egg moves, and they're worth the effort. The rest of the kit covers basics through Giga Impact and Hyper Beam and coverage across 9 types.
How to Read the Moves Table
Tabs
- Level-Up
- Learned by leveling up.
- TM
- Taught by a Technical Machine.
- Egg
- Inherited via breeding.
- Tutor
- NPC tutor (cost: items, BP, money).
- Reminder
- An NPC reteaches any move this Pokemon could have learned by leveling up.
- Transfer
- Carried over from an older game using Pokemon HOME.
- Event
- Given out through Mystery Gift events.
Visual Signals
CAT (Category)
How the move deals damage and which stats it uses.
A small dot on the icon's corner marks the move as contact. That triggers abilities like Static, Flame Body, Rough Skin, or Iron Barbs, plus items like Rocky Helmet and Sticky Barb.
Tier (S to D)
Each move's competitive rank in RankedBoost's system. TM, Egg, and Tutor sort by tier by default (best first). On Level-Up, click the Tier header to do the same.
PWR (Power)
Base damage. Numbers shown in a type color include STAB (base × 1.5). Hover any colored number to see the math.
— means no power (status moves) or variable power.
Sorting & Filter
Click any column header to sort. Level-Up opens with Lv 1 at the top. TM, Egg, and Tutor open with the highest-tier moves at the top.
Search filters by move name or type. The Filter button limits the list to STAB, Physical, Special, or Status moves.
Level-Up Moves
TM Moves
Egg Moves
Tutor Moves
Base Stats
Bibarel Ultra Sun & Ultra Moon Guide
In Ultra Sun & Ultra Moon, Bibarel can work for a story run. 410 BST is average, but Normal/Water typing fills a niche depending on your team composition.
In Ultra Sun & Ultra Moon, Unaware changes the entire equation for Bibarel. The 410 BST doesn't tell the full story. Ranked C-Tier. Swords Dance with Life Orb is the standard set.
Unaware is what you want on Bibarel. Every competitive set worth running is built with that ability in mind. The alternatives (Simple, Moody) work on paper but Unaware is what makes Bibarel worth using.
Base 71 Speed is workable. Faster than some, slower than many. On offense, Bibarel is a physical attacker with base 85 Attack.
Game Availability
Available in 11 titles since its debut in Diamond & Pearl, Bibarel spans 7 generations of Pokemon games. It's accessible through wild encounters in a solid number of games.
Click a game to view version-specific details
- Gen 1RB

 Red & Blue
 - Gen 1Y
 Yellow
 - Gen 2GS

 Gold & Silver
 - Gen 2C
 Crystal
 - Gen 3RS

 Ruby & Sapphire
 - Gen 3E
 Emerald
 - Gen 3FRLG

 FireRed & LeafGreen
 - Gen 4DPDebut

 Diamond & Pearl
 - Gen 4Pt
 Platinum
 - Gen 4HGSS

 HeartGold & SoulSilver
 - Gen 5BW

 Black & White
 - Gen 5B2W2

 Black 2 & White 2
 - Gen 6XY

 X & Y
X & Y - Gen 6ORAS

 Omega Ruby & Alpha Sapphire
 - Gen 7SM

 Sun & Moon
 - Gen 7USUM

 Ultra Sun & Ultra Moon
 - Gen 7LGPE

 Let's Go Pikachu & Eevee
 - Gen 8SwSh

 Sword & Shield
 - Gen 8BDSP

 Brilliant Diamond & Shining Pearl
 - Gen 8PLA
 Legends: Arceus
 - Gen 9SV

 Scarlet & Violet
 - Gen 9LZA
 Legends: Z-A
 - Gen 10WW

 Winds & Waves