Stats & Training
Everything pushes toward mixed damage here. Floatzel's Speed does the work, Sp. Def pays the price. But you're still getting 2 Speed EVs per KO. Moderately hard to find, on a medium-fast 1M XP curve.
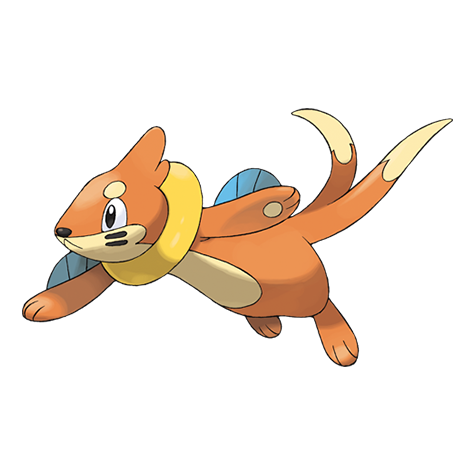
With its flotation sac inflated, it can carry people on its back. It deflates the sac before it dives.
It is a common sight around fishing ports. It is known to rescue people and help fishers carry what they caught.
Floatzel Weakness
Floatzel's Water typing leaves it vulnerable to Electric and Grass. The Water typing picks up 4 resistances to work with. At base 115 Speed, Floatzel outspeeds most threats and doesn't need to tank what it can outrun.
| Damage | Types |
|---|---|
| 2x (Weak) | Electric, Grass |
| 0.5x (Resist) | Fire, Water, Ice, Steel |
Glimmora's Power Gem hits Floatzel for 60-71%. Heatran's Flash Cannon hits Floatzel for 36-43%. Tyranitar's Stone Edge also KOs at 143-168%.
A | ||
Recommended Build AbilityToxicdebris ItemRed Card NatureTimid Moves
Damage vs Floatzel View Glimmora builds →Power Gem60-71% | ||
Heatran FireSteel | A | |
Recommended Build AbilityFlashfire ItemAir Balloon NatureTimid Moves
Damage vs Floatzel View Heatran builds →Flash Cannon36-43% | ||
A | ||
Recommended Build AbilitySand Stream ItemChoice Band NatureAdamant Moves
Damage vs Floatzel View Tyranitar builds →Knock Off93-109%KO Stone Edge143-168%KO Pursuit58-68% Earthquake95-112%KO | ||
Golurk GroundGhost | B | |
Recommended Build AbilityNoguard ItemChoice Band NatureAdamant Moves
Damage vs Floatzel View Golurk builds →Earthquake135-159%KO Poltergeist149-175%KO Stone Edge90-106%KO | ||
B | ||
Recommended Build AbilityNatural Cure ItemHeavy-Duty Boots NatureBold Moves View Blissey builds →
| ||
Evolution
Floatzel is what Buizel becomes. Breed it for Buizel eggs (average hatch time). A massive partner pool for breeding via two egg groups. Eggs are average hatch time. The evolution from Buizel pushed Floatzel to 495 total stats. Attack saw the largest single gain at +40. View every chain in the Evolution Chart.
How to Evolve


Breeding
Breed with Floatzel to get Buizel eggs easily using 278 partners from the Ground and Water1 egg groups.


Floatzel Best Moveset
the remaining moves gives Floatzel answers even while choice-locked. Choice Band provides raw power at the cost of move flexibility, and max Attack and Speed EVs with Waterveil mean every prediction that lands hits hard.
Best Build
Floatzel best EVs are Attack and Speed
Physical Sweeper Moveset
- Flip Turn
- Wave Crash
- Ice Spinner
- Aqua Jet
Recommended Teammates
Doubles Physical Sweeper Moveset
- Ice Spinner
- Flip Turn
- Aqua Jet
- Wave Crash
Recommended Teammates
Legends: Arceus uses different battle mechanics.
Competitive build content is not applicable for this game. Select a main series game for builds.
Physical Sweeper Moveset
- Aqua Jet
- Ice Punch
- Crunch
- Brick Break
Recommended Teammates
Physical Sweeper Moveset
- Ice Punch
- Liquidation
- Brick Break
- Pursuit
Recommended Teammates
Doubles Utility Moveset
- Mud Slap
- Icy Wind
- Soak
- Protect
Recommended Teammates
Moves
The level-up pool is slim, so TMs matter here. Floatzel's Dark and Ice coverage and more all comes from technical machines, built on top of Wave Crash and Hydro Pump for same-type damage. Aqua Tail and Hydro Pump are the payoff moves.
Level-Up Moves
TM Moves
Egg Moves
Tutor Moves
The offense anchors on Hydro Pump and Aqua Tail, with Normal and Dark coverage and more adding reach. It's a workable movepool for Floatzel that handles most situations. Aqua Tail and Hydro Pump give it enough punch where it matters.
You'll want to breed for Aqua Ring and Aqua Tail on Floatzel. These egg moves aren't just nice to have. Combined with STAB from Hydro Pump and Aqua Tail, they expand what Floatzel can actually threaten in practice.
You'll want to breed for Aqua Ring and Aqua Tail on Floatzel. These egg moves aren't just nice to have. Combined with STAB from Hydro Pump and Aqua Tail, they expand what Floatzel can actually threaten in practice.
How to Get Floatzel
92 encounter spots for Floatzel at decent spawn rates starting from mid-game routes. Best and Earliest sort options below help narrow down your approach based on odds vs. Accessibility.
Where To Catch Floatzel in Scarlet & Violet
To get Floatzel, start by catching Buizel through walking encounters at Lv. 2-60. The chain covers 2 catchable stages before reaching the final form.
 Step 1Catch BuizelAsado Desert - RiverScarletOverworld Lv.2-30 Desert12%EarlyAsado Desert - RiverVioletOverworld Lv.2-30 Desert12%EarlyCasseroya Lake - BeachScarletOverworld Lv.2-30 Water12%EarlyCasseroya Lake - BeachVioletOverworld Lv.2-30 Water12%EarlyCasseroya Lake - OceanVioletOverworld Lv.2-30 Water12%EarlyCasseroya Lake - OceanScarletOverworld Lv.2-30 Water12%EarlyCasseroya Lake - RiverVioletOverworld Lv.2-30 Water12%EarlyCasseroya Lake - RiverScarletOverworld Lv.2-30 Water12%EarlyEast Paldean Sea - BeachVioletOverworld Lv.2-30 Water12%EarlyEast Paldean Sea - BeachScarletOverworld Lv.2-30 Water12%EarlyEast Paldean Sea - OceanVioletOverworld Lv.2-30 Water12%EarlyEast Paldean Sea - OceanScarletOverworld Lv.2-30 Water12%EarlyEast Province (Area One) - BeachVioletOverworld Lv.2-30 Route12%EarlyEast Province (Area One) - BeachScarletOverworld Lv.2-30 Route12%EarlyEast Province (Area One) - OceanVioletOverworld Lv.2-30 Route12%EarlyEast Province (Area One) - OceanScarletOverworld Lv.2-30 Route12%EarlyEast Province (Area One) - RiverVioletOverworld Lv.2-30 Route12%EarlyEast Province (Area One) - RiverScarletOverworld Lv.2-30 Route12%EarlyEast Province (Area Three) - OceanScarletOverworld Lv.2-30 Route12%EarlyEast Province (Area Three) - OceanVioletOverworld Lv.2-30 Route12%EarlyEast Province (Area Three) - RiverScarletOverworld Lv.2-30 Route12%EarlyEast Province (Area Three) - RiverVioletOverworld Lv.2-30 Route12%EarlyEast Province (Area Two) - BeachScarletOverworld Lv.2-30 Route12%EarlyEast Province (Area Two) - BeachVioletOverworld Lv.2-30 Route12%EarlyEast Province (Area Two) - OceanVioletOverworld Lv.2-30 Route12%EarlyEast Province (Area Two) - OceanScarletOverworld Lv.2-30 Route12%EarlyEast Province (Area Two) - RiverVioletOverworld Lv.2-30 Route12%EarlyEast Province (Area Two) - RiverScarletOverworld Lv.2-30 Route12%EarlyGlaseado MountainVioletOverworld Lv.2-30 Cave12%EarlyGlaseado MountainVioletOverworld Lv.2-30 Cave12%EarlyGlaseado MountainVioletOverworld Lv.2-30 Cave12%EarlyGlaseado MountainScarletOverworld Lv.2-30 Cave12%EarlyGlaseado MountainScarletOverworld Lv.2-30 Cave12%EarlyGlaseado MountainScarletOverworld Lv.2-30 Cave12%EarlyNorth Paldean Sea - OceanVioletOverworld Lv.2-30 Water12%EarlyNorth Paldean Sea - OceanScarletOverworld Lv.2-30 Water12%EarlyNorth Province (Area One) - BeachVioletOverworld Lv.2-30 Route12%EarlyNorth Province (Area One) - BeachScarletOverworld Lv.2-30 Route12%EarlyNorth Province (Area One) - OceanVioletOverworld Lv.2-30 Route12%EarlyNorth Province (Area One) - OceanScarletOverworld Lv.2-30 Route12%EarlyNorth Province (Area One) - RiverScarletOverworld Lv.2-30 Route12%EarlyNorth Province (Area One) - RiverVioletOverworld Lv.2-30 Route12%EarlyNorth Province (Area Three) - BeachScarletOverworld Lv.2-30 Route12%EarlyNorth Province (Area Three) - BeachVioletOverworld Lv.2-30 Route12%EarlyNorth Province (Area Three) - OceanScarletOverworld Lv.2-30 Route12%EarlyNorth Province (Area Three) - OceanVioletOverworld Lv.2-30 Route12%EarlyNorth Province (Area Three) - RiverVioletOverworld Lv.2-30 Route12%EarlyNorth Province (Area Three) - RiverScarletOverworld Lv.2-30 Route12%EarlySouth Paldean Sea - OceanVioletOverworld Lv.2-30 Water12%EarlySouth Paldean Sea - OceanScarletOverworld Lv.2-30 Water12%EarlySouth Paldean Sea - RiverVioletOverworld Lv.2-30 Water12%EarlySouth Paldean Sea - RiverScarletOverworld Lv.2-30 Water12%EarlySouth Province (Area Five) - BeachVioletOverworld Lv.2-30 Route12%EarlySouth Province (Area Five) - BeachScarletOverworld Lv.2-30 Route12%EarlySouth Province (Area Five) - OceanVioletOverworld Lv.2-30 Route12%EarlySouth Province (Area Five) - OceanScarletOverworld Lv.2-30 Route12%EarlySouth Province (Area Five) - RiverVioletOverworld Lv.2-30 Route12%EarlySouth Province (Area Five) - RiverScarletOverworld Lv.2-30 Route12%EarlySouth Province (Area Four) - OceanVioletOverworld Lv.2-30 Route12%EarlySouth Province (Area Four) - OceanScarletOverworld Lv.2-30 Route12%EarlySouth Province (Area Four) - RiverScarletOverworld Lv.2-30 Route12%EarlySouth Province (Area Four) - RiverVioletOverworld Lv.2-30 Route12%EarlySouth Province (Area One) - BeachScarletOverworld Lv.2-30 Route12%EarlySouth Province (Area One) - BeachVioletOverworld Lv.2-30 Route12%EarlySouth Province (Area One) - OceanScarletOverworld Lv.2-30 Route12%EarlySouth Province (Area One) - OceanVioletOverworld Lv.2-30 Route12%EarlySouth Province (Area One) - RiverScarletOverworld Lv.2-30 Route12%EarlySouth Province (Area One) - RiverVioletOverworld Lv.2-30 Route12%EarlySouth Province (Area Six) - OceanVioletOverworld Lv.2-30 Route12%EarlySouth Province (Area Six) - OceanScarletOverworld Lv.2-30 Route12%EarlySouth Province (Area Six) - RiverVioletOverworld Lv.2-30 Route12%EarlySouth Province (Area Six) - RiverScarletOverworld Lv.2-30 Route12%EarlySouth Province (Area Two) - RiverVioletOverworld Lv.2-30 Route12%EarlySouth Province (Area Two) - RiverScarletOverworld Lv.2-30 Route12%EarlyTagtree Thicket - RiverVioletOverworld Lv.2-30 Forest12%EarlyTagtree Thicket - RiverScarletOverworld Lv.2-30 Forest12%EarlyWest Paldean Sea - OceanVioletOverworld Lv.2-30 Water12%EarlyWest Paldean Sea - OceanScarletOverworld Lv.2-30 Water12%EarlyWest Province (Area One) - BeachVioletOverworld Lv.2-30 Route12%EarlyWest Province (Area One) - BeachScarletOverworld Lv.2-30 Route12%EarlyWest Province (Area One) - OceanVioletOverworld Lv.2-30 Route12%EarlyWest Province (Area One) - OceanScarletOverworld Lv.2-30 Route12%EarlyWest Province (Area One) - RiverScarletOverworld Lv.2-30 Route12%EarlyWest Province (Area One) - RiverVioletOverworld Lv.2-30 Route12%EarlyWest Province (Area Three) - RiverScarletOverworld Lv.2-30 Route12%EarlyWest Province (Area Three) - RiverVioletOverworld Lv.2-30 Route12%EarlyWest Province (Area Two) - BeachScarletOverworld Lv.2-30 Route12%EarlyWest Province (Area Two) - BeachVioletOverworld Lv.2-30 Route12%EarlyWest Province (Area Two) - OceanVioletOverworld Lv.2-30 Route12%EarlyWest Province (Area Two) - OceanScarletOverworld Lv.2-30 Route12%EarlyWest Province (Area Two) - RiverVioletOverworld Lv.2-30 Route12%EarlyWest Province (Area Two) - RiverScarletOverworld Lv.2-30 Route12%Early
 Step 2Floatzel ✓Casseroya Lake - OceanVioletOverworld Lv.28-60 Water16%MidCasseroya Lake - OceanScarletOverworld Lv.28-60 Water16%MidEast Paldean Sea - OceanVioletOverworld Lv.28-60 Water16%MidEast Paldean Sea - OceanScarletOverworld Lv.28-60 Water16%MidEast Province (Area One) - OceanVioletOverworld Lv.28-60 Route16%MidEast Province (Area One) - OceanScarletOverworld Lv.28-60 Route16%MidEast Province (Area Three) - OceanScarletOverworld Lv.28-60 Route16%MidEast Province (Area Three) - OceanVioletOverworld Lv.28-60 Route16%MidEast Province (Area Two) - OceanVioletOverworld Lv.28-60 Route16%MidEast Province (Area Two) - OceanScarletOverworld Lv.28-60 Route16%MidGlaseado MountainVioletOverworld Lv.28-60 Cave16%MidGlaseado MountainScarletOverworld Lv.28-60 Cave16%MidNorth Paldean Sea - OceanVioletOverworld Lv.28-60 Water16%MidNorth Paldean Sea - OceanScarletOverworld Lv.28-60 Water16%MidNorth Province (Area One) - OceanVioletOverworld Lv.28-60 Route16%MidNorth Province (Area One) - OceanScarletOverworld Lv.28-60 Route16%MidNorth Province (Area Three) - OceanScarletOverworld Lv.28-60 Route16%MidNorth Province (Area Three) - OceanVioletOverworld Lv.28-60 Route16%MidSouth Paldean Sea - OceanVioletOverworld Lv.28-60 Water16%MidSouth Paldean Sea - OceanScarletOverworld Lv.28-60 Water16%MidSouth Province (Area Five) - OceanVioletOverworld Lv.28-60 Route16%MidSouth Province (Area Five) - OceanScarletOverworld Lv.28-60 Route16%MidSouth Province (Area Four) - OceanVioletOverworld Lv.28-60 Route16%MidSouth Province (Area Four) - OceanScarletOverworld Lv.28-60 Route16%MidSouth Province (Area One) - OceanScarletOverworld Lv.28-60 Route16%MidSouth Province (Area One) - OceanVioletOverworld Lv.28-60 Route16%MidSouth Province (Area Six) - OceanVioletOverworld Lv.28-60 Route16%MidSouth Province (Area Six) - OceanScarletOverworld Lv.28-60 Route16%MidWest Paldean Sea - OceanVioletOverworld Lv.28-60 Water16%MidWest Paldean Sea - OceanScarletOverworld Lv.28-60 Water16%MidWest Province (Area One) - OceanVioletOverworld Lv.28-60 Route16%MidWest Province (Area One) - OceanScarletOverworld Lv.28-60 Route16%MidWest Province (Area Two) - OceanVioletOverworld Lv.28-60 Route16%MidWest Province (Area Two) - OceanScarletOverworld Lv.28-60 Route16%MidAsado Desert - RiverScarletOverworld Lv.28-60 Desert4%MidAsado Desert - RiverVioletOverworld Lv.28-60 Desert4%MidCasseroya Lake - BeachScarletOverworld Lv.28-60 Water4%MidCasseroya Lake - BeachVioletOverworld Lv.28-60 Water4%MidCasseroya Lake - RiverVioletOverworld Lv.28-60 Water4%MidCasseroya Lake - RiverScarletOverworld Lv.28-60 Water4%MidEast Paldean Sea - BeachVioletOverworld Lv.28-60 Water4%MidEast Paldean Sea - BeachScarletOverworld Lv.28-60 Water4%MidEast Province (Area One) - BeachVioletOverworld Lv.28-60 Route4%MidEast Province (Area One) - BeachScarletOverworld Lv.28-60 Route4%MidEast Province (Area One) - RiverVioletOverworld Lv.28-60 Route4%MidEast Province (Area One) - RiverScarletOverworld Lv.28-60 Route4%MidEast Province (Area Three) - RiverScarletOverworld Lv.28-60 Route4%MidEast Province (Area Three) - RiverVioletOverworld Lv.28-60 Route4%MidEast Province (Area Two) - BeachScarletOverworld Lv.28-60 Route4%MidEast Province (Area Two) - BeachVioletOverworld Lv.28-60 Route4%MidEast Province (Area Two) - RiverVioletOverworld Lv.28-60 Route4%MidEast Province (Area Two) - RiverScarletOverworld Lv.28-60 Route4%MidGlaseado MountainVioletOverworld Lv.28-60 Cave4%MidGlaseado MountainVioletOverworld Lv.28-60 Cave4%MidGlaseado MountainScarletOverworld Lv.28-60 Cave4%MidGlaseado MountainScarletOverworld Lv.28-60 Cave4%MidNorth Province (Area One) - BeachVioletOverworld Lv.28-60 Route4%MidNorth Province (Area One) - BeachScarletOverworld Lv.28-60 Route4%MidNorth Province (Area One) - RiverScarletOverworld Lv.28-60 Route4%MidNorth Province (Area One) - RiverVioletOverworld Lv.28-60 Route4%MidNorth Province (Area Three) - BeachScarletOverworld Lv.28-60 Route4%MidNorth Province (Area Three) - BeachVioletOverworld Lv.28-60 Route4%MidNorth Province (Area Three) - RiverVioletOverworld Lv.28-60 Route4%MidNorth Province (Area Three) - RiverScarletOverworld Lv.28-60 Route4%MidSouth Paldean Sea - RiverVioletOverworld Lv.28-60 Water4%MidSouth Paldean Sea - RiverScarletOverworld Lv.28-60 Water4%MidSouth Province (Area Five) - BeachVioletOverworld Lv.28-60 Route4%MidSouth Province (Area Five) - BeachScarletOverworld Lv.28-60 Route4%MidSouth Province (Area Five) - RiverVioletOverworld Lv.28-60 Route4%MidSouth Province (Area Five) - RiverScarletOverworld Lv.28-60 Route4%MidSouth Province (Area Four) - RiverScarletOverworld Lv.28-60 Route4%MidSouth Province (Area Four) - RiverVioletOverworld Lv.28-60 Route4%MidSouth Province (Area One) - BeachScarletOverworld Lv.28-60 Route4%MidSouth Province (Area One) - BeachVioletOverworld Lv.28-60 Route4%MidSouth Province (Area One) - RiverScarletOverworld Lv.28-60 Route4%MidSouth Province (Area One) - RiverVioletOverworld Lv.28-60 Route4%MidSouth Province (Area Six) - RiverVioletOverworld Lv.28-60 Route4%MidSouth Province (Area Six) - RiverScarletOverworld Lv.28-60 Route4%MidSouth Province (Area Two) - RiverVioletOverworld Lv.28-60 Route4%MidSouth Province (Area Two) - RiverScarletOverworld Lv.28-60 Route4%MidTagtree Thicket - RiverVioletOverworld Lv.28-60 Forest4%MidTagtree Thicket - RiverScarletOverworld Lv.28-60 Forest4%MidWest Province (Area One) - BeachVioletOverworld Lv.28-60 Route4%MidWest Province (Area One) - BeachScarletOverworld Lv.28-60 Route4%MidWest Province (Area One) - RiverScarletOverworld Lv.28-60 Route4%MidWest Province (Area One) - RiverVioletOverworld Lv.28-60 Route4%MidWest Province (Area Three) - RiverScarletOverworld Lv.28-60 Route4%MidWest Province (Area Three) - RiverVioletOverworld Lv.28-60 Route4%MidWest Province (Area Two) - BeachScarletOverworld Lv.28-60 Route4%MidWest Province (Area Two) - BeachVioletOverworld Lv.28-60 Route4%MidWest Province (Area Two) - RiverVioletOverworld Lv.28-60 Route4%MidWest Province (Area Two) - RiverScarletOverworld Lv.28-60 Route4%Midor evolve from Buizel (Step 1)
Floatzel starts showing up in mid-game routes at decent spawn rates across 3 encounter spots. The list below is sorted so you can pick what fits your current progress without scrolling through everything.
Where To Catch Floatzel in Legends: Arceus
Buizel is your first catch on the way to Floatzel. You'll find walking encounters from walking across 8 total spots in the chain.
 Step 1Catch BuizelAipom HillGrassUncommonBathers' LagoonGrassUncommonHorseshoe PlainsGrassUncommonWindswept RunGrassUncommonWorn BridgeGrassUncommon
 Step 2Floatzel ✓Aipom HillGrassUncommonBathers' LagoonGrassUncommonWorn BridgeGrassUncommonor evolve from Buizel (Step 1)
Floatzel appears at high spawn rates across 22 spots in mid-game routes. Sort by Best below if you want the highest rate, or Earliest if you want the quickest access point in your playthrough.
Where To Catch Floatzel in Brilliant Diamond & Shining Pearl
Buizel is your first catch on the way to Floatzel. You'll find walking encounters from Lv. 7-54 across 38 total spots in the chain.
 Step 1Catch BuizelValley WindworksBrilliant DiamondGrass Lv.7-9 Power-plant35%EarlyValley WindworksShining PearlGrass Lv.7-9 Power-plant35%EarlyRoute 205 - SouthShining PearlGrass Lv.8-10 Route35%EarlyRoute 205 - SouthBrilliant DiamondGrass Lv.8-10 Route35%EarlyRoute 205 - NorthShining PearlGrass Lv.10-12 Route35%EarlyRoute 205 - NorthBrilliant DiamondGrass Lv.10-12 Route35%EarlyRoute 213Brilliant DiamondGrass Lv.20-21 Route30%MidRoute 213Shining PearlGrass Lv.20-21 Route30%MidFountainspring CaveBrilliant DiamondGrass Lv.16-20 CaveMidFountainspring CaveShining PearlGrass Lv.16-20 CaveMidRiverbank CaveBrilliant DiamondGrass Lv.16-20 CaveMidRiverbank CaveShining PearlGrass Lv.16-20 CaveMidStill-Water CavernBrilliant DiamondGrass Lv.16-20 CaveMidStill-Water CavernShining PearlGrass Lv.16-20 CaveMidRoute 224Brilliant DiamondGrass Lv.23 Route4%MidRoute 224Shining PearlGrass Lv.23 Route4%Mid
 Step 2Floatzel ✓Route 218Shining PearlGrass Lv.28-30 Route35%MidRoute 218Brilliant DiamondGrass Lv.28-30 Route35%MidRoute 221Shining PearlGrass Lv.28-30 Route25%MidRoute 221Brilliant DiamondGrass Lv.28-30 Route25%MidFuego IronworksShining PearlGrass Lv.29-30 Power-plant25%MidFuego IronworksBrilliant DiamondGrass Lv.29-30 Power-plant25%MidRoute 213Brilliant DiamondGrass Lv.22 Route10%MidRoute 213Shining PearlGrass Lv.22 Route10%MidRoute 222Shining PearlGrass Lv.40-42 Route35%LateNightRoute 222Brilliant DiamondGrass Lv.40-42 Route35%LateNightVictory Road - B1FShining PearlGrass Lv.44-45 Cave30%LateVictory Road - B1FBrilliant DiamondGrass Lv.44-45 Cave30%LateRoute 222Shining PearlGrass Lv.40-42 Route25%LateMorning/dayRoute 222Brilliant DiamondGrass Lv.40-42 Route25%LateMorning/dayVictory Road - Nat Dex Area B1FShining PearlGrass Lv.50-51 Cave30%PostVictory Road - Nat Dex Area B1FBrilliant DiamondGrass Lv.50-51 Cave30%PostRoute 224Shining PearlGrass Lv.53-54 Route30%PostNightRoute 224Brilliant DiamondGrass Lv.53-54 Route30%PostNightRoute 224Shining PearlGrass Lv.53 Route20%PostMorning/dayRoute 224Brilliant DiamondGrass Lv.53 Route20%PostMorning/dayRoute 230Shining PearlGrass Lv.50-52 Route13%PostRoute 230Brilliant DiamondGrass Lv.50-52 Route13%Postor evolve from Buizel (Step 1)
You'll find Floatzel at Ultra Space Wilds as a set encounter. It's always there at that location, so come prepared for the battle. The location details below cover exact positioning.
How to Obtain Floatzel in Ultra Sun & Ultra Moon
 Step 1Obtain Buizel
 Step 2Floatzel ✓Ultra Space Wilds - WaterfallUltra SunInteract with Pokemon Lv.60 DistortionPostUltra Space Wilds - WaterfallUltra MoonInteract with Pokemon Lv.60 DistortionPostor evolve from Buizel (Step 1)
Floatzel Guide
Floatzel looks average on paper at 495 BST. But Swift Swim is why it sees play. Build around that and it pulls its weight. B-Tier sweeper on our tier list.
Floatzel gets Swift Swim and Water Veil. But Swift Swim is the one that matters. It's the centerpiece of every viable set. Build around that. With base 115 Speed, Swift Swim gives Floatzel an edge before opponents can react.
Floatzel is a physical attacker with base 105 Attack. Speed tells the real story. Base 115 Speed lets it outrun most of the field. Fits the sweeper role.
Run Flip Turn, Wavecrash, Icespinner, and Aqua Jet on Floatzel. Flip Turn is the most common pick at 21% usage. This set covers the sweeper role with a mix of damage and utility.
Game Availability
Debuting in Diamond & Pearl, Floatzel appears in 12 games across 7 generations. A reliable presence in a solid number of games, typically found through wild encounters.
Click a game to view version-specific details
- Gen 1Y
 Yellow
 - Gen 1RB

 Red & Blue
 - Gen 2GS

 Gold & Silver
 - Gen 2C
 Crystal
 - Gen 3RS

 Ruby & Sapphire
 - Gen 3FRLG

 FireRed & LeafGreen
 - Gen 3E
 Emerald
 - Gen 4Pt
 Platinum
 - Gen 4HGSS

 HeartGold & SoulSilver
 - Gen 4DPDebut

 Diamond & Pearl
 - Gen 5BW

 Black & White
 - Gen 5B2W2

 Black 2 & White 2
 - Gen 6XY

 X & Y
X & Y - Gen 6ORAS

 Omega Ruby & Alpha Sapphire
 - Gen 7USUM

 Ultra Sun & Ultra Moon
 - Gen 7SM

 Sun & Moon
 - Gen 7LGPE

 Let's Go Pikachu & Eevee
 - Gen 8SwSh

 Sword & Shield
 - Gen 8PLA
 Legends: Arceus
 - Gen 8BDSP

 Brilliant Diamond & Shining Pearl
 - Gen 9SV

 Scarlet & Violet
 - Gen 9LZA
 Legends: Z-A
 - Gen 10WW

 Winds & Waves