
Is Aggron Good in Brilliant Diamond & Shining Pearl Playthrough?
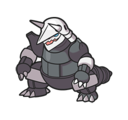
Steel/Rock with massive Defense and AbilityRock Head eliminating recoil from Head Smash and Double-Edge. Handles Candice and Aaron comfortably. The quad Fighting and Ground weaknesses limit E4 use, but Aggron excels in its comfort zone.
Aron has the type edge here and should clean up Roark's team.
Aron has the type edge here and should clean up Gardenia's team.
Maylene's team hits Aron's weaknesses hard.
Crasher Wake's team hits Aron's weaknesses hard.
Aron trades roughly evenly with Fantina's team.
Lairon trades roughly evenly with Byron's team.
Lairon has the type edge here and should clean up Candice's team.
Aggron trades roughly evenly with Volkner's team.
Aggron has the type edge here and should clean up Aaron's team.
Aggron trades roughly evenly with Bertha's team.
Aggron trades roughly evenly with Flint's team.
Aggron trades roughly evenly with Lucian's team.
Aggron trades roughly evenly with Cynthia's team.
Catch Aron on Fuego Ironworks (Poké Radar, Lv 29-30, common).
Your Aron should hit Level 32 before you reach Byron, at typical leveling pace.
Your Lairon should hit Level 42 before you reach Volkner, at typical leveling pace.
How to Get Aggron in Brilliant Diamond & Shining Pearl
You're catching Aron first, not Aggron. Aron appears at decent rates in the encounters below. The step cards map the full 3-stage chain with evolution methods between each stage.
How to Obtain Aggron in BDSP
To get Aggron, start by catching Aron through walking and special encounters at Lv. 29-63. The chain covers 2 catchable stages before reaching the final form.
 Step 1Catch AronFuego IronworksLv.29-30Using PokeRadarBrilliant DiamondRate 22%Big Bluff CavernLv.58-63CavePost-gameGlacial CavernLv.58-63CavePost-gameIcy CaveLv.58-63CavePost-gameRocky CaveLv.58-63CavePost-gameWhiteout CaveLv.58-63CavePost-game
 Step 2Catch or Evolve LaironBig Bluff CavernLv.58-63CavePost-gameGlacial CavernLv.58-63CavePost-gameIcy CaveLv.58-63CavePost-gameRocky CaveLv.58-63CavePost-gameWhiteout CaveLv.58-63CavePost-gameor evolve from Aron (Step 1)
 Step 3Aggron ✓
Aggron Weakness
Type-wise, Aggron takes extra damage from Fighting, Ground, and Water. Watch out for Fighting and Ground attacks, those deal 4x damage. Poison moves do nothing thanks to a full immunity. 8 resistances give it solid defensive coverage on top of that. Aggron's physical bulk (base 180 Def) helps cushion physical weakness hits, but special attackers are the bigger threat.
| Damage | Types |
|---|---|
| 4x (Critical) | Fighting, Ground |
| 2x (Weak) | Water |
| 0.5x (Resist) | Ice, Psychic, Bug, Rock, Dragon, Fairy |
| 0.25x (Resist) | Normal, Flying |
| 0x (Immune) | Poison |
What is Aggron Weak Against
GoodBest Pokemon Against Aggron
Machop Fighting | C | |
Available Moves Moves
Damage vs Aggron View Machop builds →Focus Punch 4x140-166%KO Earthquake 4x64-77% | ||
Cubone Ground | C | |
Available Moves Moves
Damage vs Aggron View Cubone builds →Earthquake 4x74-89% Focus Punch 4x72-85% | ||
Phanpy Ground | D | |
Available Moves Moves
Damage vs Aggron View Phanpy builds →Earthquake 4x85-102%KO Rock Smash 4x28-34% | ||
Psyduck Water | D | |
Obtain MethodCelestic Town Surfing Available Moves Moves
Damage vs Aggron View Psyduck builds →Focus Punch 4x72-85% Surf 2x81-96% | ||
Geodude RockGround | C | |
Available Moves Moves
Damage vs Aggron View Geodude builds →Earthquake 4x96-115%KO Focus Punch 4x94-111%KO | ||
Machop Fighting | C | |
Available Moves Moves
Damage vs Aggron View Machop builds →Focus Punch 4x142-168%KO Earthquake 4x68-80% | ||
Bibarel NormalWater | C | |
Available Moves Moves
Damage vs Aggron View Bibarel builds →Focus Punch 4x10²-120%KO Waterfall 2x44-54% | ||
Cubone Ground | C | |
Available Moves Moves
Damage vs Aggron View Cubone builds →Earthquake 4x80-96% Focus Punch 4x74-88% | ||
Phanpy Ground | D | |
Available Moves Moves
Damage vs Aggron View Phanpy builds →Earthquake 4x80-96% Rock Smash 4x26-32% | ||
Buizel Water | D | |
Available Moves Moves
Damage vs Aggron View Buizel builds →Focus Punch 4x88-104%KO Surf 2x80-96% | ||
Marowak Ground | C | |
Available Moves Moves
Damage vs Aggron View Marowak builds →Earthquake 4x89-105%KO Focus Punch 4x86-101%KO | ||
Machoke Fighting | C | |
Available Moves Moves
Damage vs Aggron View Machoke builds →Focus Punch 4x151-178%KO Earthquake 4x67-79% | ||
Floatzel Water | C | |
Available Moves Moves
Damage vs Aggron View Floatzel builds →Focus Punch 4x10⁴-123%KO Waterfall 2x44-53% | ||
Donphan Ground | B | |
Available Moves Moves
Damage vs Aggron View Donphan builds →Earthquake 4x118-138%KO Rock Smash 4x33-40% | ||
Gastrodon WaterGround | C | |
Available Moves Moves
Damage vs Aggron View Gastrodon builds →Earthquake 4x89-105%KO Surf 2x100-119%KO Rock Smash 4x25-31% | ||
Marowak Ground | C | |
Available Moves Moves
Damage vs Aggron View Marowak builds →Earthquake 4x89-105%KO Focus Punch 4x86-101%KO | ||
Machoke Fighting | C | |
Available Moves Moves
Damage vs Aggron View Machoke builds →Focus Punch 4x151-178%KO Earthquake 4x67-79% | ||
Quagsire WaterGround | C | |
Obtain MethodGreat Marsh Surfing Available Moves Moves
Damage vs Aggron View Quagsire builds →Earthquake 4x89-105%KO Focus Punch 4x89-105%KO Aqua Tail 2x42-49% | ||
Floatzel Water | C | |
Available Moves Moves
Damage vs Aggron View Floatzel builds →Focus Punch 4x10⁴-123%KO Dig 4x59-70% Waterfall 2x44-53% | ||
Donphan Ground | B | |
Available Moves Moves
Damage vs Aggron View Donphan builds →Earthquake 4x118-138%KO Rock Smash 4x33-40% | ||
Marowak Ground | C | |
Available Moves Moves
Damage vs Aggron View Marowak builds →Earthquake 4x85-101%KO Focus Punch 4x82-97% | ||
Machoke Fighting | C | |
Available Moves Moves
Damage vs Aggron View Machoke builds →Focus Punch 4x148-174%KO Earthquake 4x66-79% | ||
Hippowdon Ground | B | |
Available Moves Moves
Damage vs Aggron View Hippowdon builds →Earthquake 4x10⁹-129%KO Rock Smash 4x32-37% Water Pulse 2x36-43% | ||
Quagsire WaterGround | C | |
Obtain MethodGreat Marsh Surfing Available Moves Moves
Damage vs Aggron View Quagsire builds →Earthquake 4x85-101%KO Focus Punch 4x85-101%KO Aqua Tail 2x40-48% | ||
Floatzel Water | C | |
Available Moves Moves
Damage vs Aggron View Floatzel builds →Focus Punch 4x101-120%KO Dig 4x57-67% Waterfall 2x42-50% | ||
Marowak Ground | C | |
Available Moves Moves
Damage vs Aggron View Marowak builds →Earthquake 4x83-99% Focus Punch 4x79-94% | ||
Machoke Fighting | C | |
Available Moves Moves
Damage vs Aggron View Machoke builds →Focus Punch 4x142-167%KO Earthquake 4x64-77% | ||
Hippowdon Ground | B | |
Available Moves Moves
Damage vs Aggron View Hippowdon builds →Earthquake 4x10⁶-125%KO Rock Smash 4x32-38% Water Pulse 2x35-42% | ||
Quagsire WaterGround | C | |
Obtain MethodGreat Marsh Surfing Available Moves Moves
Damage vs Aggron View Quagsire builds →Earthquake 4x83-99% Focus Punch 4x83-97% Aqua Tail 2x39-47% | ||
Floatzel Water | C | |
Available Moves Moves
Damage vs Aggron View Floatzel builds →Focus Punch 4x97-115%KO Dig 4x53-63% Waterfall 2x39-47% | ||
Marowak Ground | C | |
Available Moves Moves
Damage vs Aggron View Marowak builds →Earthquake 4x83-98% Focus Punch 4x80-94% | ||
Machoke Fighting | C | |
Available Moves Moves
Damage vs Aggron View Machoke builds →Focus Punch 4x141-166%KO Earthquake 4x63-75% | ||
Steelix SteelGround | B | |
Available Moves Moves
Damage vs Aggron View Steelix builds →Earthquake 4x83-98% Rock Smash 4x24-29% | ||
Floatzel Water | C | |
Available Moves Moves
Damage vs Aggron View Floatzel builds →Focus Punch 4x97-114%KO Dig 4x55-65% Waterfall 2x41-49% | ||
Hippowdon Ground | B | |
Available Moves Moves
Damage vs Aggron View Hippowdon builds →Earthquake 4x10³-122%KO Rock Smash 4x30-36% Water Pulse 2x34-41% | ||
Hariyama Fighting | B | |
Available Moves Moves
Damage vs Aggron View Hariyama builds →Focus Punch 4x163-191%KO Earthquake 4x72-85% Surf 2x35-41% | ||
Marowak Ground | C | |
Available Moves Moves
Damage vs Aggron View Marowak builds →Earthquake 4x78-93% Focus Punch 4x78-91% | ||
Garchomp DragonGround | S | |
Available Moves Moves
Damage vs Aggron View Garchomp builds →Earthquake 4x116-137%KO Brick Break 4x60-70% Surf 2x59-69% | ||
Machoke Fighting | C | |
Available Moves Moves
Damage vs Aggron View Machoke builds →Focus Punch 4x141-166%KO Earthquake 4x63-74% | ||
Rhydon GroundRock | C | |
Available Moves Moves
Damage vs Aggron View Rhydon builds →Focus Punch 4x115-136%KO Earthquake 4x116-137%KO Surf 2x38-45% | ||
In Brilliant Diamond & Shining Pearl, Garchomp can KO Aggron with Earthquake (115-136%). Starmie threatens a KO with Scald (96-113%).
Garchomp DragonGround | S | |
Recommended Build AbilityRough Skin ItemLeftovers NatureJolly Moves
Damage vs Aggron View Garchomp builds →Earthquake 4x115-136%KO | ||
Starmie WaterPsychic | B | |
Recommended Build AbilityAnalytic ItemPower Herb NatureTimid Moves
Damage vs Aggron View Starmie builds →Scald 2x96-113%KO Ice Beam18-21% Psyshock24-28% | ||
Aggron Evolutions
Aggron is the final form in a three-stage chain from Aron through Lairon. Breeding this form produces Aron eggs (slow to hatch). Evolving from Aron gave Aggron the biggest boost in Defense (+80), bringing the total to 530 stats. View every chain in the Evolution Chart.
How to Evolve


BDSP Aggron Best Moveset
Crashed from A-tier as 180 Defense on Steel/Rock typing couldn't compensate for 4x Fighting and Ground weaknesses that dominate the format. 110 Attack behind Rock and Steel TermStab gives the moveset physical power. Hidden AbilityHeavy Metal doubles weight. D-tier because the typing creates exploitable gaps that the defensive stat can't cover.
Best Build
Aggron best EVs are HP and Attack
Physical Tank Moveset
- Metal Burst
- Stealth Rock
- Reversal
- Head Smash
Recommended Teammates
Moves List
Hard to wall, honestly. Aggron threatens 12 types beyond its own STAB, with Normal and Flying standing out. Pair that with Head Smash and Iron Tail and switchins need to think twice.
How to Read the Moves Table
Tabs
- Level-Up
- Learned by leveling up.
- TM
- Taught by a Technical Machine.
- Egg
- Inherited via breeding.
- Tutor
- NPC tutor (cost: items, BP, money).
- Reminder
- An NPC reteaches any move this Pokemon could have learned by leveling up.
- Transfer
- Carried over from an older game using Pokemon HOME.
- Event
- Given out through Mystery Gift events.
Visual Signals
CAT (Category)
How the move deals damage and which stats it uses.
A small dot on the icon's corner marks the move as contact. That triggers abilities like Static, Flame Body, Rough Skin, or Iron Barbs, plus items like Rocky Helmet and Sticky Barb.
Tier (S to D)
Each move's competitive rank in RankedBoost's system. TM, Egg, and Tutor sort by tier by default (best first). On Level-Up, click the Tier header to do the same.
PWR (Power)
Base damage. Numbers shown in a type color include STAB (base × 1.5). Hover any colored number to see the math.
— means no power (status moves) or variable power.
Sorting & Filter
Click any column header to sort. Level-Up opens with Lv 1 at the top. TM, Egg, and Tutor open with the highest-tier moves at the top.
Search filters by move name or type. The Filter button limits the list to STAB, Physical, Special, or Status moves.
Level-Up Moves
TM Moves
Egg Moves
Tutor Moves
Base Stats
While seeking iron for food, it digs tunnels by breaking through bedrock with its steel horns.
Aggron Brilliant Diamond & Shining Pearl Guide
In Brilliant Diamond & Shining Pearl, Aggron has a 530 base stat total and ranks as B-Tier: a solid option in Brilliant Diamond & Shining Pearl for the right team. It works best as a balanced. Metalburst with Custapberry is the standard set.
Mega Evolution isn't available in Brilliant Diamond & Shining Pearl, but Aggron does have a Mega form in Gen 6-7 games (X/Y, ORAS, Sun/Moon). Mega Aggron hits 630 BST.
In Brilliant Diamond & Shining Pearl, Aggron's biggest threats include Machamp (Fighting), Golem (Ground), and Swampert (Water), all carrying super-effective STAB moves. Machamp is the most dangerous since Fighting moves deal 4x damage. Aggron has enough bulk to absorb a hit, but don't push the matchup. Pivot to a teammate that resists.
Sturdy is the go-to ability for Aggron. It prevents being KOed from full HP, leaving 1 HP instead. Its hidden ability Heavy Metal can work in specific setups. Rock Head is the other option. Pick based on what your team needs.
In Brilliant Diamond & Shining Pearl, Aggron fills the balanced role. It's a physical attacker with base 110 Attack. Base 50 Speed is low. Priority moves or Trick Room are the way to go. And it's tanky enough to absorb a few hits.
Game Availability
Aggron first appeared in Ruby & Sapphire and spans 15 games across 8 generations. It later gained a Mega form in Generation 6, adding new dimensions to its competitive identity.
Click a game to view version-specific details
- Gen 1RB

 Red & Blue
 - Gen 1Y
 Yellow
 - Gen 2GS

 Gold & Silver
 - Gen 2C
 Crystal
 - Gen 3RSDebut

 Ruby & Sapphire
 - Gen 3E
 Emerald
 - Gen 3FRLG

 FireRed & LeafGreen
 - Gen 4DP

 Diamond & Pearl
 - Gen 4Pt
 Platinum
 - Gen 4HGSS

 HeartGold & SoulSilver
 - Gen 5BW

 Black & White
 - Gen 5B2W2

 Black 2 & White 2
 - Gen 6XY

 X & Y
X & Y - Gen 6ORASMega

 Omega Ruby & Alpha Sapphire
 - Gen 7SM

 Sun & Moon
 - Gen 7USUM

 Ultra Sun & Ultra Moon
 - Gen 7LGPE

 Let's Go Pikachu & Eevee
 - Gen 8SwSh

 Sword & Shield
 - Gen 8BDSP

 Brilliant Diamond & Shining Pearl
 - Gen 8PLA
 Legends: Arceus
 - Gen 9SV

 Scarlet & Violet
 - Gen 9LZA
 Legends: Z-A
 - Gen 10WW

 Winds & Waves