Stats & Training
The stat budget goes to damage. Sp. Atk and Speed carry the offense, Defense doesn't even come close. A Dark Pokemon on a slow 1.25M XP grind, worth 2 Sp. Atk EVs per KO.
Long ago, people imagined its eerie howls to be the call of the grim reaper.
Long ago, people imagined its eerie howls to be the call of the grim reaper.
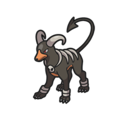
Houndoom Weakness
Water, Fighting, Ground, and Rock moves hit Houndoom for super-effective damage. The upside? Psychic-type moves can't touch it at all. With 6 resistances, the defensive profile is strong. Flash Fire grants an additional Fire immunity, reshaping the matchup chart. Houndoom's special bulk (base 80 Sp.Def) helps absorb special-type weaknesses, though physical moves exploit the lower Defense.
| Damage | Types |
|---|---|
| 2x (Weak) | Water, Fighting, Ground, Rock |
| 0.5x (Resist) | Fire, Grass, Ice, Ghost, Dark, Steel |
| 0x (Immune) | Psychic |
Onix RockGround | C | |
Available Moves Moves
Damage vs Houndoom View Onix builds →Stone Edge 2x87-103%KO Earthquake 2x87-103%KO Rock Slide 2x66-79% Rock Tomb 2x53-63% | ||
Machop Fighting | D | |
Available Moves Moves
Damage vs Houndoom View Machop builds →Focus Punch 2x174-205%KO Earthquake 2x79-95% Brick Break 2x92-111%KO Rock Slide 2x61-74% | ||
Surskit BugWater | D | |
Available Moves Moves
Damage vs Houndoom View Surskit builds →Scald 2x58-71% Water Pulse 2x45-55% Water Gun 2x32-39% | ||
Phanpy Ground | D | |
Available Moves Moves
Damage vs Houndoom View Phanpy builds →Earthquake 2x100-118%KO Rock Slide 2x53-63% Rock Tomb 2x45-53% Rock Smash 2x29-37% | ||
Psyduck Water | D | |
Obtain MethodCelestic Town Surfing Available Moves Moves
Damage vs Houndoom View Psyduck builds →Focus Punch 2x89-105%KO Surf 2x74-87% Waterfall 2x74-87% Scald 2x66-79% | ||
Onix RockGround | C | |
Available Moves Moves
Damage vs Houndoom View Onix builds →Stone Edge 2x77-91% Earthquake 2x77-91% Rock Slide 2x58-70% Rock Tomb 2x47-56% | ||
Shellos Water | D | |
Available Moves Moves
Damage vs Houndoom View Shellos builds →Surf 2x58-70% Scald 2x51-63% Brine 2x47-56% Water Pulse 2x40-49% | ||
Machop Fighting | D | |
Available Moves Moves
Damage vs Houndoom View Machop builds →Focus Punch 2x153-181%KO Earthquake 2x70-84% Brick Break 2x81-98% Rock Slide 2x53-65% | ||
Surskit BugWater | D | |
Available Moves Moves
Damage vs Houndoom View Surskit builds →Scald 2x51-63% Water Pulse 2x40-49% Water Gun 2x28-35% | ||
Phanpy Ground | D | |
Available Moves Moves
Damage vs Houndoom View Phanpy builds →Earthquake 2x88-105%KO Rock Slide 2x47-56% Rock Tomb 2x40-47% Rock Smash 2x26-33% | ||
Onix RockGround | C | |
Available Moves Moves
Damage vs Houndoom View Onix builds →Stone Edge 2x76-89% Earthquake 2x76-89% Rock Slide 2x56-67% Bulldoze 2x46-54% | ||
Nosepass Rock | C | |
Available Moves Moves
Damage vs Houndoom View Nosepass builds →Stone Edge 2x76-89% Earthquake 2x50-60% Power Gem 2x43-51% Rock Slide 2x56-67% | ||
Medicham FightingPsychic | D | |
Available Moves Moves
Damage vs Houndoom View Medicham builds →Focus Punch 2x132-156%KO High Jump Kick 2x116-137%KO Focus Blast 2x78-93% Brick Break 2x67-80% | ||
Machoke Fighting | D | |
Available Moves Moves
Damage vs Houndoom View Machoke builds →Focus Punch 2x195-230%KO Focus Blast 2x67-80% Earthquake 2x88-104%KO Brick Break 2x100-118%KO | ||
Shellos Water | D | |
Available Moves Moves
Damage vs Houndoom View Shellos builds →Surf 2x56-67% Scald 2x51-61% Brine 2x43-51% Water Pulse 2x40-48% | ||
Onix RockGround | C | |
Available Moves Moves
Damage vs Houndoom View Onix builds →Stone Edge 2x76-89% Earthquake 2x76-89% Dig 2x60-70% Rock Slide 2x56-67% | ||
Nosepass Rock | C | |
Available Moves Moves
Damage vs Houndoom View Nosepass builds →Stone Edge 2x76-89% Earthquake 2x50-60% Power Gem 2x43-51% Rock Slide 2x56-67% | ||
Medicham FightingPsychic | D | |
Available Moves Moves
Damage vs Houndoom View Medicham builds →Focus Punch 2x132-156%KO High Jump Kick 2x116-137%KO Focus Blast 2x78-93% Brick Break 2x67-80% | ||
Machoke Fighting | D | |
Available Moves Moves
Damage vs Houndoom View Machoke builds →Focus Punch 2x195-230%KO Focus Blast 2x67-80% Earthquake 2x88-104%KO Dig 2x70-83% | ||
Shellos Water | D | |
Available Moves Moves
Damage vs Houndoom View Shellos builds →Surf 2x56-67% Scald 2x51-61% Brine 2x43-51% Water Pulse 2x40-48% | ||
Onix RockGround | C | |
Available Moves Moves
Damage vs Houndoom View Onix builds →Stone Edge 2x71-84% Earthquake 2x71-84% Dig 2x57-68% Rock Slide 2x55-65% | ||
Nosepass Rock | C | |
Available Moves Moves
Damage vs Houndoom View Nosepass builds →Stone Edge 2x71-84% Earthquake 2x47-56% Power Gem 2x41-49% Rock Slide 2x55-65% | ||
Medicham FightingPsychic | D | |
Available Moves Moves
Damage vs Houndoom View Medicham builds →Focus Punch 2x128-151%KO High Jump Kick 2x112-132%KO Focus Blast 2x76-89% Brick Break 2x66-78% | ||
Machoke Fighting | D | |
Available Moves Moves
Damage vs Houndoom View Machoke builds →Focus Punch 2x190-224%KO Focus Blast 2x66-78% Earthquake 2x86-101%KO Dig 2x68-81% | ||
Shellos Water | D | |
Available Moves Moves
Damage vs Houndoom View Shellos builds →Muddy Water 2x55-65% Earth Power 2x36-43% Surf 2x55-65% Scald 2x48-57% | ||
Gastrodon WaterGround | B | |
Available Moves Moves
Damage vs Houndoom View Gastrodon builds →Earthquake 2x10⁹-129%KO Stone Edge 2x72-86% Muddy Water 2x76-91% Earth Power 2x76-91% | ||
Onix RockGround | C | |
Available Moves Moves
Damage vs Houndoom View Onix builds →Stone Edge 2x71-83% Earthquake 2x71-83% Dig 2x57-68% Rock Slide 2x53-63% | ||
Nosepass Rock | C | |
Available Moves Moves
Damage vs Houndoom View Nosepass builds →Stone Edge 2x71-83% Earthquake 2x47-55% Earth Power 2x31-37% Power Gem 2x40-48% | ||
Medicham FightingPsychic | D | |
Available Moves Moves
Damage vs Houndoom View Medicham builds →Focus Punch 2x126-149%KO High Jump Kick 2x10⁹-129%KO Focus Blast 2x72-86% Brick Break 2x64-76% | ||
Machoke Fighting | D | |
Available Moves Moves
Damage vs Houndoom View Machoke builds →Focus Punch 2x188-222%KO Focus Blast 2x64-76% Earthquake 2x84-99% Dig 2x68-81% | ||
Gastrodon WaterGround | B | |
Available Moves Moves
Damage vs Houndoom View Gastrodon builds →Earthquake 2x10⁷-127%KO Stone Edge 2x71-84% Muddy Water 2x75-89% Earth Power 2x75-89% | ||
Onix RockGround | C | |
Available Moves Moves
Damage vs Houndoom View Onix builds →Stone Edge 2x70-82% Earthquake 2x70-82% Dig 2x55-66% Rock Slide 2x52-61% | ||
Nosepass Rock | C | |
Available Moves Moves
Damage vs Houndoom View Nosepass builds →Stone Edge 2x70-82% Earthquake 2x46-55% Earth Power 2x29-34% Power Gem 2x40-47% | ||
Medicham FightingPsychic | D | |
Available Moves Moves
Damage vs Houndoom View Medicham builds →Focus Punch 2x125-148%KO High Jump Kick 2x10⁹-129%KO Focus Blast 2x71-84% Brick Break 2x63-75% | ||
Machoke Fighting | D | |
Available Moves Moves
Damage vs Houndoom View Machoke builds →Focus Punch 2x185-218%KO Focus Blast 2x63-75% Earthquake 2x84-98% Dig 2x66-78% | ||
In Brilliant Diamond & Shining Pearl, Excadrill can KO Houndoom with Earthquake (200-236%). Cobalion threatens a KO with Close Combat (182-214%). Slowking deals 72-85% with Scald.
Excadrill GroundSteel | A | |
Recommended Build AbilityMold Breaker ItemLeftovers NatureJolly Moves
Damage vs Houndoom View Excadrill builds →Earthquake 2x200-236%KO Rapid Spin33-40% | ||
Cobalion SteelFighting | A | |
Recommended Build AbilityJustified ItemRocky Helmet NatureJolly Moves
Damage vs Houndoom View Cobalion builds →Close Combat 2x182-214%KO | ||
Slowking WaterPsychic | A | |
Recommended Build AbilityRegenerator ItemColbur Berry NatureRelaxed Moves
Damage vs Houndoom View Slowking builds →Scald 2x72-85% | ||
Nihilego RockPoison | A | |
Recommended Build AbilityBeastboost ItemBlack Sludge NatureTimid Moves
Damage vs Houndoom View Nihilego builds →Power Gem 2x101-119%KO | ||
Urshifu FightingDark | C | |
Water is super effective against HoundoomView Urshifu → | ||
Brilliant Diamond & Shining Pearl Evolution
Evolved from Houndour. Houndoom is the final form in this two-stage line. A massive partner pool for breeding via one egg group. Eggs are average hatch time. HP grew the most through evolution (+30 over Houndour), and Houndoom peaks at 500 total stats. View every chain in the Evolution Chart.
How to Evolve
Breeding
Breed with Houndoom to get Houndour eggs easily using 131 partners from the Ground egg group. Notable egg moves include Beat Up, Counter, Destiny Bond and 7 more.


Brilliant Diamond & Shining Pearl Houndoom Best Moveset
the remaining moves is what separates a good sweep from a wasted boost. After Nasty Plot, Houndoom threatens a wide range with max Sp. Atk and Speed EVs and Expert Belt backing every hit.
Best Build
Houndoom best EVs are Sp. Atk and Speed
Special Setup Sweeper Moveset
- Dark Pulse
- Nasty Plot
- Flamethrower
- Sludge Bomb
Recommended Teammates
Moves
Without breeding, Houndoom misses out on Beat Up and Counter. That's 10 egg moves adding depth that the base kit lacks. STAB comes from Overheat and Fire Blast, with coverage across 8 types rounding things out.
Level-Up Moves
TM Moves
Egg Moves
Tutor Moves
How to Get Houndoom in Brilliant Diamond & Shining Pearl
high spawn rates in mid-game routes across 22 locations. Houndoom's one of the easier catches on the list. Two different catch methods are in play here. Knock it out fast and save your time for harder targets.
Where To Catch Houndoom in Brilliant Diamond & Shining Pearl
Houndour is your first catch on the way to Houndoom. You'll find walking and special encounters from Lv. 16-63 across 22 total spots in the chain.
 Step 1Obtain Houndour
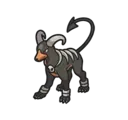 Step 2Houndoom ✓Volcanic CaveBrilliant DiamondGrass Lv.16-63 Volcano100%MidUnique encounterVolcanic CaveShining PearlGrass Lv.16-63 Volcano70%MidUnique encounterSandsear CaveBrilliant DiamondGrass Lv.16-63 Desert50%MidUnique encounterTyphlo CavernBrilliant DiamondGrass Lv.16-63 Cave50%MidUnique encounterSandsear CaveShining PearlGrass Lv.16-63 Desert40%MidUnique encounterTyphlo CavernShining PearlGrass Lv.16-63 Cave40%MidUnique encounterDazzling CaveShining PearlGrass Lv.16-63 Cave25%MidUnique encounterStargleam CavernShining PearlGrass Lv.16-63 Cave25%MidUnique encounterRoute 215Shining PearlUsing PokeRadar Lv.20-22 Route22%MidRoute 214Shining PearlUsing PokeRadar Lv.23-24 Route22%MidDazzling CaveBrilliant DiamondGrass Lv.16-63 Cave20%MidUnique encounterStargleam CavernBrilliant DiamondGrass Lv.16-63 Cave20%MidUnique encounterSpacious CaveShining PearlGrass Lv.16-63 Cave19%MidUnique encounterSpacious CaveBrilliant DiamondGrass Lv.16-63 Cave19%MidUnique encounterDazzling CaveBrilliant DiamondGrass Lv.58-63 CavePostPost-gameDazzling CaveShining PearlGrass Lv.58-63 CavePostPost-gameSandsear CaveShining PearlGrass Lv.58-63 DesertPostPost-gameSandsear CaveBrilliant DiamondGrass Lv.58-63 DesertPostPost-gameSpacious CaveShining PearlGrass Lv.58-63 CavePostPost-gameSpacious CaveBrilliant DiamondGrass Lv.58-63 CavePostPost-gameStargleam CavernShining PearlGrass Lv.58-63 CavePostPost-gameStargleam CavernBrilliant DiamondGrass Lv.58-63 CavePostPost-gameor evolve from Houndour (Step 1)
Houndoom Guide
In Brilliant Diamond & Shining Pearl, Flash Fire changes the entire equation for Houndoom. The 500 BST doesn't tell the full story. Ranked C-Tier as an attacker. Dark Pulse with Expert Belt is the standard set.
Mega Evolution isn't available in Brilliant Diamond & Shining Pearl, but Houndoom does have a Mega form in Gen 6-7 games (X/Y, ORAS, Sun/Moon). Mega Houndoom hits 600 BST.
Flash Fire is what you want on Houndoom. Every competitive set worth running is built with that ability in mind. The alternatives (Early Bird, Unnerve) work on paper but Flash Fire is what makes Houndoom worth using.
Base 95 Speed is workable. Faster than some, slower than many. On offense, Houndoom is a special attacker with base 110 Sp. Atk. Defensively? Enough bulk to take a hit or two. Best used as an attacker.
Game Availability
Since debuting in Gold & Silver, Houndoom has appeared in 17 titles over 9 generations. Along the way, it received a Mega form in Generation 7, keeping it relevant across different competitive metas.
Click a game to view version-specific details
- Gen 1Y
 Yellow
 - Gen 1RB

 Red & Blue
 - Gen 2GSDebut

 Gold & Silver
 - Gen 2C
 Crystal
 - Gen 3RS

 Ruby & Sapphire
 - Gen 3FRLG

 FireRed & LeafGreen
 - Gen 3E
 Emerald
 - Gen 4Pt
 Platinum
 - Gen 4HGSS

 HeartGold & SoulSilver
 - Gen 4DP

 Diamond & Pearl
 - Gen 5BW

 Black & White
 - Gen 5B2W2

 Black 2 & White 2
 - Gen 6XY

 X & Y
X & Y - Gen 6ORASMega

 Omega Ruby & Alpha Sapphire
 - Gen 7USUM

 Ultra Sun & Ultra Moon
 - Gen 7SM

 Sun & Moon
 - Gen 7LGPE

 Let's Go Pikachu & Eevee
 - Gen 8SwSh

 Sword & Shield
 - Gen 8PLA
 Legends: Arceus
 - Gen 8BDSP

 Brilliant Diamond & Shining Pearl
 - Gen 9SV

 Scarlet & Violet
 - Gen 9LZA
 Legends: Z-A
 - Gen 10WW

 Winds & Waves