
Zelda Tears of the Kingdom Hyrule Field Location
The Zelda Tears of the Kingdom Hyrule Field location guide, here you can use a interactive map to find up to 14 shrines, 3 mini bosses, and 36 Armor gear pieces. You can also find all of treasures chests, shops, stables and more in Hyrule Field area.
Hyrule Field Map Guide
| Location | Type | Subtype | Description | Show on map |
|---|
List Skyview Towers in Hyrule Field
| Skyview Tower | How To Unlock |
|---|---|
|
The Hyrule Field is situated in the heart of a enemy camp. Be sure to defeat the nearby enemies to ensure a safe passage to the tower. | |
|
You will unlock the Hyrule Field via following the main quest line. You will need to complete the "Crisis at Hyrule Castle" quest to unlock this tower. |
List Shrines in Hyrule Field
| # | Shrine | Rewards |
|---|---|---|
| 029 | ||
| 142 | Hasty Elixir | |
| 068 | ||
| 077 | ||
| 136 | Zonaite Sword | |
| 004 | Energizing Elixir | |
| 046 | ||
| 010 | ||
| 048 | ||
| 000 | Spiky Shield | |
| 032 | ||
| 124 | ||
| 042 | ||
| 123 |
Armor Found in the Hyrule Field
| Armor | Defense | Special Effects | How To Get | |
|---|---|---|---|---|
B Tier
|
Legwear
|
Base:
3 ★:
5 ★★:
8 ★★★:
12 ★★★★:
20 |
Ancient Tree Stump Bargainer Statue
| |
C Tier
|
Headgear
|
Base:
3 ★:
5 ★★:
8 ★★★:
12 ★★★★:
20 |
none
|
Bargainer Statue
|
C Tier
|
Legwear
|
Base:
3 ★:
5 ★★:
8 ★★★:
12 ★★★★:
20 |
none
|
Bargainer Statue
|
C Tier
|
Body Armor
|
Base:
3 ★:
5 ★★:
8 ★★★:
12 ★★★★:
20 |
none
|
Bargainer Statue
|
A Tier
|
Headgear
|
Base:
3 ★:
5 ★★:
8 ★★★:
12 ★★★★:
20 |
Bargainer Statue
| |
A Tier
|
Legwear
|
Base:
3 ★:
5 ★★:
8 ★★★:
12 ★★★★:
20 |
Bargainer Statue
| |
A Tier
|
Body Armor
|
Base:
3 ★:
5 ★★:
8 ★★★:
12 ★★★★:
20 |
Bargainer Statue
| |
? Tier
|
Body Armor
|
Base:
4 ★:
7 ★★:
12 ★★★:
18 ★★★★:
28 |
|
Bargainer Statue
|
C Tier
|
Headgear
|
Base:
3 ★:
★★:
★★★:
★★★★:
|
|
Bargainer Statue
|
C Tier
|
Legwear
|
Base:
3 ★:
★★:
★★★:
★★★★:
|
|
Bargainer Statue
|
C Tier
|
Body Armor
|
Base:
3 ★:
★★:
★★★:
★★★★:
|
|
Bargainer Statue
|
E Tier
|
Headgear
|
Base:
3 ★:
5 ★★:
8 ★★★:
12 ★★★★:
20 |
|
Bargainer Statue
|
E Tier
|
Legwear
|
Base:
3 ★:
5 ★★:
8 ★★★:
12 ★★★★:
20 |
|
Gerudo Canyon Mine Bargainer Statue
|
E Tier
|
Body Armor
|
Base:
3 ★:
5 ★★:
8 ★★★:
12 ★★★★:
20 |
|
Lindor Canyon Mine Bargainer Statue
|
E Tier
|
Headgear
|
Base:
3 ★:
5 ★★:
8 ★★★:
12 ★★★★:
20 |
|
Tingel Island Chasm Bargainer Statue
|
E Tier
|
Legwear
|
Base:
3 ★:
5 ★★:
8 ★★★:
12 ★★★★:
20 |
|
Bargainer Statue
|
E Tier
|
Body Armor
|
Base:
3 ★:
5 ★★:
8 ★★★:
12 ★★★★:
20 |
|
Bargainer Statue
|
E Tier
|
Headgear
|
Base:
3 ★:
5 ★★:
8 ★★★:
12 ★★★★:
20 |
|
Bargainer Statue
|
E Tier
|
Legwear
|
Base:
3 ★:
5 ★★:
8 ★★★:
12 ★★★★:
20 |
|
Bargainer Statue
|
E Tier
|
Body Armor
|
Base:
3 ★:
5 ★★:
8 ★★★:
12 ★★★★:
20 |
|
Bargainer Statue
|
E Tier
|
Headgear
|
Base:
3 ★:
5 ★★:
8 ★★★:
12 ★★★★:
20 |
|
Bargainer Statue
|
E Tier
|
Legwear
|
Base:
3 ★:
5 ★★:
8 ★★★:
12 ★★★★:
20 |
|
Bargainer Statue
|
E Tier
|
Body Armor
|
Base:
3 ★:
5 ★★:
8 ★★★:
12 ★★★★:
20 |
|
Bargainer Statue
|
E Tier
|
Headgear
|
Base:
2 ★:
4 ★★:
6 ★★★:
9 ★★★★:
16 |
Bargainer Statue
| |
B Tier
|
Headgear
|
Base:
3 ★:
5 ★★:
8 ★★★:
12 ★★★★:
20 |
Skull Lake Cave Bargainer Statue
| |
B Tier
|
Body Armor
|
Base:
3 ★:
5 ★★:
8 ★★★:
12 ★★★★:
20 |
Akkala Citadel Ruins Bargainer Statue
| |
C Tier
|
Headgear
|
Base:
3 ★:
5 ★★:
8 ★★★:
12 ★★★★:
20 |
Bargainer Statue
| |
C Tier
|
Legwear
|
Base:
3 ★:
5 ★★:
8 ★★★:
12 ★★★★:
20 |
Bargainer Statue
| |
C Tier
|
Body Armor
|
Base:
3 ★:
5 ★★:
8 ★★★:
12 ★★★★:
20 |
Bargainer Statue
| |
? Tier
|
Body Armor
|
Base:
5 ★:
8 ★★:
14 ★★★:
22 ★★★★:
32 |
|
Hyrule Castle
|
E Tier
|
Headgear
|
Base:
4 ★:
6 ★★:
10 ★★★:
15 ★★★★:
24 |
none
|
Hyrule Castle
|
E Tier
|
Legwear
|
Base:
4 ★:
6 ★★:
10 ★★★:
15 ★★★★:
24 |
none
|
Hyrule Castle
|
E Tier
|
Body Armor
|
Base:
4 ★:
6 ★★:
10 ★★★:
15 ★★★★:
24 |
none
|
Hyrule Castle
|
C Tier
|
Headgear
|
Base:
4 ★:
7 ★★:
12 ★★★:
18 ★★★★:
28 |
none
|
Royal Hidden Passage
|
C Tier
|
Legwear
|
Base:
4 ★:
7 ★★:
12 ★★★:
18 ★★★★:
28 |
none
|
Royal Hidden Passage
|
C Tier
|
Body Armor
|
Base:
4 ★:
7 ★★:
12 ★★★:
18 ★★★★:
28 |
none
|
Royal Hidden Passage
|


Equipment found in the Hyrule Field
| Weapons | Stats | |
|---|---|---|
A Tier
|
Sword
|
Effect: Improved Flurry Rush (weapon deals 2x more damage during flurry rushes)
Attack:
36-15
Guard Break:
55
Durability:
40-20
|
B Tier
|
Spear
|
Effect: Improved Flurry Rush (weapon deals 2x more damage during flurry rushes)
Attack:
13-5
Guard Break:
32
Durability:
50-30
|
E Tier
|
Sword
|
Effect: Desperate Strength (weapon has 2x damage when Link has one heart or less)
Attack:
18-7
Guard Break:
26
Durability:
27-18
|
C Tier
|
Sword
|
Effect: Improved Flurry Rush (weapon deals 2x more damage during flurry rushes)
Attack:
24-10
Guard Break:
36
Durability:
35-20
|
E Tier
|
Spear
|
Effect: Quick Charge (Charged attacks charge twice faster)
Attack:
7-3
Guard Break:
8
Durability:
35-25
|
F Tier
|
Spear
|
Attack:
2
Guard Break:
4
Durability:
12
|
F Tier
|
Spear
|
Attack:
3
Guard Break:
4
Durability:
12
|
F Tier
|
Spear
|
Attack:
2
Guard Break:
2
Durability:
8
|
E Tier
|
Sword
|
Attack:
10-7
Guard Break:
10
Durability:
20-16
|
C Tier
|
Sword
|
Effect: Charge Atk. Stamina Up (Decrease Charge Attack Stamina Used)
Attack:
17-9
Guard Break:
20
Durability:
25-17
|
B Tier
|
Sword
|
Effect: Desperate Strength (weapon has 2x damage when Link has one heart or less)
Attack:
26-12
Guard Break:
38
Durability:
30-18
|
F Tier
|
Sword
|
Attack:
7
Guard Break:
8
Durability:
8
|
F Tier
|
Club
|
Attack:
7
Guard Break:
3
Durability:
6
|
S Tier
|
Boomerang
|
Attack:
25
Guard Break:
12
Durability:
40
|
F Tier
|
Club
|
Attack:
6
Guard Break:
6
Durability:
14
|
D Tier
|
Club
|
Effect: Extra Durable (Grants Extra Durability)
Attack:
8
Guard Break:
6
Durability:
26
|
F Tier
|
Sword
|
Attack:
7-5
Guard Break:
5
Durability:
20-16
|
E Tier
|
Sword
|
Effect: Quick Charge (Charged attacks charge twice faster)
Attack:
12-6
Guard Break:
14
Durability:
23-17
|
F Tier
|
Sword
|
Attack:
5
Guard Break:
5
Durability:
6
|
F Tier
|
Club
|
Attack:
4
Guard Break:
5
Durability:
5
|
B Tier
|
Sword
|
Effect: Improved Sneak Strike (x16 sneakstrikes instead of x8 for a sneak attack)
Attack:
15
Guard Break:
15
Durability:
26
|
F Tier
|
Club
|
Attack:
2
Guard Break:
2
Durability:
8
|
F Tier
|
Club
|
Attack:
2
Guard Break:
2
Durability:
4
|
F Tier
|
Club
|
Attack:
4
Guard Break:
4
Durability:
12
|
D Tier
|
Club
|
Effect: Extra Durable (Grants Extra Durability)
Attack:
5
Guard Break:
4
Durability:
24
|
E Tier
|
Bow
|
Attack:
5
Range:
20
Durability:
22
|
D Tier
|
Bow
|
Attack:
14
Range:
20
Durability:
36
|
D Tier
|
Bow
|
Attack:
12
Range:
20
Durability:
20
|
F Tier
|
Bow
|
Attack:
4
Range:
20
Durability:
16
|
A Tier
|
Bow
|
Attack:
38
Range:
20
Durability:
60
|
F Tier
|
Bow
|
Attack:
4
Range:
20
Durability:
20
|
B Tier
|
Bow
|
Attack:
14x2
Range:
40
Durability:
18
|
F Tier
|
Shield
|
Defense:
2
Durability:
12
|
C Tier
|
Shield
|
Defense:
16
Durability:
16
|
F Tier
|
Shield
|
Defense:
3
Durability:
5
|
E Tier
|
Shield
|
Defense:
10
Durability:
7
|
B Tier
|
Shield
|
Defense:
30
Durability:
12
|
F Tier
|
Shield
|
Defense:
3
Durability:
16
|
S Tier
|
Shield
|
Defense:
55
Durability:
29
|
F Tier
|
Shield
|
Defense:
4
Durability:
12
|
F Tier
|
Shield
|
Defense:
1
Durability:
10
|


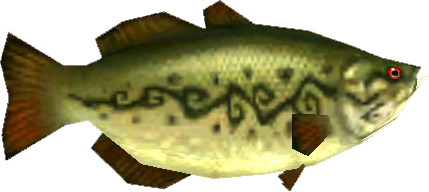
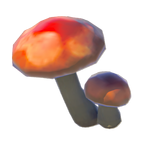
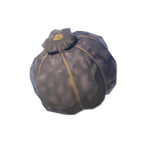
Materials found in the Hyrule Field
| Material | Effects |
|---|---|
|
Time Boost: 0:30
| |
|
| |
|
Elixir: Extra Stamina
| |
|
Elixir:
| |
|
| |
|
Cooking:
| |
|
Time Boost: 0:40
| |
|
Time Boost: 0:40
| |
|
Time Boost: 0:40
| |
|
Time Boost: 0:40
| |
|
Time Boost: 1:20
| |
|
Time Boost: 1:20
| |
|
Time Boost: 1:20
| |
|
Time Boost: 0:40
| |
|
Time Boost: 0:40
| |
|
Time Boost: 0:40
| |
|
Time Boost: 0:40
| |
|
Time Boost: 0:40
| |
|
Time Boost: 0:40
| |
|
Time Boost: 0:40
| |
|
| |
|
Cooking:
| |
|
| |
|
Time Boost: 0:20
| |
|
| |
|
Cooking: Extra Hearts
| |
|
| |
|
Cooking:
| |
|
| |
|
|


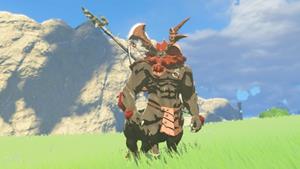
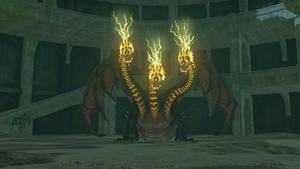
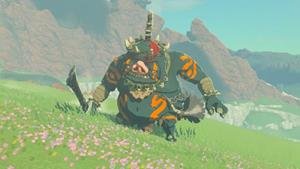
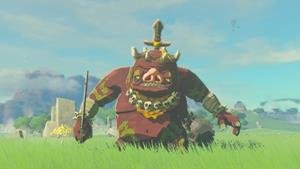
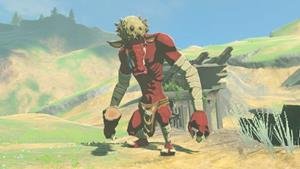
Bosses in the Hyrule Field Location
| Bosses | Stats | Drops |
|---|---|---|
|
Life: 2000
|
 | |
|
Life: 380
|
| |
|
Life: 8000
|
|

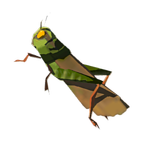
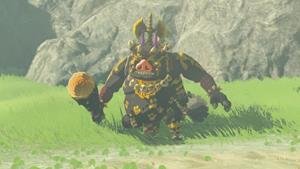
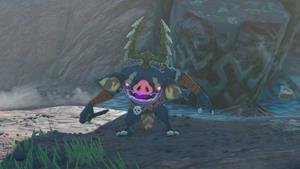
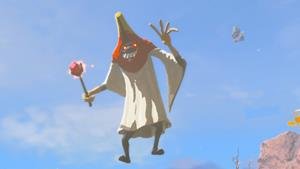
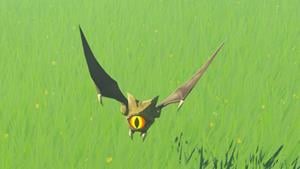
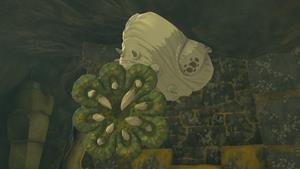
Enemies in the Hyrule Field Location
| Enemies | Stats | Drops |
|---|---|---|
|
Life: 750
|
| |
|
Life: 72
|
| |
|
Life: 400
|
| |
|
Life: 144
|
| |
|
Life: 25
|
| |
|
Life: 200
|
| |
|
Life: 10
|
| |
|
Life: 40
|
| |
|
Life: 150
|
| |
|
Life: 1
|
| |
|
Life: 200
|
| |
|
Life: 62
|
| |
|
Life: 400
|
|


All Locations in Zelda Tears of the Kingdom.
Central Hyrule
Hyrule Field
Great Hyrule Forest
Hyrule Ridge
Eldin
Goron City
Death Mountain
Eldin Canyon
Eldin Mountains
Akkala
Deep Akkala
Akkala Highlands
Lanayru
Zora's Domain
Lanayru Great Spring
Mount Lanayru
Lanayru Wetlands
Necluda
Kakariko Village
East Necluda
West Necluda
Hateno Village
Faron
Faron Grasslands
Lake Hylia
Lurelin Village
Gerudo Desert
Gerudo Highlands
Hebra
Hebra Mountains
Tabantha Frontier
Tabantha Tundra
Akkala Sky
Central Hyrule Sky
Eldin Sky
Faron Sky
Gerudo Sky
Herbra Sky
Lanayru Sky
Necluda Sky
Gerudo
Eldin Depths
Faron Depths
Herba Depths
Lanayru Depths
Necluda Depths
Eventide Island Depths
Akkala Depths
Central Hyrule Depths
Popular Guides
Main Guides
Weapons, Armor, Fuse Guides
Locations
Advertisement