

Is Roggenrola Good in Omega Ruby & Alpha Sapphire Playthrough?
Available wild in Hoenn. Rock with AbilitySturdy guaranteeing one hit survived. Evolves through Boldore to Gigalith (trade). Even Boldore alone tanks physical hits through mid-game. Golem competes for the Rock slot.
Roxanne's typing presses Roggenrola's defenses.
Brawly's team hits Roggenrola's weaknesses hard.
Wattson's team hits Roggenrola's weaknesses hard.
Roggenrola trades roughly evenly with Flannery's team.
Boldore trades roughly evenly with Norman's team.
Boldore trades roughly evenly with Winona's team.
Tate & Liza's team hits Gigalith's weaknesses hard.
Wallace's team hits Gigalith's weaknesses hard.
Gigalith trades roughly evenly with Sidney's team.
Gigalith trades roughly evenly with Phoebe's team.
Gigalith has the type edge here and should clean up Glacia's team.
Gigalith trades roughly evenly with Drake's team.
Gigalith trades roughly evenly with Steven's team.
Catch Roggenrola on Fiery Path (walking, Lv 15, common). DexNav.
Your Roggenrola should hit Level 25 before you reach Norman, at typical leveling pace.
Most players are ready to trade before reaching Tate & Liza.
How to Get Roggenrola in Omega Ruby & Alpha Sapphire
Roggenrola's 3-stage chain starts with Roggenrola, which appears in the wild in the locations below. Level through 3 stages while you find a trade partner. Everything except the trade step is solo.
Where To Catch Roggenrola in ORAS
Roggenrola is your first catch on the way to Roggenrola. You'll find rock smash and walking encounters from Lv. 15-37 across 10 total spots in the chain.
 Step 1Roggenrola ✓Fiery PathLv.15CaveRate 60%DexNav chain
 Step 2Catch or Evolve into BoldoreMirage Spots - Area 25Lv.37Smashing rocksRate 5%Mirage Spots - Area 26Lv.37Smashing rocksRate 5%Mirage Spots - Area 29Lv.37Smashing rocksRate 5%Mirage Spots - Area 31Lv.37Smashing rocksRate 5%or evolve from Roggenrola (Step 1)
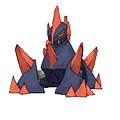 Step 3Evolve into Gigalith
Roggenrola Weakness
Roggenrola is weak to Water, Grass, Fighting, Ground, and Steel. The Rock typing picks up 4 resistances to work with. Roggenrola's physical bulk (base 85 Def) helps cushion physical weakness hits, but special attackers are the bigger threat.
| Damage | Types |
|---|---|
| 2x (Weak) | Water, Grass, Fighting, Ground, Steel |
| 0.5x (Resist) | Normal, Fire, Poison, Flying |
What is Roggenrola Weak Against
FragileBest Pokemon Against Roggenrola
Leafeon Grass | C | |
Oshawott Water | D | |
Obtain MethodRoute 101 Gift | ||
Piplup Water | D | |
Obtain MethodRoute 101 Gift | ||
Shellos Water | D | |
Available Moves Moves
Damage vs Roggenrola View Shellos builds →Surf 2x123-147%KO Mud Bomb 2x63-74% | ||
Mudkip Water | D | |
Obtain MethodRoute 101 Gift Available Moves Moves
Damage vs Roggenrola View Mudkip builds →Surf 2x119-140%KO Mud-Slap 2x23-28% | ||
Vaporeon Water | B | |
Aron SteelRock | C | |
Available Moves Moves
Damage vs Roggenrola View Aron builds →Metal Claw 2x42-50% Mud-Slap 2x21-25% | ||
Timburr Fighting | C | |
Oshawott Water | D | |
Obtain MethodRoute 101 Gift | ||
Shellos Water | D | |
Available Moves Moves
Damage vs Roggenrola View Shellos builds →Surf 2x131-156%KO Mud Bomb 2x67-79% | ||
Ludicolo WaterGrass | C | |
Available Moves Moves
Damage vs Roggenrola View Ludicolo builds →Surf 2x178-210%KO Mega Drain 2x84-99% | ||
Vaporeon Water | B | |
Aron SteelRock | C | |
Available Moves Moves
Damage vs Roggenrola View Aron builds →Iron Head 2x64-76% Mud-Slap 2x16-21% | ||
Prinplup Water | C | |
Obtain MethodEvolve Piplup (Route 101 Gift) Available Moves Moves
Damage vs Roggenrola View Prinplup builds →Surf 2x167-197%KO Metal Claw 2x27-33% | ||
Timburr Fighting | C | |
Hitmonlee Fighting | B | |
Available Moves Moves
Damage vs Roggenrola View Hitmonlee builds →High Jump Kick 2x148-175%KO Bulldoze 2x47-56% | ||
Hariyama Fighting | B | |
Available Moves Moves
Damage vs Roggenrola View Hariyama builds →Vital Throw 2x80-95% Dig 2x62-73% Surf 2x68-81% | ||
Throh Fighting | C | |
Available Moves Moves
Damage vs Roggenrola View Throh builds →Vital Throw 2x71-84% Dig 2x53-63% | ||
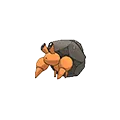
Sandslash Ground | C | |
Available Moves Moves
Damage vs Roggenrola View Sandslash builds →Dig 2x80-95% Rock Smash 2x28-33% | ||
Sawk Fighting | C | |
Available Moves Moves
Damage vs Roggenrola View Sawk builds →Brick Break 2x90-106%KO Dig 2x65-76% | ||
Hitmonlee Fighting | B | |
Available Moves Moves
Damage vs Roggenrola View Hitmonlee builds →High Jump Kick 2x151-179%KO Bulldoze 2x48-57% | ||
Hariyama Fighting | B | |
Available Moves Moves
Damage vs Roggenrola View Hariyama builds →Vital Throw 2x85-100%KO Dig 2x62-74% Surf 2x68-81% | ||
Throh Fighting | C | |
Available Moves Moves
Damage vs Roggenrola View Throh builds →Vital Throw 2x73-86% Dig 2x54-64% | ||
Sandslash Ground | C | |
Available Moves Moves
Damage vs Roggenrola View Sandslash builds →Dig 2x81-96% Rock Smash 2x27-33% | ||
Sawk Fighting | C | |
Available Moves Moves
Damage vs Roggenrola View Sawk builds →Brick Break 2x90-107%KO Dig 2x64-76% | ||
Torterra GrassGround | C | |
Obtain MethodEvolve Turtwig (Route 101 Gift) Available Moves Moves
Damage vs Roggenrola View Torterra builds →Wood Hammer 2x131-155%KO Earthquake 2x10⁸-128%KO Rock Smash 2x30-36% | ||
Hitmonlee Fighting | B | |
Available Moves Moves
Damage vs Roggenrola View Hitmonlee builds →High Jump Kick 2x152-179%KO Bulldoze 2x47-56% | ||
Hariyama Fighting | B | |
Available Moves Moves
Damage vs Roggenrola View Hariyama builds →Vital Throw 2x82-98% Dig 2x63-74% Surf 2x70-83% | ||
Throh Fighting | C | |
Available Moves Moves
Damage vs Roggenrola View Throh builds →Vital Throw 2x71-84% Dig 2x55-65% | ||
Sandslash Ground | C | |
Available Moves Moves
Damage vs Roggenrola View Sandslash builds →Dig 2x82-98% Rock Smash 2x28-34% | ||
Torterra GrassGround | C | |
Obtain MethodEvolve Turtwig (Route 101 Gift) Available Moves Moves
Damage vs Roggenrola View Torterra builds →Wood Hammer 2x131-155%KO Earthquake 2x110-130%KO Rock Smash 2x30-36% | ||
Rhydon GroundRock | B | |
Available Moves Moves
Damage vs Roggenrola View Rhydon builds →Dig 2x101-119%KO Hammer Arm 2x83-98% Surf 2x76-90% | ||
Metagross SteelPsychic | B | |
Obtain MethodEvolve Beldum (Mossdeep City Gift) Available Moves Moves
Damage vs Roggenrola View Metagross builds →Meteor Mash 2x119-140%KO Hammer Arm 2x86-102%KO Bulldoze 2x53-63% | ||
Heracross BugFighting | B | |
Available Moves Moves
Damage vs Roggenrola View Heracross builds →Close Combat 2x147-173%KO Dig 2x66-78% Bullet Seed 2x21-25% | ||
Aggron SteelRock | B | |
Available Moves Moves
Damage vs Roggenrola View Aggron builds →Iron Head 2x88-104%KO Dig 2x58-69% Solar Beam 2x124-146%KO Surf 2x93-110%KO | ||
Rhydon GroundRock | B | |
Available Moves Moves
Damage vs Roggenrola View Rhydon builds →Earthquake 2x123-145%KO Hammer Arm 2x82-97% Surf 2x75-88% | ||
Hariyama Fighting | B | |
Available Moves Moves
Damage vs Roggenrola View Hariyama builds →Close Combat 2x138-163%KO Earthquake 2x78-92% Surf 2x71-83% | ||
Torterra GrassGround | C | |
Obtain MethodEvolve Turtwig (Route 101 Gift) Available Moves Moves
Damage vs Roggenrola View Torterra builds →Wood Hammer 2x128-150%KO Earthquake 2x10⁸-128%KO Rock Smash 2x29-35% | ||
Metagross SteelPsychic | B | |
Obtain MethodEvolve Beldum (Mossdeep City Gift) Available Moves Moves
Damage vs Roggenrola View Metagross builds →Meteor Mash 2x117-138%KO Earthquake 2x85-100%KO Hammer Arm 2x85-100%KO | ||
Heracross BugFighting | B | |
Available Moves Moves
Damage vs Roggenrola View Heracross builds →Close Combat 2x144-170%KO Earthquake 2x80-95% Bullet Seed 2x21-25% | ||
Cobalion SteelFighting | B | |
Obtain MethodMirage Spots Interact Encounter Available Moves Moves
Damage vs Roggenrola View Cobalion builds →Close Combat 2x10⁹-129%KO Iron Head 2x74-88% | ||
Terrakion RockFighting | B | |
Obtain MethodMirage Spots Interact Encounter Available Moves Moves
Damage vs Roggenrola View Terrakion builds →Close Combat 2x149-175%KO Earthquake 2x83-98% | ||
Gurdurr Fighting | C | |
Available Moves Moves
Damage vs Roggenrola View Gurdurr builds →Focus Punch 2x155-183%KO Dig 2x55-65% | ||
Excadrill GroundSteel | S | |
Available Moves Moves
Damage vs Roggenrola View Excadrill builds →Earthquake 2x129-151%KO Brick Break 2x64-76% Metal Claw 2x65-77% | ||
Hariyama Fighting | B | |
Available Moves Moves
Damage vs Roggenrola View Hariyama builds →Close Combat 2x140-165%KO Earthquake 2x78-92% Surf 2x70-83% | ||
In Omega Ruby & Alpha Sapphire, Machamp's Stone Edge hits Roggenrola for 55-65%. Landorus deals 78-92% with Explosion.
Ferrothorn GrassSteel | A | |
Recommended Build AbilityIron Barbs ItemLeftovers NatureRelaxed Moves View Ferrothorn builds →
| ||
Machamp Fighting | B | |
Recommended Build AbilityNoguard ItemAssault Vest NatureAdamant Moves
Damage vs Roggenrola View Machamp builds →Knock Off36-42% Bullet Punch 2x45-53% Stone Edge55-65% | ||
Landorus Ground | B | |
Recommended Build AbilitySandforce ItemLife Orb NatureJolly Moves
Damage vs Roggenrola View Landorus builds →Explosion78-92% | ||
Venusaur GrassPoison | C | |
Recommended Build AbilityOvergrow ItemAssault Vest NatureModest Moves
Damage vs Roggenrola View Venusaur builds →Sludge Bomb73-86% Giga Drain 2x246-289%KO Venoshock53-63% | ||
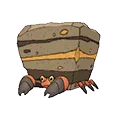
Roggenrola Evolutions
Roggenrola kicks off a three-stage evolution line through Boldore all the way to Gigalith. For breeding, quick to hatch with plenty of partners via one egg group. Evolving adds up to 235 stat points total. View every chain in the Evolution Chart.
How to Evolve


ORAS Roggenrola Best Moveset
Rock at 75 Attack and 85 Defense. AbilitySturdy survives one hit. AbilitySand Force as a hidden ability boosts moves in sand. The moveset fires at pre-evolution power. Gigalith two evolutions away adds 135 Attack and AbilitySand Stream.
Best Build
Utility Moveset
- Earthquake
- Explosion
- Earth Power
- Flash Cannon
Moves List
Egg moves make a real difference. Roggenrola gets Autotomize and Curse exclusively through breeding, filling gaps that TMs and level-up can't touch. Normal and Ground coverage and more rounds out the picture alongside Stone Edge and Rock Slide.
How to Read the Moves Table
Tabs
- Level-Up
- Learned by leveling up.
- TM
- Taught by a Technical Machine.
- Egg
- Inherited via breeding.
- Tutor
- NPC tutor (cost: items, BP, money).
- Reminder
- An NPC reteaches any move this Pokemon could have learned by leveling up.
- Transfer
- Carried over from an older game using Pokemon HOME.
- Event
- Given out through Mystery Gift events.
Visual Signals
CAT (Category)
How the move deals damage and which stats it uses.
A small dot on the icon's corner marks the move as contact. That triggers abilities like Static, Flame Body, Rough Skin, or Iron Barbs, plus items like Rocky Helmet and Sticky Barb.
Tier (S to D)
Each move's competitive rank in RankedBoost's system. TM, Egg, and Tutor sort by tier by default (best first). On Level-Up, click the Tier header to do the same.
PWR (Power)
Base damage. Numbers shown in a type color include STAB (base × 1.5). Hover any colored number to see the math.
— means no power (status moves) or variable power.
Sorting & Filter
Click any column header to sort. Level-Up opens with Lv 1 at the top. TM, Egg, and Tutor open with the highest-tier moves at the top.
Search filters by move name or type. The Filter button limits the list to STAB, Physical, Special, or Status moves.
Level-Up Moves
TM Moves
Egg Moves
Tutor Moves
Base Stats
Its ear is hexagonal in shape. Compressed underground, its body is as hard as steel.
They were discovered a hundred years ago in an earthquake fissure. Inside each one is an energy core.
Roggenrola Omega Ruby & Alpha Sapphire Guide
In Omega Ruby & Alpha Sapphire, For a casual playthrough, Roggenrola works as a placeholder. Rock coverage is useful early. The real payoff is Boldore. That's where the stats start mattering.
Game Availability
Since Black & White, Roggenrola has been obtainable in 7 games. A Generation 5 debut means a shorter history, but Roggenrola has appeared steadily across every generation since.
Click a game to view version-specific details
- Gen 1RB

 Red & Blue
 - Gen 1Y
 Yellow
 - Gen 2GS

 Gold & Silver
 - Gen 2C
 Crystal
 - Gen 3RS

 Ruby & Sapphire
 - Gen 3E
 Emerald
 - Gen 3FRLG

 FireRed & LeafGreen
 - Gen 4DP

 Diamond & Pearl
 - Gen 4Pt
 Platinum
 - Gen 4HGSS

 HeartGold & SoulSilver
 - Gen 5BWDebut

 Black & White
 - Gen 5B2W2

 Black 2 & White 2
 - Gen 6XY

 X & Y
X & Y - Gen 6ORAS

 Omega Ruby & Alpha Sapphire
 - Gen 7SM

 Sun & Moon
 - Gen 7USUM

 Ultra Sun & Ultra Moon
 - Gen 7LGPE

 Let's Go Pikachu & Eevee
 - Gen 8SwSh

 Sword & Shield
 - Gen 8BDSP

 Brilliant Diamond & Shining Pearl
 - Gen 8PLA
 Legends: Arceus
 - Gen 9SV

 Scarlet & Violet
 - Gen 9LZA
 Legends: Z-A
 - Gen 10WW

 Winds & Waves