
Stats & Training
Attack and Sp. Atk carry most of Remoraid's stat budget. HP's the obvious dump stat. Common in the wild and yields 1 Sp. Atk EV. Follows a medium-fast 1M XP curve.
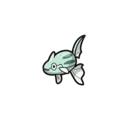
It squirts water forcefully from its mouth to shoot down flying prey.
It clings to Mantine to feed on the big Pokémon’s scraps. This is an adaptation to avoid foes.
Remoraid Weakness
Remoraid's Water typing leaves it vulnerable to Electric and Grass. 4 resistances help offset the weaknesses. Just 2 weak spots to worry about, which keeps teambuilding straightforward.
| Damage | Types |
|---|---|
| 2x (Weak) | Electric, Grass |
| 0.5x (Resist) | Fire, Water, Ice, Steel |
Budew GrassPoison | D | |
Available Moves Moves
Damage vs Remoraid View Budew builds →Energy Ball 2x117-140%KO Giga Drain 2x100-120%KO Bullet Seed 2x33-40% Absorb 2x33-40% | ||
Shinx Electric | D | |
Available Moves Moves
Damage vs Remoraid View Shinx builds →Volt Switch 2x83-100%KO Shock Wave 2x73-90% Charge Beam 2x67-80% Thunder Shock 2x57-70% | ||
Pachirisu Electric | C | |
Available Moves Moves
Damage vs Remoraid View Pachirisu builds →Thunderbolt 2x10³-124%KO Volt Switch 2x82-97% Shock Wave 2x74-88% Charge Beam 2x59-71% | ||
Budew GrassPoison | D | |
Available Moves Moves
Damage vs Remoraid View Budew builds →Energy Ball 2x10³-124%KO Giga Drain 2x88-106%KO Bullet Seed 2x29-35% Absorb 2x29-35% | ||
Electrike Electric | D | |
Available Moves Moves
Damage vs Remoraid View Electrike builds →Thunderbolt 2x126-150%KO Volt Switch 2x97-115%KO Shock Wave 2x88-106%KO Charge Beam 2x74-88% | ||
Shinx Electric | D | |
Available Moves Moves
Damage vs Remoraid View Shinx builds →Thunderbolt 2x97-115%KO Volt Switch 2x74-88% Shock Wave 2x65-79% Charge Beam 2x59-71% | ||
Abomasnow GrassIce | C | |
Available Moves Moves
Damage vs Remoraid View Abomasnow builds →Solar Beam 2x247-291%KO Energy Ball 2x186-219%KO Giga Drain 2x156-184%KO Razor Leaf 2x116-137%KO | ||
Pachirisu Electric | C | |
Available Moves Moves
Damage vs Remoraid View Pachirisu builds →Thunder 2x137-163%KO Thunderbolt 2x113-133%KO Volt Switch 2x87-103%KO Spark 2x83-99% | ||
Budew GrassPoison | D | |
Available Moves Moves
Damage vs Remoraid View Budew builds →Solar Beam 2x160-189%KO Energy Ball 2x120-141%KO Giga Drain 2x101-120%KO Bullet Seed 2x29-34% | ||
Electrike Electric | D | |
Available Moves Moves
Damage vs Remoraid View Electrike builds →Thunder 2x174-206%KO Thunderbolt 2x146-171%KO Volt Switch 2x113-133%KO Thunder Fang 2x83-99% | ||
Shinx Electric | D | |
Available Moves Moves
Damage vs Remoraid View Shinx builds →Thunder 2x127-150%KO Thunderbolt 2x10⁴-124%KO Volt Switch 2x83-99% Spark 2x10⁴-124%KO | ||
Abomasnow GrassIce | C | |
Available Moves Moves
Damage vs Remoraid View Abomasnow builds →Solar Beam 2x241-285%KO Energy Ball 2x183-216%KO Giga Drain 2x155-183%KO Razor Leaf 2x115-135%KO | ||
Pachirisu Electric | C | |
Available Moves Moves
Damage vs Remoraid View Pachirisu builds →Thunder 2x133-157%KO Thunderbolt 2x10⁹-128%KO Volt Switch 2x87-102%KO Spark 2x80-95% | ||
Budew GrassPoison | D | |
Available Moves Moves
Damage vs Remoraid View Budew builds →Solar Beam 2x155-183%KO Energy Ball 2x117-139%KO Giga Drain 2x99-117%KO Bullet Seed 2x27-33% | ||
Electrike Electric | D | |
Available Moves Moves
Damage vs Remoraid View Electrike builds →Thunder 2x171-201%KO Thunderbolt 2x139-165%KO Discharge 2x124-146%KO Volt Switch 2x10⁹-128%KO | ||
Shinx Electric | D | |
Available Moves Moves
Damage vs Remoraid View Shinx builds →Thunder 2x121-143%KO Thunderbolt 2x99-117%KO Volt Switch 2x80-95% Spark 2x10²-121%KO | ||
Abomasnow GrassIce | C | |
Available Moves Moves
Damage vs Remoraid View Abomasnow builds →Solar Beam 2x240-283%KO Energy Ball 2x182-215%KO Giga Drain 2x153-181%KO Razor Leaf 2x113-133%KO | ||
Pachirisu Electric | C | |
Available Moves Moves
Damage vs Remoraid View Pachirisu builds →Thunder 2x133-157%KO Thunderbolt 2x10⁹-130%KO Volt Switch 2x86-102%KO Spark 2x81-95% | ||
Roselia GrassPoison | D | |
Available Moves Moves
Damage vs Remoraid View Roselia builds →Solar Beam 2x260-307%KO Energy Ball 2x197-232%KO Giga Drain 2x165-194%KO Magical Leaf 2x133-157%KO | ||
Luxio Electric | D | |
Available Moves Moves
Damage vs Remoraid View Luxio builds →Thunder 2x159-188%KO Thunderbolt 2x130-153%KO Volt Switch 2x10³-123%KO Spark 2x124-147%KO | ||
Voltorb Electric | D | |
Available Moves Moves
Damage vs Remoraid View Voltorb builds →Thunder 2x150-177%KO Thunderbolt 2x124-147%KO Discharge 2x10⁹-130%KO Volt Switch 2x95-113%KO | ||
Abomasnow GrassIce | C | |
Available Moves Moves
Damage vs Remoraid View Abomasnow builds →Solar Beam 2x240-284%KO Energy Ball 2x181-214%KO Giga Drain 2x151-179%KO Razor Leaf 2x114-134%KO | ||
Pachirisu Electric | C | |
Available Moves Moves
Damage vs Remoraid View Pachirisu builds →Thunder 2x130-153%KO Thunderbolt 2x10⁵-124%KO Discharge 2x95-112%KO Volt Switch 2x84-99% | ||
Roselia GrassPoison | D | |
Available Moves Moves
Damage vs Remoraid View Roselia builds →Solar Beam 2x257-303%KO Energy Ball 2x195-230%KO Giga Drain 2x163-191%KO Magical Leaf 2x130-153%KO | ||
Luxio Electric | D | |
Available Moves Moves
Damage vs Remoraid View Luxio builds →Thunder 2x160-188%KO Thunderbolt 2x130-153%KO Volt Switch 2x10²-121%KO Spark 2x124-147%KO | ||
Voltorb Electric | D | |
Available Moves Moves
Damage vs Remoraid View Voltorb builds →Thunder 2x149-176%KO Thunderbolt 2x124-147%KO Discharge 2x111-131%KO Volt Switch 2x97-115%KO | ||
In Brilliant Diamond & Shining Pearl, Zarude can KO Remoraid with Close Combat (130-154%). Regieleki threatens a KO with Thunderbolt (260-306%). Rillaboom's Wood Hammer also KOs at 442-520%.
Zarude DarkGrass | A | |
Recommended Build AbilityLeafguard ItemChoice Scarf NatureJolly Moves
Damage vs Remoraid View Zarude builds →U Turn76-90% Close Combat130-154%KO | ||
Regieleki Electric | A | |
Recommended Build AbilityTransistor ItemMagnet NatureTimid Moves
Damage vs Remoraid View Regieleki builds →Volt Switch 2x201-237%KO Electroweb 2x159-188%KO Thunderbolt 2x260-306%KO | ||
Rillaboom Grass | A | |
Recommended Build AbilityGrassy Surge ItemAssault Vest NatureAdamant Moves
Damage vs Remoraid View Rillaboom builds →U Turn86-101%KO Wood Hammer 2x442-520%KO | ||
Brilliant Diamond & Shining Pearl Evolution
One evolution ahead. Remoraid grows into Octillery through a straightforward two-stage chain. Plenty of partners for breeding via two egg groups. Eggs are average hatch time. The evolved forms gain up to 180 total stats over Remoraid. View every chain in the Evolution Chart.
How to Evolve
Breeding
Breed Remoraid easily with 69 breeding partners from the Water1 and Water2 egg groups. Pass egg moves like Acid Spray, Aurora Beam, Entrainment and 10 more to offspring.


Brilliant Diamond & Shining Pearl Remoraid Best Moveset
Best Build
No build content available for this Pokemon in Gen 8.
Try selecting a different game/generation filter, or check back later.
Moves
Breadth over depth defines this movepool. Remoraid won't stack one type's damage ceiling, but coverage across 10 types means it always has an effective option. Water Spout and Hydro Pump anchor the STAB core.
Level-Up Moves
TM Moves
Egg Moves
Tutor Moves
Brilliant Diamond & Shining Pearl Remoraid Locations
Remoraid's scattered across 16 spots in early-game fishing spots with high spawn rates. Check the list below for the closest location to wherever you are in the game. This one's quick.
Best Locations to Catch Remoraid in Brilliant Diamond & Shining Pearl
Bring Good Rod for Remoraid. There are 16 fishing encounters from Lv. 10-25 with no walking alternatives. Pick the spot with the best rate and settle in.
Remoraid Guide
Get Remoraid to Octillery at level 25. At 300 BST, Remoraid is just the starting point.
Level 25 gets you Octillery. Not the fastest evolution, so consider Exp. Share or route grinding to speed it up.
For Brilliant Diamond & Shining Pearl, you can run Remoraid through the first few routes without issues. 300 BST won't carry you far though. Get it to Octillery as fast as you can.
You can find Remoraid in Brilliant Diamond & Shining Pearl. The Locations section has the full breakdown of routes and encounter details. It also appears in 16 other games across the series.
Game Availability
Available in 17 titles since its debut in Gold & Silver, Remoraid spans 9 generations of Pokemon games. It's accessible through catching or hatching as a base form in most mainline games.
Click a game to view version-specific details
- Gen 1Y
 Yellow
 - Gen 1RB

 Red & Blue
 - Gen 2GSDebut

 Gold & Silver
 - Gen 2C
 Crystal
 - Gen 3RS

 Ruby & Sapphire
 - Gen 3FRLG

 FireRed & LeafGreen
 - Gen 3E
 Emerald
 - Gen 4Pt
 Platinum
 - Gen 4HGSS

 HeartGold & SoulSilver
 - Gen 4DP

 Diamond & Pearl
 - Gen 5BW

 Black & White
 - Gen 5B2W2

 Black 2 & White 2
 - Gen 6XY

 X & Y
X & Y - Gen 6ORAS

 Omega Ruby & Alpha Sapphire
 - Gen 7USUM

 Ultra Sun & Ultra Moon
 - Gen 7SM

 Sun & Moon
 - Gen 7LGPE

 Let's Go Pikachu & Eevee
 - Gen 8SwSh

 Sword & Shield
 - Gen 8PLA
 Legends: Arceus
 - Gen 8BDSP

 Brilliant Diamond & Shining Pearl
 - Gen 9SV

 Scarlet & Violet
 - Gen 9LZA
 Legends: Z-A
 - Gen 10WW

 Winds & Waves