Stats & Training
The stat bars tell the story: Defense carries everything and Sp. Def's dead weight. But this Earthworm Pokemon still yields 2 Defense EVs per fight on a slow 1.25M XP grind.
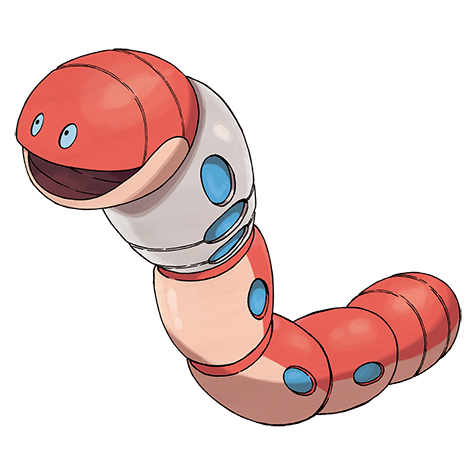
When attacked, this Pokémon will wield the tendrils on its body like fists and pelt the opponent with a storm of punches.
This Pokémon lives in arid deserts. It maintains its metal body by consuming iron from the soil.
Orthworm Weakness
Orthworm is weak to Fire, Fighting, and Ground. On the flip side, it's immune to Poison-type moves entirely. It resists 10 types, so it can switch into a lot of moves safely. Orthworm's physical bulk (base 145 Def) helps cushion physical weakness hits, but special attackers are the bigger threat.
| Damage | Types |
|---|---|
| 2x (Weak) | Fire, Fighting, Ground |
| 0.5x (Resist) | Normal, Grass, Ice, Flying, Psychic, Bug, Rock, Dragon, Steel, Fairy |
| 0x (Immune) | Poison |
Donphan's Earthquake hits Orthworm for 49-58%.
A | ||
Recommended Build AbilitySturdy ItemLeftovers NatureImpish Moves
Damage vs Orthworm View Donphan builds →Earthquake 2x49-58% Rapid Spin4-5% Knock Off11-13% | ||
A | ||
Recommended Build AbilityThickfat ItemLeftovers NatureCareful Moves
Damage vs Orthworm View Snorlax builds →Body Slam10-11% | ||
Grimmsnarl DarkFairy | B | |
Recommended Build AbilityPrankster ItemLightclay NatureImpish Moves View Grimmsnarl builds →
| ||
ClodsireIgnores boosts via Unaware, recovers with Recover, threatens with High Horsepower PoisonGround | B | |
Recommended Build AbilityWaterabsorb ItemLeftovers NatureCareful Moves
Damage vs Orthworm View Clodsire builds →Earthquake 2x33-39% | ||
B | ||
Recommended Build AbilityAftermath ItemRocky Helmet NatureJolly Moves
Damage vs Orthworm View Skuntank builds →Knock Off16-19% Sucker Punch18-21% | ||
Evolution
Breeding is the whole story for Orthworm. A massive partner pool through one egg group, eggs are slow to hatch, and you won't need to evolve anything. View every chain in the Evolution Chart.
How to Evolve
Breeding
Breed Orthworm with 278 breeding partners from the Ground egg group.


Orthworm Best Moveset
Orthworm's job is getting Stealth Rock up and staying on the field. Leftovers provides passive recovery each turn, Eartheater helps it stick around, and max HP and Sp. Def EVs prioritize longevity.
Best Build
Orthworm best EVs are HP and Sp. Def
Hazard Setter Moveset
- Body Press
- Stealth Rock
- Heavy Slam
- Coil
Recommended Teammates
Physical Tank Moveset
- Body Press
- Stealth Rock
- Coil
- Heavy Slam
Recommended Teammates
Doubles Hazard Setter Moveset
- Body Press
- Protect
- Stealth Rock
- Shed Tail
Recommended Teammates
Doubles Bulky Support Moveset
- Body Press
- Shed Tail
- Iron Defense
- Heavy Slam
Recommended Teammates
Moves
Most of Orthworm's flexibility comes from TMs. Same-type output runs through Steel Beam and Iron Tail, but Normal and Ground and the rest of the TM pool push it from predictable to genuinely threatening.
Level-Up Moves
TM Moves
Egg Moves
Tutor Moves
Orthworm Locations
low spawn rates is the best you'll get on Orthworm in mid-game routes. Use the sort toggle below. Best shows where the odds peak, Earliest shows where you can access it soonest in your playthrough.
Best Locations to Catch Orthworm in Scarlet & Violet
Which version you're playing matters for Orthworm. 6 walking spots at Lv. 22-65 spread across Violet and Scarlet, and some routes only appear in one cartridge. Check the version badges below.
Orthworm Guide
Orthworm brings 480 BST to the table. B-Tier on our list: a solid choice for the right team. That 145 base Defense does the heavy lifting.
Earth Eater is the go-to ability for Orthworm. It restores HP when hit by a Ground-type move. Its hidden ability Sand Veil can work in specific setups.
Orthworm is a physical attacker with base 85 Attack. Enough bulk to take a hit or two, too. Speed tells the real story. At base 65 Speed, it won't be moving first often.
The core moveset is Bodypress, Stealth Rock, Heavyslam, and Coil. Bodypress leads at 19% usage. Coil lets it set up before sweeping.
Game Availability
Since Scarlet & Violet, Orthworm has been obtainable in 1 games. A Generation 9 debut means a shorter history, but Orthworm has appeared steadily across every generation since.
Click a game to view version-specific details
- Gen 1Y
 Yellow
 - Gen 1RB

 Red & Blue
 - Gen 2GS

 Gold & Silver
 - Gen 2C
 Crystal
 - Gen 3RS

 Ruby & Sapphire
 - Gen 3FRLG

 FireRed & LeafGreen
 - Gen 3E
 Emerald
 - Gen 4Pt
 Platinum
 - Gen 4HGSS

 HeartGold & SoulSilver
 - Gen 4DP

 Diamond & Pearl
 - Gen 5BW

 Black & White
 - Gen 5B2W2

 Black 2 & White 2
 - Gen 6XY

 X & Y
X & Y - Gen 6ORAS

 Omega Ruby & Alpha Sapphire
 - Gen 7USUM

 Ultra Sun & Ultra Moon
 - Gen 7SM

 Sun & Moon
 - Gen 7LGPE

 Let's Go Pikachu & Eevee
 - Gen 8SwSh

 Sword & Shield
 - Gen 8PLA
 Legends: Arceus
 - Gen 8BDSP

 Brilliant Diamond & Shining Pearl
 - Gen 9SVDebut

 Scarlet & Violet
 - Gen 9LZA
 Legends: Z-A
 - Gen 10WW

 Winds & Waves