Stats & Training
Hariyama's spread is anchored by HP, with balanced defenses backing it up. Sp. Atk is the clear weak point. Worth 2 HP EVs per KO, and the standard growth curve keeps leveling painless.
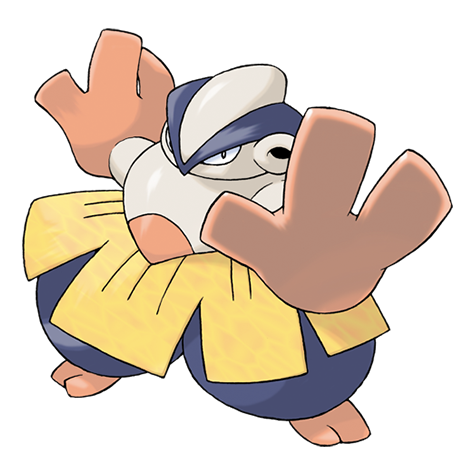
It loves challenging others to tests of strength. It has the power to stop a train with a slap.
It stomps on the ground to build power. It can send a 10-ton truck flying with a straight-arm punch.
Hariyama Weakness
Flying, Psychic, and Fairy moves hit Hariyama for super-effective damage. Thick Fat reduces Fire/Ice damage, further improving the defensive spread. With 144 HP and balanced defenses, Hariyama can afford to eat a neutral hit or two.
| Damage | Types |
|---|---|
| 2x (Weak) | Flying, Psychic, Fairy |
| 0.5x (Resist) | Bug, Rock, Dark |
Tyranitar's Earthquake hits Hariyama for 64-76%.
A | ||
Recommended Build AbilitySand Stream ItemChoice Band NatureAdamant Moves
Damage vs Hariyama View Tyranitar builds →Knock Off31-37% Stone Edge48-57% Pursuit19-23% Earthquake64-76% | ||
A | ||
Recommended Build AbilityRegenerator ItemHeavy-Duty Boots NatureRelaxed Moves
Damage vs Hariyama View Alomomola builds →Flip Turn18-22% | ||
A | ||
Recommended Build AbilityFlashfire ItemAir Balloon NatureTimid Moves
Damage vs Hariyama View Heatran builds →Flash Cannon33-39% | ||
B | ||
Recommended Build AbilityIllusion ItemChoice Specs NatureTimid Moves
Damage vs Hariyama View Zoroark builds →Dark Pulse23-27% Sludge Bomb35-41% Flamethrower35-41% | ||
B | ||
Recommended Build AbilityIcescales ItemHeavy-Duty Boots NatureModest Moves
Damage vs Hariyama View Frosmoth builds →Ice Beam33-39% Giga Drain18-22% | ||
Evolution
Hariyama is the evolved form of Makuhita. Breeding produces Makuhita eggs, and they're average hatch time. Evolving from Makuhita gave Hariyama the biggest boost in HP (+72), bringing the total to 474 stats. View every chain in the Evolution Chart.
How to Evolve


Breeding
Breed with Hariyama to get Makuhita eggs easily using 70 partners from the Humanshape egg group.


Hariyama Best Moveset
Knock Off is the main STAB option after a Bulk Up boost. Flame Orb gives Hariyama self-burn for Guts activation to survive the setup turn, and flexible EVs make the boosted hits count. The remaining moves catches resists.
Best Build
Hariyama best EVs are Sp. Def and Attack
Physical Tank Moveset
- Knock Off
- Bullet Punch
- Drain Punch
- Bulk Up
Recommended Teammates
Doubles Physical Tank Moveset
- Fake Out
- Drain Punch
- Facade
- Knock Off
Recommended Teammates
Doubles Bulky Support Moveset
- Fake Out
- Close Combat
- Knock Off
- Heavy Slam
Recommended Teammates
Physical Tank Moveset
- Close Combat
- Bullet Punch
- Knock Off
- Facade
Doubles Physical Attacker Moveset
- Fake Out
- Knock Off
- Wide Guard
- Close Combat
Recommended Teammates
Physical Tank Moveset
- Close Combat
- Earthquake
- Bullet Punch
- Fake Out
Doubles Physical Attacker Moveset
- Fake Out
- Knock Off
- Wide Guard
- Close Combat
Recommended Teammates
Physical Tank Moveset
- Close Combat
- Earthquake
- Bullet Punch
- Fake Out
Moves
Coverage runs deep. Hariyama can hit 11 types beyond STAB, including Water and Normal. The offense anchors on Focus Punch and Close Combat while TMs handle everything else.
Level-Up Moves
TM Moves
Egg Moves
Tutor Moves
Don't skip the egg moves. Hariyama picks up Bullet Punch and Counter only through breeding, and both fill gaps the natural movepool can't. STAB runs through Focus Punch and Close Combat while coverage across 7 types adds range.
Coverage runs deep. Hariyama can hit 10 types beyond STAB, including Water and Normal. The offense anchors on Focus Punch and Close Combat while TMs handle everything else.
Don't skip the egg moves. Hariyama picks up Bullet Punch and Chip Away only through breeding, and both fill gaps the natural movepool can't. STAB runs through Focus Punch and Close Combat while coverage across 7 types adds range.
How to Get Hariyama
Hariyama appears at decent spawn rates across 64 spots in mid-game routes. Sort by Best below if you want the highest rate, or Earliest if you want the quickest access point in your playthrough.
Where To Catch Hariyama in Scarlet & Violet
Makuhita is your first catch on the way to Hariyama. You'll find walking encounters from Lv. 10-43 across 128 total spots in the chain.
 Step 1Catch MakuhitaAsado Desert - RockyVioletOverworld Lv.10-25 Desert18%EarlyAsado Desert - RockyScarletOverworld Lv.10-25 Desert18%EarlyCasseroya Lake - RockyVioletOverworld Lv.10-25 Water18%EarlyCasseroya Lake - RockyScarletOverworld Lv.10-25 Water18%EarlyEast Province (Area One) - RockyVioletOverworld Lv.10-25 Route18%EarlyEast Province (Area One) - RockyScarletOverworld Lv.10-25 Route18%EarlyEast Province (Area Three) - RockyScarletOverworld Lv.10-25 Route18%EarlyEast Province (Area Three) - RockyVioletOverworld Lv.10-25 Route18%EarlyEast Province (Area Two) - RockyScarletOverworld Lv.10-25 Route18%EarlyEast Province (Area Two) - RockyVioletOverworld Lv.10-25 Route18%EarlyGlaseado MountainVioletOverworld Lv.10-25 Cave18%EarlyGlaseado MountainScarletOverworld Lv.10-25 Cave18%EarlyGlaseado MountainVioletOverworld Lv.10-25 Cave18%EarlyGlaseado MountainScarletOverworld Lv.10-25 Cave18%EarlyNorth Province (Area One) - RockyVioletOverworld Lv.10-25 Route18%EarlyNorth Province (Area One) - RockyScarletOverworld Lv.10-25 Route18%EarlyNorth Province (Area Three) - RockyVioletOverworld Lv.10-25 Route18%EarlyNorth Province (Area Three) - RockyScarletOverworld Lv.10-25 Route18%EarlyNorth Province (Area Two) - RockyVioletOverworld Lv.10-25 Route18%EarlyNorth Province (Area Two) - RockyScarletOverworld Lv.10-25 Route18%EarlySouth Province (Area Five) - RockyScarletOverworld Lv.10-25 Route18%EarlySouth Province (Area Five) - RockyVioletOverworld Lv.10-25 Route18%EarlySouth Province (Area Four) - RockyScarletOverworld Lv.10-25 Route18%EarlySouth Province (Area Four) - RockyVioletOverworld Lv.10-25 Route18%EarlySouth Province (Area Six) - RockyVioletOverworld Lv.10-25 Route18%EarlySouth Province (Area Six) - RockyScarletOverworld Lv.10-25 Route18%EarlySouth Province (Area Three) - RockyVioletOverworld Lv.10-25 Route18%EarlySouth Province (Area Three) - RockyScarletOverworld Lv.10-25 Route18%EarlySouth Province (Area Two) - RockyVioletOverworld Lv.10-25 Route18%EarlySouth Province (Area Two) - RockyScarletOverworld Lv.10-25 Route18%EarlyThe Pokémon League - RockyVioletOverworld Lv.10-2518%EarlyThe Pokémon League - RockyScarletOverworld Lv.10-2518%EarlyWest Province (Area One) - RockyVioletOverworld Lv.10-25 Route18%EarlyWest Province (Area One) - RockyScarletOverworld Lv.10-25 Route18%EarlyWest Province (Area Three) - RockyVioletOverworld Lv.10-25 Route18%EarlyWest Province (Area Three) - RockyScarletOverworld Lv.10-25 Route18%EarlyWest Province (Area Two) - RockyScarletOverworld Lv.10-25 Route18%EarlyWest Province (Area Two) - RockyVioletOverworld Lv.10-25 Route18%EarlyEast Province (Area One) - CaveVioletOverworld Lv.10-25 Route12%EarlyEast Province (Area One) - CaveScarletOverworld Lv.10-25 Route12%EarlyEast Province (Area Three) - CaveVioletOverworld Lv.10-25 Route12%EarlyEast Province (Area Three) - CaveScarletOverworld Lv.10-25 Route12%EarlyGlaseado MountainVioletOverworld Lv.10-25 Cave12%EarlyGlaseado MountainScarletOverworld Lv.10-25 Cave12%EarlyGlaseado MountainScarletOverworld Lv.10-25 Cave12%EarlyGlaseado MountainVioletOverworld Lv.10-25 Cave12%EarlyNorth Province (Area One) - CaveVioletOverworld Lv.10-25 Route12%EarlyNorth Province (Area One) - CaveScarletOverworld Lv.10-25 Route12%EarlyNorth Province (Area Three) - CaveVioletOverworld Lv.10-25 Route12%EarlyNorth Province (Area Three) - CaveScarletOverworld Lv.10-25 Route12%EarlyNorth Province (Area Two) - CaveVioletOverworld Lv.10-25 Route12%EarlyNorth Province (Area Two) - CaveScarletOverworld Lv.10-25 Route12%EarlySouth Province (Area One) - CaveScarletOverworld Lv.10-25 Route12%EarlySouth Province (Area One) - CaveVioletOverworld Lv.10-25 Route12%EarlySouth Province (Area Six) - CaveVioletOverworld Lv.10-25 Route12%EarlySouth Province (Area Six) - CaveScarletOverworld Lv.10-25 Route12%EarlyWest Province (Area One) - CaveVioletOverworld Lv.10-25 Route12%EarlyWest Province (Area One) - CaveScarletOverworld Lv.10-25 Route12%EarlyWest Province (Area Three) - CaveVioletOverworld Lv.10-25 Route12%EarlyWest Province (Area Three) - CaveScarletOverworld Lv.10-25 Route12%EarlyWest Province (Area Two) - CaveScarletOverworld Lv.10-25 Route12%EarlyWest Province (Area Two) - CaveVioletOverworld Lv.10-25 Route12%EarlyEast Province (Area Three) - MineVioletOverworld Lv.10-25 Route6%EarlyEast Province (Area Three) - MineScarletOverworld Lv.10-25 Route6%Early
 Step 2Hariyama ✓East Province (Area Three) - MineVioletOverworld Lv.27-43 Route16%MidEast Province (Area Three) - MineScarletOverworld Lv.27-43 Route16%MidAsado Desert - RockyVioletOverworld Lv.27-43 Desert6%MidAsado Desert - RockyScarletOverworld Lv.27-43 Desert6%MidCasseroya Lake - RockyVioletOverworld Lv.27-43 Water6%MidCasseroya Lake - RockyScarletOverworld Lv.27-43 Water6%MidEast Province (Area One) - RockyVioletOverworld Lv.27-43 Route6%MidEast Province (Area One) - RockyScarletOverworld Lv.27-43 Route6%MidEast Province (Area Three) - RockyScarletOverworld Lv.27-43 Route6%MidEast Province (Area Three) - RockyVioletOverworld Lv.27-43 Route6%MidEast Province (Area Two) - RockyScarletOverworld Lv.27-43 Route6%MidEast Province (Area Two) - RockyVioletOverworld Lv.27-43 Route6%MidGlaseado MountainVioletOverworld Lv.27-43 Cave6%MidGlaseado MountainScarletOverworld Lv.27-43 Cave6%MidGlaseado MountainVioletOverworld Lv.27-43 Cave6%MidGlaseado MountainScarletOverworld Lv.27-43 Cave6%MidNorth Province (Area One) - RockyVioletOverworld Lv.27-43 Route6%MidNorth Province (Area One) - RockyScarletOverworld Lv.27-43 Route6%MidNorth Province (Area Three) - RockyVioletOverworld Lv.27-43 Route6%MidNorth Province (Area Three) - RockyScarletOverworld Lv.27-43 Route6%MidNorth Province (Area Two) - RockyVioletOverworld Lv.27-43 Route6%MidNorth Province (Area Two) - RockyScarletOverworld Lv.27-43 Route6%MidSouth Province (Area Five) - RockyScarletOverworld Lv.27-43 Route6%MidSouth Province (Area Five) - RockyVioletOverworld Lv.27-43 Route6%MidSouth Province (Area Four) - RockyScarletOverworld Lv.27-43 Route6%MidSouth Province (Area Four) - RockyVioletOverworld Lv.27-43 Route6%MidSouth Province (Area Six) - RockyVioletOverworld Lv.27-43 Route6%MidSouth Province (Area Six) - RockyScarletOverworld Lv.27-43 Route6%MidSouth Province (Area Three) - RockyVioletOverworld Lv.27-43 Route6%MidSouth Province (Area Three) - RockyScarletOverworld Lv.27-43 Route6%MidSouth Province (Area Two) - RockyVioletOverworld Lv.27-43 Route6%MidSouth Province (Area Two) - RockyScarletOverworld Lv.27-43 Route6%MidThe Pokémon League - RockyVioletOverworld Lv.27-436%MidThe Pokémon League - RockyScarletOverworld Lv.27-436%MidWest Province (Area One) - RockyVioletOverworld Lv.27-43 Route6%MidWest Province (Area One) - RockyScarletOverworld Lv.27-43 Route6%MidWest Province (Area Three) - RockyVioletOverworld Lv.27-43 Route6%MidWest Province (Area Three) - RockyScarletOverworld Lv.27-43 Route6%MidWest Province (Area Two) - RockyScarletOverworld Lv.27-43 Route6%MidWest Province (Area Two) - RockyVioletOverworld Lv.27-43 Route6%MidEast Province (Area One) - CaveVioletOverworld Lv.27-43 Route4%MidEast Province (Area One) - CaveScarletOverworld Lv.27-43 Route4%MidEast Province (Area Three) - CaveVioletOverworld Lv.27-43 Route4%MidEast Province (Area Three) - CaveScarletOverworld Lv.27-43 Route4%MidGlaseado MountainVioletOverworld Lv.27-43 Cave4%MidGlaseado MountainScarletOverworld Lv.27-43 Cave4%MidGlaseado MountainScarletOverworld Lv.27-43 Cave4%MidGlaseado MountainVioletOverworld Lv.27-43 Cave4%MidNorth Province (Area One) - CaveVioletOverworld Lv.27-43 Route4%MidNorth Province (Area One) - CaveScarletOverworld Lv.27-43 Route4%MidNorth Province (Area Three) - CaveVioletOverworld Lv.27-43 Route4%MidNorth Province (Area Three) - CaveScarletOverworld Lv.27-43 Route4%MidNorth Province (Area Two) - CaveVioletOverworld Lv.27-43 Route4%MidNorth Province (Area Two) - CaveScarletOverworld Lv.27-43 Route4%MidSouth Province (Area One) - CaveScarletOverworld Lv.27-43 Route4%MidSouth Province (Area One) - CaveVioletOverworld Lv.27-43 Route4%MidSouth Province (Area Six) - CaveVioletOverworld Lv.27-43 Route4%MidSouth Province (Area Six) - CaveScarletOverworld Lv.27-43 Route4%MidWest Province (Area One) - CaveVioletOverworld Lv.27-43 Route4%MidWest Province (Area One) - CaveScarletOverworld Lv.27-43 Route4%MidWest Province (Area Three) - CaveVioletOverworld Lv.27-43 Route4%MidWest Province (Area Three) - CaveScarletOverworld Lv.27-43 Route4%MidWest Province (Area Two) - CaveScarletOverworld Lv.27-43 Route4%MidWest Province (Area Two) - CaveVioletOverworld Lv.27-43 Route4%Midor evolve from Makuhita (Step 1)
Hariyama doesn't appear wild. Catch Makuhita instead, it shows up at solid rates. Evolve it at level 24 to get Hariyama. The 2-stage line is mapped in the step cards below.
How to Obtain Hariyama in Brilliant Diamond & Shining Pearl
 Step 1Catch MakuhitaRoute 225Shining PearlGrass Lv.50-51 Route40%PostSwarm activeRoute 225Brilliant DiamondGrass Lv.50-51 Route40%PostSwarm active
 Step 2Hariyama ✓
Hariyama appears at decent spawn rates across 4 spots in endgame routes. Sort by Best below if you want the highest rate, or Earliest if you want the quickest access point in your playthrough.
Where To Catch Hariyama in Ultra Sun & Ultra Moon
Makuhita is your first catch on the way to Hariyama. You'll find walking encounters from Lv. 6-57 across 20 total spots in the chain.
 Step 1Catch MakuhitaRoute 2 - SouthUltra MoonGrass Lv.7-10 Route30%EarlyDayShaking spotRoute 2 - SouthUltra SunGrass Lv.7-10 Route30%EarlyDayShaking spotRoute 2 - NorthUltra SunGrass Lv.8-11 Route30%EarlyDayShaking spotRoute 2 - NorthUltra MoonGrass Lv.8-11 Route30%EarlyDayShaking spotRoute 2 - SouthUltra MoonGrass Lv.6-9 Route20%EarlyDayRoute 2 - SouthUltra SunGrass Lv.6-9 Route20%EarlyDayRoute 2 - NorthUltra MoonGrass Lv.7-10 Route20%EarlyDayRoute 2 - NorthUltra SunGrass Lv.7-10 Route20%EarlyDayRoute 2 - SouthUltra MoonGrass Lv.6-9 Route10%EarlyNightRoute 2 - SouthUltra SunGrass Lv.6-9 Route10%EarlyNightRoute 2 - NorthUltra MoonGrass Lv.7-10 Route10%EarlyNightRoute 2 - NorthUltra SunGrass Lv.7-10 Route10%EarlyNightRoute 2 - SouthUltra MoonGrass Lv.7-10 Route5%EarlyNightShaking spotRoute 2 - SouthUltra SunGrass Lv.7-10 Route5%EarlyNightShaking spotRoute 2 - NorthUltra SunGrass Lv.8-11 Route5%EarlyNightShaking spotRoute 2 - NorthUltra MoonGrass Lv.8-11 Route5%EarlyNightShaking spot
 Step 2Hariyama ✓Poni Plains - NorthUltra MoonGrass Lv.54-5720%PostDayPoni Plains - NorthUltra SunGrass Lv.54-5720%PostDayPoni Plains - NorthUltra MoonGrass Lv.54-5710%PostNightPoni Plains - NorthUltra SunGrass Lv.54-5710%PostNightor evolve from Makuhita (Step 1)
Hariyama starts showing up in endgame routes at high spawn rates across 2 encounter spots. The list below is sorted so you can pick what fits your current progress without scrolling through everything.
Where To Catch Hariyama in Sun & Moon
Makuhita is your first catch on the way to Hariyama. You'll find walking encounters from Lv. 9-57 across 6 total spots in the chain.
- Step 1Catch MakuhitaRoute 2 - NorthMoonGrass Lv.9-10 Route30%EarlyShaking spotRoute 2 - NorthSunGrass Lv.9-10 Route30%EarlyShaking spotRoute 2 - SouthMoonGrass Lv.9-10 Route30%EarlyShaking spotRoute 2 - SouthSunGrass Lv.9-10 Route30%EarlyShaking spot
- Step 2Hariyama ✓Poni Plains - CenterSunGrass Lv.54-5730%PostShaking spotPoni Plains - CenterMoonGrass Lv.54-5730%PostShaking spotor evolve from Makuhita (Step 1)
Hariyama Guide
Don't let Hariyama's 474 base stat total fool you. Sheer Force is what makes it tick. It punches way above its weight class. We rate it B-Tier as a wallbreaker.
Run Sheer Force on Hariyama. It's the ability that defines how you build around it and the main reason it holds a competitive niche. Hariyama also gets Thick Fat and Guts, but they don't compare.
Hariyama fills the wallbreaker role. It's a physical attacker with base 120 Attack. Base 50 Speed is low. Priority moves or Trick Room are the way to go. And it's enough bulk to take a hit or two.
Hariyama's hidden ability is Sheer Force. Strengthens moves with extra effects to 1.3× their power, but prevents their extra effects. Better than the standard options for competitive play.
Game Availability
Hariyama first appeared in Ruby & Sapphire and has been available in 14 games across 8 generations. Obtainable through wild encounters in most titles where it appears.
Click a game to view version-specific details
- Gen 1Y
 Yellow
 - Gen 1RB

 Red & Blue
 - Gen 2GS

 Gold & Silver
 - Gen 2C
 Crystal
 - Gen 3RSDebut

 Ruby & Sapphire
 - Gen 3FRLG

 FireRed & LeafGreen
 - Gen 3E
 Emerald
 - Gen 4Pt
 Platinum
 - Gen 4HGSS

 HeartGold & SoulSilver
 - Gen 4DP

 Diamond & Pearl
 - Gen 5BW

 Black & White
 - Gen 5B2W2

 Black 2 & White 2
 - Gen 6XY

 X & Y
X & Y - Gen 6ORAS

 Omega Ruby & Alpha Sapphire
 - Gen 7USUM

 Ultra Sun & Ultra Moon
 - Gen 7SM

 Sun & Moon
 - Gen 7LGPE

 Let's Go Pikachu & Eevee
 - Gen 8SwSh

 Sword & Shield
 - Gen 8PLA
 Legends: Arceus
 - Gen 8BDSP

 Brilliant Diamond & Shining Pearl
 - Gen 9SV

 Scarlet & Violet
 - Gen 9LZA
 Legends: Z-A
 - Gen 10WW

 Winds & Waves