
Stats & Training
Graveler's all-in on Defense at the expense of Speed. The physical lean is obvious from the bars. Yields 0 HP EVs and follows a 1.06M XP medium-slow curve.
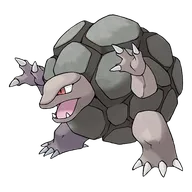
A slow walker, it rolls to move. It pays no attention to any object that happens to be in its path.
Moss-covered rocks are Graveler's favorite food. It consumes over a ton of them a day, crunching loudly while it eats.
Graveler Weakness
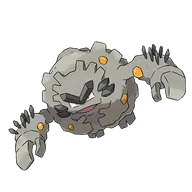
Graveler's Rock/Electric typing leaves it vulnerable to Ground, Water, Grass, and Fighting. Ground hits land at 4x, so they're the biggest threat. It resists 5 types, giving it decent defensive coverage. Graveler's physical bulk (base 115 Def) helps cushion physical weakness hits, but special attackers are the bigger threat.
| Damage | Types |
|---|---|
| 4x (Critical) | Ground |
| 2x (Weak) | Water, Grass, Fighting |
| 0.5x (Resist) | Normal, Fire, Electric, Poison |
| 0.25x (Resist) | Flying |
Garchomp can KO Graveler with Earthquake (187-220%). Annihilape deals 56-66% with Drain Punch.
Garchomp DragonGround | S | |
Recommended Build AbilityRough Skin ItemRocky Helmet NatureJolly Moves
Damage vs Graveler View Garchomp builds →Earthquake 4x187-220%KO | ||
Dondozo Water | A | |
Recommended Build AbilityUnaware ItemLeftovers NatureImpish Moves View Dondozo builds →
| ||
Annihilape FightingGhost | A | |
Recommended Build AbilityDefiant ItemSitrus Berry NatureJolly Moves
Damage vs Graveler View Annihilape builds →Drain Punch 2x56-66% | ||
Krookodile GroundDark | A | |
Recommended Build AbilityMoxie ItemChoice Scarf NatureJolly Moves
Damage vs Graveler View Krookodile builds →Earthquake 4x174-204%KO Knock Off28-33% Close Combat 2x69-82% | ||
Whimsicott GrassFairy | A | |
Recommended Build AbilityPrankster ItemCovert Cloak NatureBold Moves
Damage vs Graveler View Whimsicott builds →Moonblast49-58% | ||
Evolution
Graveler is partway through a three-stage line between Geodude and Golem. The chain involves a trade, so it's not a straightforward grind. So far, HP got the biggest boost (+15 from Geodude). The final form adds another 105 stats on top. View every chain in the Evolution Chart.
How to Evolve


Breeding
Breed with Graveler to get Geodude eggs easily using 84 partners from the Mineral egg group.


Graveler Best Moveset
Custapberry and Sturdy form the backbone. Graveler invests max HP and Attack EVs to play its hazard lead role properly, and Adamant nature pushes Attack higher. Earthquake handles the heavy lifting on offense. Normal coverage rounds it out.
Best Build
Graveler best EVs are HP and Attack
Physical Tank Moveset
- Explosion
- Earthquake
- Stealth Rock
- Endure
Recommended Teammates
Physical Wallbreaker Moveset
- Explosion
- Earthquake
- Body Press
- Stone Edge
Recommended Teammates
Legends: Arceus uses different battle mechanics.
Competitive build content is not applicable for this game. Select a main series game for builds.
No build content available for this Pokemon in Gen 8.
Try selecting a different game/generation filter, or check back later.
Let's Go Pikachu & Eevee uses different battle mechanics.
Competitive build content is not applicable for this game. Select a main series game for builds.
Moves
Without TMs, Graveler's movepool is bare bones. With them, you get Normal and Fighting coverage and more on top of Thunder and Stone Edge for STAB. The natural kit handles basics, but TMs are doing the real work.
Level-Up Moves
TM Moves
Egg Moves
Tutor Moves
Graveler's movepool balances level-up moves with TM options. Consistent STAB comes from Stone Edge and Rock Slide, and Normal and Ground coverage and more keeps opponents from switching in for free. No major gaps here.
You'll want to breed for Autotomize and Block on Graveler. These egg moves aren't just nice to have. Combined with STAB from Stone Edge and Rock Slide, they expand what Graveler can actually threaten in practice.
Graveler develops a solid moveset just through leveling. Take Down and Self-Destruct show up naturally, and the progression handles both STAB and utility without leaning on TMs for the core attacks.
How to Get Alolan Graveler
Graveler isn't available in the wild in Scarlet & Violet. Start by transferring Geodude from Red, Yellow, or Gold. The evolution path from Geodude to Graveler is covered in the steps below.
decent spawn rates for Graveler across 15 locations in mid-game routes. Nothing complicated. Check the sorted list below, compare the top few options, and head to whichever is closest.
Where To Catch Graveler in Legends: Arceus
The path to Graveler starts with Geodude at walking via walking encounters. 2 catchable stages total, with locations listed for each one below.
 Step 1Catch GeodudeAipom HillGrassUncommonBathers' LagoonGrassUncommonBolderoll RavineGrassUncommonBolderoll SlopeGrassUncommonCelestica RuinsGrass RuinsUncommonClamberclaw CliffsGrassUncommonDeertrack HeightsGrassUncommonGapejaw BogGrass SwampUncommonGinkgo LandingGrassUncommonOreburrow TunnelGrass CaveUncommonScarlet BogGrass SwampUncommonUrsa's RingGrassUncommonVeilstone CapeGrassUncommonWorn BridgeGrassUncommon
 Step 2Graveler ✓Bolderoll RavineGrassUncommonBolderoll SlopeGrassUncommonCelestica RuinsGrass RuinsUncommonClamberclaw CliffsGrassUncommonFirespit IslandGrass WaterUncommonGapejaw BogGrass SwampUncommonHeavenward LookoutGrassUncommonIslespy ShoreGrassUncommonOreburrow TunnelGrass CaveUncommonSandgem FlatsGrass DesertUncommonScarlet BogGrass SwampUncommonSnowpoint TempleGrass IceUncommonSpring PathGrass RouteUncommonUrsa's RingGrassUncommonWindbreak StandGrassUncommonor evolve from Geodude (Step 1)
Plenty of locations for Graveler with high spawn rates across mid-game routes. The sort toggle below swaps between best odds and earliest access, so you can approach it based on where you are in the game.
Where To Catch Graveler in Brilliant Diamond & Shining Pearl
To get Graveler, start by catching Geodude through walking encounters at Lv. 4-57. The chain covers 2 catchable stages before reaching the final form.
 Step 1Catch GeodudeOreburgh Gate - 1FShining PearlGrass Lv.4-880%EarlyOreburgh Gate - 1FBrilliant DiamondGrass Lv.4-880%EarlyOreburgh Mine - 1FShining PearlGrass Lv.5-9 Cave70%EarlyOreburgh Mine - 1FBrilliant DiamondGrass Lv.5-9 Cave70%EarlyOreburgh Mine - B1FShining PearlGrass Lv.6-10 Cave70%EarlyOreburgh Mine - B1FBrilliant DiamondGrass Lv.6-10 Cave70%EarlyRoute 207Brilliant DiamondGrass Lv.5-7 Route55%EarlyRoute 207Shining PearlGrass Lv.5-7 Route55%EarlyRoute 206Shining PearlGrass Lv.14-16 Route35%EarlyMt. Coronet - Route 211 EntranceShining PearlGrass Lv.12-13 Cave30%EarlyMt. Coronet - Route 211 EntranceBrilliant DiamondGrass Lv.12-13 Cave30%EarlyMt. Coronet - Route 207 EntranceBrilliant DiamondGrass Lv.14-15 Cave30%EarlyMt. Coronet - Route 207 EntranceShining PearlGrass Lv.14-15 Cave30%EarlyRavaged PathShining PearlGrass Lv.5 Route20%EarlyRavaged PathBrilliant DiamondGrass Lv.5 Route20%EarlyMt. Coronet - Route 211 EntranceShining PearlGrass Lv.13 Cave20%EarlyMorningMt. Coronet - Route 211 EntranceBrilliant DiamondGrass Lv.13 Cave20%EarlyMorningMt. Coronet - Route 207 EntranceBrilliant DiamondGrass Lv.15 Cave20%EarlyMorningMt. Coronet - Route 207 EntranceShining PearlGrass Lv.15 Cave20%EarlyMorningWayward Cave - 1FBrilliant DiamondGrass Lv.15-16 Cave15%EarlyWayward Cave - 1FShining PearlGrass Lv.15-16 Cave15%EarlyOreburgh Gate - B1FShining PearlGrass Lv.910%EarlyOreburgh Gate - B1FBrilliant DiamondGrass Lv.910%EarlyRoute 211 - WestShining PearlGrass Lv.13 Route10%EarlyRoute 211 - WestBrilliant DiamondGrass Lv.13 Route10%EarlyRoute 206Brilliant DiamondGrass Lv.14 Route10%EarlyRuin Maniac Tunnel - 0-9 Unown caughtShining PearlGrass Lv.22 Cave95%MidRuin Maniac Tunnel - 0-9 Unown caughtBrilliant DiamondGrass Lv.22 Cave95%MidRuin Maniac Tunnel - 10-25 Unown caughtShining PearlGrass Lv.23 Cave90%MidRuin Maniac Tunnel - 10-25 Unown caughtBrilliant DiamondGrass Lv.23 Cave90%MidRuin Maniac Tunnel - 26 Unown caughtBrilliant DiamondGrass Lv.24 Cave80%MidRuin Maniac Tunnel - 26 Unown caughtShining PearlGrass Lv.24 Cave80%MidRoute 215Shining PearlGrass Lv.20-22 Route35%MidMorningRoute 215Brilliant DiamondGrass Lv.20-22 Route35%MidMorningIron Island - 1FBrilliant DiamondGrass Lv.29-31 Water35%MidIron Island - 1FShining PearlGrass Lv.29-31 Water35%MidRoute 210 - SouthBrilliant DiamondGrass Lv.19 Route30%MidRoute 210 - SouthShining PearlGrass Lv.19 Route30%MidRoute 215Shining PearlGrass Lv.20-22 Route25%MidRoute 215Brilliant DiamondGrass Lv.20-22 Route25%MidValor LakefrontBrilliant DiamondGrass Lv.20 Water20%MidValor LakefrontShining PearlGrass Lv.20 Water20%MidRoute 214Shining PearlGrass Lv.22 Route20%MidRoute 214Brilliant DiamondGrass Lv.22 Route20%MidBig Bluff CavernBrilliant DiamondGrass Lv.16-20 CaveMidBig Bluff CavernShining PearlGrass Lv.16-20 CaveMidRocky CaveShining PearlGrass Lv.16-20 CaveMidRocky CaveBrilliant DiamondGrass Lv.16-20 CaveMidSpacious CaveShining PearlGrass Lv.16-20 CaveMidSpacious CaveBrilliant DiamondGrass Lv.16-20 CaveMidTyphlo CavernShining PearlGrass Lv.16-20 CaveMidTyphlo CavernBrilliant DiamondGrass Lv.16-20 CaveMidVolcanic CaveBrilliant DiamondGrass Lv.16-20 VolcanoMidVolcanic CaveShining PearlGrass Lv.16-20 VolcanoMidWayward Cave - B1FShining PearlGrass Lv.16 Cave10%MidWayward Cave - B1FBrilliant DiamondGrass Lv.16 Cave10%MidStark Mountain - EntranceShining PearlGrass Lv.25-27 Volcano5%MidStark Mountain - EntranceBrilliant DiamondGrass Lv.25-27 Volcano5%MidStark Mountain - InteriorShining PearlGrass Lv.27-29 Volcano5%MidStark Mountain - InteriorBrilliant DiamondGrass Lv.27-29 Volcano5%MidIron Island - B1F Left CaveShining PearlGrass Lv.31 Water1%LateIron Island - B1F Left CaveBrilliant DiamondGrass Lv.31 Water1%LateIron Island - B1F Right CaveShining PearlGrass Lv.31 Water1%LateIron Island - B1F Right CaveBrilliant DiamondGrass Lv.31 Water1%LateIron Island - B2F Right CaveShining PearlGrass Lv.31 Water1%LateIron Island - B2F Right CaveBrilliant DiamondGrass Lv.31 Water1%LateIron Island - B2F Left CaveShining PearlGrass Lv.32 Water1%LateIron Island - B2F Left CaveBrilliant DiamondGrass Lv.32 Water1%LateIron Island - B3FShining PearlGrass Lv.32 Water1%LateIron Island - B3FBrilliant DiamondGrass Lv.32 Water1%Late
 Step 2Graveler ✓Iron Island - B1F Left CaveShining PearlGrass Lv.29-33 Water69%MidIron Island - B1F Left CaveBrilliant DiamondGrass Lv.29-33 Water69%MidIron Island - B1F Right CaveBrilliant DiamondGrass Lv.29-33 Water69%MidIron Island - B1F Right CaveShining PearlGrass Lv.29-33 Water69%MidIron Island - B2F Right CaveBrilliant DiamondGrass Lv.29-33 Water49%MidIron Island - B2F Right CaveShining PearlGrass Lv.29-33 Water49%MidIron Island - B2F Left CaveBrilliant DiamondGrass Lv.30-34 Water39%MidIron Island - B2F Left CaveShining PearlGrass Lv.30-34 Water39%MidIron Island - B3FBrilliant DiamondGrass Lv.30-34 Water39%MidIron Island - B3FShining PearlGrass Lv.30-34 Water39%MidRoute 211 - EastBrilliant DiamondGrass Lv.27 Route20%MidRoute 211 - EastShining PearlGrass Lv.27 Route20%MidValor LakefrontBrilliant DiamondGrass Lv.21-22 Water15%MidMorning/dayValor LakefrontShining PearlGrass Lv.21-22 Water15%MidMorning/dayRoute 214Brilliant DiamondGrass Lv.23-24 Route15%MidMorning/dayRoute 214Shining PearlGrass Lv.23-24 Route15%MidMorning/dayBig Bluff CavernBrilliant DiamondGrass Lv.25-29 CaveMidRequires DefogBig Bluff CavernShining PearlGrass Lv.25-29 CaveMidRequires DefogRocky CaveBrilliant DiamondGrass Lv.25-29 CaveMidRequires DefogRocky CaveShining PearlGrass Lv.25-29 CaveMidRequires DefogSpacious CaveBrilliant DiamondGrass Lv.25-29 CaveMidRequires DefogSpacious CaveShining PearlGrass Lv.25-29 CaveMidRequires DefogTyphlo CavernShining PearlGrass Lv.25-29 CaveMidRequires DefogTyphlo CavernBrilliant DiamondGrass Lv.25-29 CaveMidRequires DefogVolcanic CaveBrilliant DiamondGrass Lv.25-29 VolcanoMidRequires DefogVolcanic CaveShining PearlGrass Lv.25-29 VolcanoMidRequires DefogValor LakefrontBrilliant DiamondGrass Lv.22 Water5%MidNightValor LakefrontShining PearlGrass Lv.22 Water5%MidNightRoute 214Brilliant DiamondGrass Lv.24 Route5%MidNightRoute 214Shining PearlGrass Lv.24 Route5%MidNightMt. Coronet - Top CaveBrilliant DiamondGrass Lv.39-40 Cave40%LateMt. Coronet - Top CaveShining PearlGrass Lv.39-40 Cave40%LateIron Island - 1FBrilliant DiamondGrass Lv.31-33 Water35%LateIron Island - 1FShining PearlGrass Lv.31-33 Water35%LateMt. Coronet - B1FShining PearlGrass Lv.31 Cave20%LateMt. Coronet - B1FBrilliant DiamondGrass Lv.31 Cave20%LateMt. Coronet - Route 216 EntranceBrilliant DiamondGrass Lv.31 Cave20%LateMt. Coronet - Route 216 EntranceShining PearlGrass Lv.31 Cave20%LateMt. Coronet - 2FBrilliant DiamondGrass Lv.36 Cave20%LateMt. Coronet - 2FShining PearlGrass Lv.36 Cave20%LateMt. Coronet - 3FBrilliant DiamondGrass Lv.36 Cave20%LateMt. Coronet - 3FShining PearlGrass Lv.36 Cave20%LateMt. Coronet - 4FBrilliant DiamondGrass Lv.38 Cave20%LateMt. Coronet - 4FShining PearlGrass Lv.38 Cave20%LateMt. Coronet - 5FBrilliant DiamondGrass Lv.38 Cave20%LateMt. Coronet - 5FShining PearlGrass Lv.38 Cave20%LateMt. Coronet - 6FBrilliant DiamondGrass Lv.40 Cave20%LateMt. Coronet - 6FShining PearlGrass Lv.40 Cave20%LateMt. Coronet - 7FShining PearlGrass Lv.40 Cave20%LateMt. Coronet - 7FBrilliant DiamondGrass Lv.40 Cave20%LateVictory Road - 1FBrilliant DiamondGrass Lv.45 Cave20%LateVictory Road - 1FShining PearlGrass Lv.45 Cave20%LateRoute 216Brilliant DiamondGrass Lv.33-34 Route10%LateRoute 216Shining PearlGrass Lv.33-34 Route10%LateVictory Road - 2FBrilliant DiamondGrass Lv.46 Cave20%PostVictory Road - 2FShining PearlGrass Lv.46 Cave20%PostVictory Road - Nat Dex AreaBrilliant DiamondGrass Lv.51 Cave20%PostVictory Road - Nat Dex AreaShining PearlGrass Lv.51 Cave20%PostStark Mountain - EntranceBrilliant DiamondGrass Lv.55 Volcano20%PostStark Mountain - EntranceShining PearlGrass Lv.55 Volcano20%PostStark Mountain - InteriorBrilliant DiamondGrass Lv.57 Volcano20%PostStark Mountain - InteriorShining PearlGrass Lv.57 Volcano20%PostRoute 227Brilliant DiamondGrass Lv.54-56 Route15%PostMorning/dayRoute 227Shining PearlGrass Lv.54-56 Route15%PostMorning/dayStark Mountain - OutsideBrilliant DiamondGrass Lv.54-56 Volcano15%PostMorning/dayStark Mountain - OutsideShining PearlGrass Lv.54-56 Volcano15%PostMorning/daySnowpoint Temple - 1FShining PearlGrass Lv.52 Ice10%PostSnowpoint Temple - 1FBrilliant DiamondGrass Lv.52 Ice10%PostSnowpoint Temple - B1FShining PearlGrass Lv.54 Ice10%PostSnowpoint Temple - B1FBrilliant DiamondGrass Lv.54 Ice10%PostSnowpoint Temple - B2FBrilliant DiamondGrass Lv.54 Ice10%PostSnowpoint Temple - B2FShining PearlGrass Lv.54 Ice10%PostSnowpoint Temple - B3FBrilliant DiamondGrass Lv.54 Ice10%PostSnowpoint Temple - B3FShining PearlGrass Lv.54 Ice10%PostSnowpoint Temple - B4FBrilliant DiamondGrass Lv.56 Ice10%PostSnowpoint Temple - B4FShining PearlGrass Lv.56 Ice10%PostSnowpoint Temple - B5FBrilliant DiamondGrass Lv.56 Ice10%PostSnowpoint Temple - B5FShining PearlGrass Lv.56 Ice10%PostRoute 227Brilliant DiamondGrass Lv.56 Route5%PostNightRoute 227Shining PearlGrass Lv.56 Route5%PostNightStark Mountain - OutsideBrilliant DiamondGrass Lv.56 Volcano5%PostNightStark Mountain - OutsideShining PearlGrass Lv.56 Volcano5%PostNightor evolve from Geodude (Step 1)
Graveler starts showing up in mid-game routes at decent spawn rates across 12 encounter spots. The list below is sorted so you can pick what fits your current progress without scrolling through everything.
Where To Catch Graveler in Let's Go Pikachu & Eevee
Geodude is your first catch on the way to Graveler. You'll find walking and trade encounters from Lv. 5-56 across 30 total spots in the chain.
 Step 1Catch GeodudeMt. Moon - 1FLet's Go EeveeGrass Lv.5-10 Cave40%EarlyMt. Moon - 1FLet's Go PikachuGrass Lv.5-10 Cave40%EarlyMt. Moon - B1FLet's Go EeveeGrass Lv.5-10 Cave34%EarlyMt. Moon - B1FLet's Go PikachuGrass Lv.5-10 Cave34%EarlyRock Tunnel - B1FLet's Go EeveeGrass Lv.18-23 Cave20%MidRock Tunnel - B1FLet's Go PikachuGrass Lv.18-23 Cave20%MidVermilion City - CityLet's Go EeveeIn-game trade Lv.16 CityMidTrade for (give Geodude)Vermilion City - CityLet's Go PikachuIn-game trade Lv.16 CityMidTrade for (give Geodude)Rock Tunnel - 1FLet's Go EeveeGrass Lv.18-23 Cave10%MidRock Tunnel - 1FLet's Go PikachuGrass Lv.18-23 Cave10%MidVictory Road - 1F-3FLet's Go EeveeGrass Lv.41-46 Cave10%LateVictory Road - 1F-3FLet's Go PikachuGrass Lv.41-46 Cave10%LateCerulean Cave - 1FLet's Go EeveeGrass Lv.51-56 Cave10%PostCerulean Cave - 1FLet's Go PikachuGrass Lv.51-56 Cave10%PostCerulean Cave - B1FLet's Go PikachuGrass Lv.51-56 Cave10%PostCerulean Cave - B1FLet's Go EeveeGrass Lv.51-56 Cave10%PostCerulean Cave - 2FLet's Go EeveeGrass Lv.51-56 Cave5%PostCerulean Cave - 2FLet's Go PikachuGrass Lv.51-56 Cave5%Post
 Step 2Graveler ✓Rock Tunnel - 1FLet's Go PikachuGrass Lv.18-23 Cave20%MidRock Tunnel - 1FLet's Go EeveeGrass Lv.18-23 Cave20%MidRock Tunnel - B1FLet's Go PikachuGrass Lv.18-23 Cave10%MidRock Tunnel - B1FLet's Go EeveeGrass Lv.18-23 Cave10%MidVictory Road - 1F-3FLet's Go PikachuGrass Lv.41-46 Cave15%LateVictory Road - 1F-3FLet's Go EeveeGrass Lv.41-46 Cave15%LateCerulean Cave - 2FLet's Go EeveeGrass Lv.51-56 Cave20%PostCerulean Cave - 2FLet's Go PikachuGrass Lv.51-56 Cave20%PostCerulean Cave - 1FLet's Go EeveeGrass Lv.51-56 Cave15%PostCerulean Cave - 1FLet's Go PikachuGrass Lv.51-56 Cave15%PostCerulean Cave - B1FLet's Go PikachuGrass Lv.51-56 Cave15%PostCerulean Cave - B1FLet's Go EeveeGrass Lv.51-56 Cave15%Postor evolve from Geodude (Step 1)
Graveler Guide
Graveler isn't fully evolved, so it's not built for competitive play. You'll want to evolve it into Golem to unlock its full potential. At 390 BST, it's a stepping stone rather than a team anchor.
Watch for Rhydon (Ground), Starmie (Water), and Venusaur (Grass) when using Graveler. They all hit it super-effectively with STAB. Rhydon is the most dangerous since Ground moves deal 4x damage. Fighting-type attackers are also a problem. At base 35 Speed, Graveler won't outrun any of these threats so switching to a resist is usually the safer play.
Magnet Pull prevents steel opponents from fleeing or switching out. That's the one you want on Graveler. Galvanize is the hidden ability. Niche, but it has its uses. Sturdy works too if your team needs something different.
Graveler fills the trick room role. It's a physical attacker with base 95 Attack. Base 35 Speed is low. Priority moves or Trick Room are the way to go. And it's enough bulk to take a hit or two.
Game Availability
Graveler first appeared in Red & Blue and spans 20 games across 10 generations. It later gained an Alolan form in Generation 7, adding new dimensions to its competitive identity.
Click a game to view version-specific details
- Gen 1Y
 Yellow
 - Gen 1RBDebut

 Red & Blue
 - Gen 2GS

 Gold & Silver
 - Gen 2C
 Crystal
 - Gen 3RS

 Ruby & Sapphire
 - Gen 3FRLG

 FireRed & LeafGreen
 - Gen 3E
 Emerald
 - Gen 4Pt
 Platinum
 - Gen 4HGSS

 HeartGold & SoulSilver
 - Gen 4DP

 Diamond & Pearl
 - Gen 5BW

 Black & White
 - Gen 5B2W2

 Black 2 & White 2
 - Gen 6XY

 X & Y
X & Y - Gen 6ORAS

 Omega Ruby & Alpha Sapphire
 - Gen 7USUM

 Ultra Sun & Ultra Moon
 - Gen 7SMAlolan

 Sun & Moon
 - Gen 7LGPE

 Let's Go Pikachu & Eevee
 - Gen 8SwSh

 Sword & Shield
 - Gen 8PLA
 Legends: Arceus
 - Gen 8BDSP

 Brilliant Diamond & Shining Pearl
 - Gen 9SV

 Scarlet & Violet
 - Gen 9LZA
 Legends: Z-A
 - Gen 10WW

 Winds & Waves