
Zelda Tears of the Kingdom Armor List
This is a list of all armor such as headgear, graves, and tunics you can equip to increase your overall defense and even gain special effects.
Armor List for Zelda TotK
Below is a list of armor and the locations you can find them. We link to each armor which includes the cost to upgrade them in zelda totk. We also decided to include a map that will show you where you can find treasure chest that hold various armor pieces.
| Location | Type | Subtype | Description | Show on map |
|---|
| Tier | Armor List | Defense | Special Effects | How To Get |
|---|---|---|---|---|
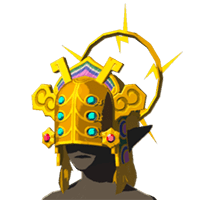
S Tier
|
Headgear
|
Base:
12 ★:
21 ★★:
36 ★★★:
54 ★★★★:
84 |
|
Temple of Time
|
S Tier
|
Headgear
|
Base:
3 ★:
★★:
★★★:
★★★★:
|
Lightning Proof
|
Yiga Clan Hideout
|
S Tier
|
Headgear
|
Base:
1 ★:
★★:
★★★:
★★★★:
|
Shakes when a Korok is nearby.
|
Forest Coliseum
|
S Tier
|
Headgear
|
Base:
4 ★:
7 ★★:
12 ★★★:
18 ★★★★:
28 |
|
|
S Tier
|
Legwear
|
Base:
4 ★:
7 ★★:
12 ★★★:
18 ★★★★:
28 |
|
Sky Mine
|
S Tier
|
Body Armor
|
Base:
4 ★:
7 ★★:
12 ★★★:
18 ★★★★:
28 |
|
|
S Tier
|
Headgear
|
Base:
3 ★:
★★:
★★★:
★★★★:
|
|
|
S Tier
|
Body Armor
|
Base:
3 ★:
★★:
★★★:
★★★★:
|
|
Purchase From Koltin at Night Near Ulri Mountains Skyview Tower
|
S Tier
|
Legwear
|
Base:
3 ★:
★★:
★★★:
★★★★:
|
|
|
S Tier
|
Legwear
|
Base:
3 ★:
5 ★★:
8 ★★★:
12 ★★★★:
20 |
|
Gerudo Secret Club
|
A Tier
|
Headgear
|
Base:
3 ★:
5 ★★:
8 ★★★:
12 ★★★★:
20 |
|
Blocked Ruin
|
A Tier
|
Body Armor
|
Base:
3 ★:
5 ★★:
8 ★★★:
12 ★★★★:
20 |
|
Dracozu Lake
|
A Tier
|
Legwear
|
Base:
3 ★:
5 ★★:
8 ★★★:
12 ★★★★:
20 |
|
Damel Forest
|
A Tier
|
Headgear
|
Base:
2 ★:
4 ★★:
6 ★★★:
9 ★★★★:
16 |
|
YunoboCo HQ South Cave
|
A Tier
|
Body Armor
|
Base:
2 ★:
4 ★★:
6 ★★★:
9 ★★★★:
16 |
|
Cephla Lake Cave
|
A Tier
|
Legwear
|
Base:
2 ★:
4 ★★:
6 ★★★:
9 ★★★★:
16 |
|
Goronbi River Cave
|
A Tier
|
Headgear
|
Base:
2 ★:
4 ★★:
6 ★★★:
9 ★★★★:
16 |
|
Lake Kilsie Cave
|
A Tier
|
Body Armor
|
Base:
2 ★:
4 ★★:
6 ★★★:
9 ★★★★:
16 |
|
Brightcap Cave
|
A Tier
|
Legwear
|
Base:
2 ★:
4 ★★:
6 ★★★:
9 ★★★★:
16 |
|
Hebra Headspring Cave
|
A Tier
|
Body Armor
|
Base:
1 ★:
★★:
★★★:
★★★★:
|
| |
A Tier
|
Headgear
|
Base:
7 ★:
★★:
★★★:
★★★★:
|
Lone Island Coliseum
| |
A Tier
|
Headgear
|
Base:
3 ★:
5 ★★:
8 ★★★:
12 ★★★★:
20 |
|
Abandoned Kara Kara Mine
|
A Tier
|
Body Armor
|
Base:
3 ★:
5 ★★:
8 ★★★:
12 ★★★★:
20 |
|
Hylia Canyon Mine
|
A Tier
|
Legwear
|
Base:
3 ★:
5 ★★:
8 ★★★:
12 ★★★★:
20 |
|
Daphnes Canyon Mine
|
A Tier
|
Headgear
|
Base:
2 ★:
★★:
★★★:
★★★★:
|
Increases sideway climbing speed
|
Secluded Coliseum
|
A Tier
|
Headgear
|
Base:
3 ★:
★★:
★★★:
★★★★:
|
Unfreezable
|
Scorching Coliseum
|
A Tier
|
Body Armor
|
Base:
3 ★:
5 ★★:
8 ★★★:
12 ★★★★:
20 |
Crenel Hills Cave
| |
A Tier
|
Headgear
|
Base:
3 ★:
5 ★★:
8 ★★★:
12 ★★★★:
20 |
Robred Dropoff Cave
| |
A Tier
|
Legwear
|
Base:
3 ★:
5 ★★:
8 ★★★:
12 ★★★★:
20 |
Walnot Mountain Cave
| |
A Tier
|
Legwear
|
Base:
3 ★:
5 ★★:
8 ★★★:
12 ★★★★:
20 |
Bargainer Statue
| |
A Tier
|
Headgear
|
Base:
3 ★:
5 ★★:
8 ★★★:
12 ★★★★:
20 |
Bargainer Statue
| |
A Tier
|
Headgear
|
Base:
3 ★:
★★:
★★★:
★★★★:
|
Prevents Lynel from attacking.
|
|
A Tier
|
Body Armor
|
Base:
8 ★:
★★:
★★★:
★★★★:
|
Tamio River Downstream Cave
| |
A Tier
|
Legwear
|
Base:
8 ★:
★★:
★★★:
★★★★:
|
Ancient Altar Ruins
| |
A Tier
|
Headgear
|
Base:
8 ★:
★★:
★★★:
★★★★:
|
Puffer Beach Overhead Cave
| |
A Tier
|
Body Armor
|
Base:
3 ★:
5 ★★:
8 ★★★:
12 ★★★★:
20 |
Whistling Hill Cave
| |
A Tier
|
Headgear
|
Base:
3 ★:
5 ★★:
8 ★★★:
12 ★★★★:
20 |
Sarjon Woods Cave
| |
A Tier
|
Legwear
|
Base:
3 ★:
5 ★★:
8 ★★★:
12 ★★★★:
20 |
Horon Lagoon Cave
| |
A Tier
|
Legwear
|
Base:
3 ★:
5 ★★:
8 ★★★:
12 ★★★★:
20 |
|
Gerudo Secret Club
|
A Tier
|
Body Armor
|
Base:
3 ★:
5 ★★:
8 ★★★:
12 ★★★★:
20 |
Bargainer Statue
| |
A Tier
|
Headgear
|
Base:
2 ★:
4 ★★:
6 ★★★:
9 ★★★★:
16 |
North Biron Snowshelf Cave
| |
A Tier
|
Headgear
|
Base:
2 ★:
4 ★★:
6 ★★★:
9 ★★★★:
16 |
| |
A Tier
|
Headgear
|
Base:
2 ★:
4 ★★:
6 ★★★:
9 ★★★★:
16 |
|
|
A Tier
|
Headgear
|
Base:
2 ★:
4 ★★:
6 ★★★:
9 ★★★★:
16 |
| |
A Tier
|
Body Armor
|
Base:
3 ★:
5 ★★:
8 ★★★:
12 ★★★★:
20 |
|
Goron City Armor Shop
|
A Tier
|
Legwear
|
Base:
3 ★:
5 ★★:
8 ★★★:
12 ★★★★:
20 |
|
Goron City Armor Shop
|
A Tier
|
Headgear
|
Base:
3 ★:
5 ★★:
8 ★★★:
12 ★★★★:
20 |
|
Goron City Armor Shop
|
B Tier
|
Headgear
|
Base:
3 ★:
5 ★★:
8 ★★★:
12 ★★★★:
20 |
| |
B Tier
|
Legwear
|
Base:
3 ★:
5 ★★:
8 ★★★:
12 ★★★★:
20 |
| |
B Tier
|
Body Armor
|
Base:
3 ★:
5 ★★:
8 ★★★:
12 ★★★★:
20 |
| |
B Tier
|
Headgear
|
Base:
3 ★:
5 ★★:
8 ★★★:
12 ★★★★:
20 |
Kara Kara Bazaar
| |
B Tier
|
Headgear
|
Base:
4 ★:
7 ★★:
12 ★★★:
18 ★★★★:
28 |
Gerudo Town Starlight Memories
| |
B Tier
|
Headgear
|
Base:
2 ★:
4 ★★:
6 ★★★:
9 ★★★★:
16 |
|
Valor Island Dive Ceremony
|
B Tier
|
Body Armor
|
Base:
2 ★:
4 ★★:
6 ★★★:
9 ★★★★:
16 |
|
Courage Island Dive Ceremony
|
B Tier
|
Legwear
|
Base:
2 ★:
4 ★★:
6 ★★★:
9 ★★★★:
16 |
|
Bravery Island Dive Ceremony
|
B Tier
|
Headgear
|
Base:
3 ★:
5 ★★:
8 ★★★:
12 ★★★★:
20 |
|
Gerudo Town Starlight Memories
|
B Tier
|
Headgear
|
Base:
3 ★:
5 ★★:
8 ★★★:
12 ★★★★:
20 |
Gerudo Town Starlight Memories
| |
B Tier
|
Headgear
|
Base:
3 ★:
5 ★★:
8 ★★★:
12 ★★★★:
20 |
Gerudo Town Starlight Memories
| |
B Tier
|
Headgear
|
Base:
3 ★:
5 ★★:
8 ★★★:
12 ★★★★:
18 |
Gerudo Town Starlight Memories
| |
B Tier
|
Body Armor
|
Base:
3 ★:
5 ★★:
8 ★★★:
12 ★★★★:
20 |
|
A Token of Friendship
|
B Tier
|
Legwear
|
Base:
3 ★:
5 ★★:
8 ★★★:
12 ★★★★:
20 |
|
Restoring the Zora Armor
|
B Tier
|
Headgear
|
Base:
3 ★:
5 ★★:
8 ★★★:
12 ★★★★:
20 |
|
Never-Ending Lecture
|
B Tier
|
Body Armor
|
Base:
3 ★:
5 ★★:
8 ★★★:
12 ★★★★:
20 |
Gerudo Secret Club
| |
B Tier
|
Legwear
|
Base:
3 ★:
5 ★★:
8 ★★★:
12 ★★★★:
20 |
Gerudo Secret Club
| |
B Tier
|
Body Armor
|
Base:
3 ★:
5 ★★:
8 ★★★:
12 ★★★★:
20 |
Akkala Citadel Ruins Bargainer Statue
| |
B Tier
|
Legwear
|
Base:
3 ★:
5 ★★:
8 ★★★:
12 ★★★★:
20 |
Ancient Tree Stump Bargainer Statue
| |
B Tier
|
Headgear
|
Base:
3 ★:
5 ★★:
8 ★★★:
12 ★★★★:
20 |
Skull Lake Cave Bargainer Statue
| |
B Tier
|
Headgear
|
Base:
3 ★:
5 ★★:
8 ★★★:
12 ★★★★:
20 |
Brazen Beak
| |
B Tier
|
Legwear
|
Base:
3 ★:
5 ★★:
8 ★★★:
12 ★★★★:
20 |
Brazen Beak
| |
B Tier
|
Body Armor
|
Base:
3 ★:
5 ★★:
8 ★★★:
12 ★★★★:
20 |
Brazen Beak
| |
C Tier
|
Legwear
|
Base:
2 ★:
★★:
★★★:
★★★★:
|
| |
C Tier
|
Headgear
|
Base:
3 ★:
5 ★★:
8 ★★★:
12 ★★★★:
20 |
|
Ploymus Mountain
|
C Tier
|
Legwear
|
Base:
3 ★:
5 ★★:
8 ★★★:
12 ★★★★:
20 |
|
Upland Zorana
|
C Tier
|
Body Armor
|
Base:
3 ★:
5 ★★:
8 ★★★:
12 ★★★★:
20 |
|
North Hyrule Plain
|
C Tier
|
Headgear
|
Base:
3 ★:
★★:
★★★:
★★★★:
|
Prevents Lizalfos from attacking.
|
Koltin Shop
|
C Tier
|
Body Armor
|
Base:
4 ★:
7 ★★:
12 ★★★:
18 ★★★★:
28 |
none
|
Royal Hidden Passage
|
C Tier
|
Legwear
|
Base:
4 ★:
7 ★★:
12 ★★★:
18 ★★★★:
28 |
none
|
Royal Hidden Passage
|
C Tier
|
Headgear
|
Base:
4 ★:
7 ★★:
12 ★★★:
18 ★★★★:
28 |
none
|
Royal Hidden Passage
|
C Tier
|
Headgear
|
Base:
3 ★:
5 ★★:
8 ★★★:
12 ★★★★:
20 |
Bargainer Statue
| |
C Tier
|
Headgear
|
Base:
3 ★:
★★:
★★★:
★★★★:
|
|
Bargainer Statue
|
C Tier
|
Legwear
|
Base:
3 ★:
★★:
★★★:
★★★★:
|
|
Bargainer Statue
|
C Tier
|
Body Armor
|
Base:
3 ★:
★★:
★★★:
★★★★:
|
|
Bargainer Statue
|
C Tier
|
Headgear
|
Base:
3 ★:
5 ★★:
8 ★★★:
12 ★★★★:
20 |
none
|
Bargainer Statue
|
C Tier
|
Legwear
|
Base:
3 ★:
5 ★★:
8 ★★★:
12 ★★★★:
20 |
none
|
Bargainer Statue
|
C Tier
|
Legwear
|
Base:
3 ★:
5 ★★:
8 ★★★:
12 ★★★★:
20 |
Bargainer Statue
| |
C Tier
|
Body Armor
|
Base:
3 ★:
5 ★★:
8 ★★★:
12 ★★★★:
20 |
none
|
Bargainer Statue
|
C Tier
|
Body Armor
|
Base:
3 ★:
5 ★★:
8 ★★★:
12 ★★★★:
20 |
Bargainer Statue
| |
D Tier
|
Body Armor
|
Base:
2 ★:
4 ★★:
6 ★★★:
9 ★★★★:
16 |
Enchanted
| |
D Tier
|
Headgear
|
Base:
2 ★:
4 ★★:
6 ★★★:
9 ★★★★:
16 |
Enchanted
| |
D Tier
|
Legwear
|
Base:
2 ★:
4 ★★:
6 ★★★:
9 ★★★★:
16 |
Enchanted
| |
E Tier
|
Body Armor
|
Base:
4 ★:
★★:
★★★:
★★★★:
|
| |
E Tier
|
Legwear
|
Base:
4 ★:
★★:
★★★:
★★★★:
|
| |
E Tier
|
Headgear
|
Base:
4 ★:
★★:
★★★:
★★★★:
|
| |
E Tier
|
Headgear
|
Base:
3 ★:
★★:
★★★:
★★★★:
|
Prevents Horriblin from attacking.
|
Koltin Shop
|
E Tier
|
Headgear
|
Base:
1 ★:
3 ★★:
5 ★★★:
7 ★★★★:
12 |
Yiga Clan Hideout
| |
E Tier
|
Legwear
|
Base:
1 ★:
3 ★★:
5 ★★★:
7 ★★★★:
12 |
Yiga Clan Maritta Branch
| |
E Tier
|
Headgear
|
Base:
4 ★:
7 ★★:
12 ★★★:
18 ★★★★:
28 |
|
Hebra Dark Skeleton
|
E Tier
|
Legwear
|
Base:
4 ★:
6 ★★:
10 ★★★:
15 ★★★★:
24 |
none
|
Hyrule Castle
|
E Tier
|
Headgear
|
Base:
4 ★:
6 ★★:
10 ★★★:
15 ★★★★:
24 |
none
|
Hyrule Castle
|
E Tier
|
Body Armor
|
Base:
4 ★:
6 ★★:
10 ★★★:
15 ★★★★:
24 |
none
|
Hyrule Castle
|
E Tier
|
Headgear
|
Base:
2 ★:
4 ★★:
6 ★★★:
9 ★★★★:
16 |
Bargainer Statue
| |
E Tier
|
Headgear
|
Base:
2 ★:
★★:
★★★:
★★★★:
|
|
Statue of the Eighth Heroine
|
E Tier
|
Body Armor
|
Base:
2 ★:
★★:
★★★:
★★★★:
|
|
Dueling Peaks South Cave
|
E Tier
|
Legwear
|
Base:
2 ★:
★★:
★★★:
★★★★:
|
|
Cape Cales Cliffbase Cave
|
E Tier
|
Legwear
|
Base:
4 ★:
7 ★★:
12 ★★★:
18 ★★★★:
28 |
|
Eldin Dark Skeleton
|
E Tier
|
Body Armor
|
Base:
4 ★:
7 ★★:
12 ★★★:
18 ★★★★:
28 |
|
Gerudo Dark Skeleton
|
E Tier
|
Body Armor
|
Base:
1 ★:
3 ★★:
5 ★★★:
7 ★★★★:
12 |
Akkala Ancient Tech Lab
| |
E Tier
|
Headgear
|
Base:
3 ★:
5 ★★:
8 ★★★:
12 ★★★★:
20 |
|
Bargainer Statue
|
E Tier
|
Headgear
|
Base:
3 ★:
5 ★★:
8 ★★★:
12 ★★★★:
20 |
|
Bargainer Statue
|
E Tier
|
Headgear
|
Base:
3 ★:
5 ★★:
8 ★★★:
12 ★★★★:
20 |
|
Bargainer Statue
|
E Tier
|
Headgear
|
Base:
3 ★:
5 ★★:
8 ★★★:
12 ★★★★:
20 |
|
Tingel Island Chasm Bargainer Statue
|
E Tier
|
Headgear
|
Base:
3 ★:
5 ★★:
8 ★★★:
12 ★★★★:
20 |
|
Enchanted
|
E Tier
|
Body Armor
|
Base:
3 ★:
5 ★★:
8 ★★★:
12 ★★★★:
20 |
|
Enchanted
|
E Tier
|
Legwear
|
Base:
3 ★:
5 ★★:
8 ★★★:
12 ★★★★:
20 |
|
Enchanted
|
E Tier
|
Legwear
|
Base:
3 ★:
5 ★★:
8 ★★★:
12 ★★★★:
20 |
|
Gerudo Canyon Mine Bargainer Statue
|
E Tier
|
Legwear
|
Base:
3 ★:
5 ★★:
8 ★★★:
12 ★★★★:
20 |
|
Bargainer Statue
|
E Tier
|
Legwear
|
Base:
3 ★:
5 ★★:
8 ★★★:
12 ★★★★:
20 |
|
Bargainer Statue
|
E Tier
|
Legwear
|
Base:
3 ★:
5 ★★:
8 ★★★:
12 ★★★★:
20 |
|
Bargainer Statue
|
E Tier
|
Body Armor
|
Base:
3 ★:
5 ★★:
8 ★★★:
12 ★★★★:
20 |
|
Lindor Canyon Mine Bargainer Statue
|
E Tier
|
Body Armor
|
Base:
3 ★:
5 ★★:
8 ★★★:
12 ★★★★:
20 |
|
Bargainer Statue
|
E Tier
|
Body Armor
|
Base:
3 ★:
5 ★★:
8 ★★★:
12 ★★★★:
20 |
|
Bargainer Statue
|
E Tier
|
Body Armor
|
Base:
3 ★:
5 ★★:
8 ★★★:
12 ★★★★:
20 |
|
Bargainer Statue
|
F Tier
|
Headgear
|
Base:
★:
★★:
★★★:
★★★★:
|
| |
F Tier
|
Headgear
|
Base:
3 ★:
★★:
★★★:
★★★★:
|
|
The Mayoral Election
|
F Tier
|
Headgear
|
Base:
3 ★:
★★:
★★★:
★★★★:
|
|
Koltin Shop
|
F Tier
|
Headgear
|
Base:
3 ★:
★★:
★★★:
★★★★:
|
Prevents Moblin from attacking.
|
Koltin Shop
|
F Tier
|
Headgear
|
Base:
3 ★:
5 ★★:
8 ★★★:
12 ★★★★:
20 |
none
|
Lookout Landing Armor Shop
|
F Tier
|
Legwear
|
Base:
3 ★:
5 ★★:
8 ★★★:
12 ★★★★:
20 |
none
|
Lookout Landing Armor Shop
|
F Tier
|
Body Armor
|
Base:
3 ★:
5 ★★:
8 ★★★:
12 ★★★★:
20 |
none
|
Lookout Landing Armor Shop
|
? Tier
|
Body Armor
|
Base:
4 ★:
7 ★★:
12 ★★★:
18 ★★★★:
28 |
|
Bargainer Statue
|
? Tier
|
Legwear
|
Base:
1 ★:
★★:
★★★:
★★★★:
|
|
Room of Awakening
|
? Tier
|
Body Armor
|
Base:
1 ★:
★★:
★★★:
★★★★:
|
|
Pondside Cave
|
? Tier
|
Body Armor
|
Base:
5 ★:
8 ★★:
14 ★★★:
22 ★★★★:
32 |
|
Hyrule Castle
|
? Tier
|
Headgear
|
Base:
1 ★:
★★:
★★★:
★★★★:
|
|
Floating Colosseum
|
? Tier
|
Headgear
|
Base:
4 ★:
7 ★★:
12 ★★★:
18 ★★★★:
28 |
|
Gerudo Town Starlight Memories
|


Advertisement
Popular Guides
Main Guides
Weapons, Armor, Fuse Guides
Locations