
Stats & Training
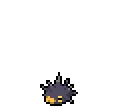
Defense and Attack carry most of Koffing's stat budget. Speed's the obvious dump stat. Common in the wild and yields 1 Defense EV. Follows a medium-fast 1M XP curve.
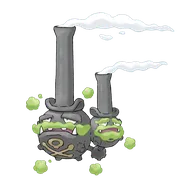
Its body is full of poisonous gas. It floats into garbage dumps, seeking out the fumes of raw, rotting trash.
It adores polluted air. Some claim that Koffing used to be more plentiful in the Galar region than they are now.
Koffing Weakness
Ground and Psychic moves hit Koffing for super-effective damage. 5 resistances help offset the weaknesses. Levitate grants an additional Ground immunity, reshaping the matchup chart. Koffing's physical bulk (base 95 Def) helps cushion physical weakness hits, but special attackers are the bigger threat.
| Damage | Types |
|---|---|
| 2x (Weak) | Ground, Psychic |
| 0.5x (Resist) | Grass, Fighting, Poison, Bug, Fairy |
Stunfisk GroundElectric | A | |
Available Moves Moves
Damage vs Koffing View Stunfisk builds →Mud Shot 2x87-104%KO Mud-Slap 2x33-40% | ||
Diggersby NormalGround | B | |
Available Moves Moves
Damage vs Koffing View Diggersby builds →Mud Shot 2x63-75% Mud-Slap 2x29-35% | ||
Mudbray Ground | C | |
Available Moves Moves
Damage vs Koffing View Mudbray builds →Bulldoze 2x67-81% Mud-Slap 2x29-35% | ||
Bronzor SteelPsychic | D | |
Palpitoad WaterGround | D | |
Stunfisk GroundElectric | A | |
Available Moves Moves
Damage vs Koffing View Stunfisk builds →Mud Shot 2x85-100%KO Mud-Slap 2x33-40% | ||
Diggersby NormalGround | B | |
Available Moves Moves
Damage vs Koffing View Diggersby builds →Bulldoze 2x42-50% Mud Shot 2x58-70% Sand Tomb 2x28-35% Mud-Slap 2x25-30% | ||
Onix RockGround | C | |
Mudbray Ground | C | |
Available Moves Moves
Damage vs Koffing View Mudbray builds →Bulldoze 2x63-75% Sand Tomb 2x37-45% Mud-Slap 2x25-30% | ||
Bronzor SteelPsychic | D | |
Stunfisk GroundElectric | A | |
Available Moves Moves
Damage vs Koffing View Stunfisk builds →Mud Shot 2x85-100%KO Mud-Slap 2x33-41% | ||
Diggersby NormalGround | B | |
Available Moves Moves
Damage vs Koffing View Diggersby builds →Bulldoze 2x42-50% Mud Shot 2x61-73% Sand Tomb 2x26-32% Mud-Slap 2x26-32% | ||
Onix RockGround | C | |
Mudbray Ground | C | |
Available Moves Moves
Damage vs Koffing View Mudbray builds →Bulldoze 2x65-77% Sand Tomb 2x38-45% Mud-Slap 2x23-27% | ||
Bronzor SteelPsychic | D | |
Excadrill GroundSteel | A | |
Available Moves Moves
Damage vs Koffing View Excadrill builds →Dig 2x10⁷-127%KO Mud Shot 2x62-74% Sand Tomb 2x51-60% Mud-Slap 2x24-28% | ||
Hippowdon Ground | A | |
Available Moves Moves
Damage vs Koffing View Hippowdon builds →Dig 2x93-109%KO Mud Shot 2x74-88% Sand Tomb 2x41-49% | ||
Stunfisk GroundElectric | A | |
Available Moves Moves
Damage vs Koffing View Stunfisk builds →Dig 2x62-74% Mud Shot 2x86-102%KO Mud-Slap 2x33-39% | ||
Lunatone RockPsychic | A | |
Available Moves Moves
Damage vs Koffing View Lunatone builds →Psychic 2x155-184%KO Psyshock 2x138-162%KO Confusion 2x89-106%KO Sand Tomb 2x18-21% | ||
Bronzor SteelPsychic | D | |
Available Moves Moves
Damage vs Koffing View Bronzor builds →Extrasensory 2x56-67% Confusion 2x39-46% | ||
Excadrill GroundSteel | A | |
Available Moves Moves
Damage vs Koffing View Excadrill builds →Dig 2x10⁷-127%KO Mud Shot 2x62-73% Sand Tomb 2x50-60% Mud-Slap 2x24-30% | ||
Hippowdon Ground | A | |
Available Moves Moves
Damage vs Koffing View Hippowdon builds →Dig 2x93-110%KO Mud Shot 2x76-90% Sand Tomb 2x42-50% | ||
Stunfisk GroundElectric | A | |
Available Moves Moves
Damage vs Koffing View Stunfisk builds →Dig 2x62-73% Mud Shot 2x88-103%KO Mud-Slap 2x33-40% | ||
Lunatone RockPsychic | A | |
Available Moves Moves
Damage vs Koffing View Lunatone builds →Psychic 2x156-183%KO Psyshock 2x138-163%KO Confusion 2x88-103%KO Sand Tomb 2x17-20% | ||
Bronzor SteelPsychic | D | |
Available Moves Moves
Damage vs Koffing View Bronzor builds →Extrasensory 2x59-70% Confusion 2x37-43% | ||
Excadrill GroundSteel | A | |
Available Moves Moves
Damage vs Koffing View Excadrill builds →Dig 2x10⁴-122%KO Bulldoze 2x81-95% Mud Shot 2x59-70% Sand Tomb 2x49-58% | ||
Hippowdon Ground | A | |
Available Moves Moves
Damage vs Koffing View Hippowdon builds →Dig 2x91-107%KO Bulldoze 2x67-80% Mud Shot 2x74-89% Sand Tomb 2x41-49% | ||
Bronzong SteelPsychic | C | |
Available Moves Moves
Damage vs Koffing View Bronzong builds →Extrasensory 2x116-138%KO Bulldoze 2x38-45% Confusion 2x74-89% | ||
Sandaconda Ground | C | |
Available Moves Moves
Damage vs Koffing View Sandaconda builds →Dig 2x86-101%KO Bulldoze 2x64-77% Mud Shot 2x69-83% Sand Tomb 2x39-46% | ||
Seismitoad WaterGround | C | |
Available Moves Moves
Damage vs Koffing View Seismitoad builds →Dig 2x78-92% Bulldoze 2x59-70% Mud Shot 2x88-104%KO | ||
Excadrill GroundSteel | A | |
Available Moves Moves
Damage vs Koffing View Excadrill builds →Dig 2x10⁵-124%KO Bulldoze 2x79-94% Mud Shot 2x60-71% Sand Tomb 2x47-56% | ||
Hippowdon Ground | A | |
Available Moves Moves
Damage vs Koffing View Hippowdon builds →Earthquake 2x112-132%KO Dig 2x89-106%KO Bulldoze 2x70-82% Mud Shot 2x75-88% | ||
Bronzong SteelPsychic | C | |
Available Moves Moves
Damage vs Koffing View Bronzong builds →Extrasensory 2x120-141%KO Bulldoze 2x38-45% Confusion 2x75-88% | ||
Sandaconda Ground | C | |
Available Moves Moves
Damage vs Koffing View Sandaconda builds →Dig 2x87-103%KO Bulldoze 2x67-79% Mud Shot 2x72-85% Sand Tomb 2x39-47% | ||
Seismitoad WaterGround | C | |
Available Moves Moves
Damage vs Koffing View Seismitoad builds →Dig 2x79-94% Bulldoze 2x60-71% Mud Shot 2x87-103%KO | ||
Excadrill GroundSteel | A | |
Available Moves Moves
Damage vs Koffing View Excadrill builds →Dig 2x10⁷-127%KO Drill Run 2x10⁷-127%KO Stomping Tantrum 2x101-119%KO Bulldoze 2x80-95% | ||
Hippowdon Ground | A | |
Available Moves Moves
Damage vs Koffing View Hippowdon builds →Earthquake 2x114-135%KO Dig 2x92-108%KO Stomping Tantrum 2x86-103%KO Bulldoze 2x68-81% | ||
Bronzong SteelPsychic | C | |
Available Moves Moves
Damage vs Koffing View Bronzong builds →Extrasensory 2x119-141%KO Bulldoze 2x38-45% Confusion 2x76-89% | ||
Flygon GroundDragon | C | |
Available Moves Moves
Damage vs Koffing View Flygon builds →Earthquake 2x10³-122%KO Earth Power 2x135-159%KO Dig 2x82-97% Bulldoze 2x64-76% | ||
Sandaconda Ground | C | |
Available Moves Moves
Damage vs Koffing View Sandaconda builds →Dig 2x86-103%KO Bulldoze 2x66-78% Mud Shot 2x73-86% Sand Tomb 2x41-49% | ||
In Sword & Shield, Hatterene can KO Koffing with Psychic (284-334%). Excadrill threatens a KO with Earthquake (160-189%). Krookodile's Earthquake also KOs at 136-160%.
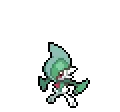
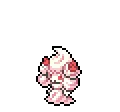
Hatterene PsychicFairy | A | |
Recommended Build AbilityMagic Bounce ItemLeftovers NatureQuiet Moves
Damage vs Koffing View Hatterene builds →Dazzling Gleam63-74% Psychic 2x284-334%KO | ||
Excadrill GroundSteel | A | |
Recommended Build AbilityMold Breaker ItemLeftovers NatureJolly Moves
Damage vs Koffing View Excadrill builds →Earthquake 2x160-189%KO Rapid Spin27-32% | ||
Krookodile GroundDark | B | |
Recommended Build AbilityIntimidate ItemChoice Scarf NatureJolly Moves
Damage vs Koffing View Krookodile builds →Earthquake 2x136-160%KO Knock Off44-52% | ||
Gardevoir PsychicFairy | B | |
Recommended Build AbilitySynchronize ItemLeftovers NatureCalm Moves View Gardevoir builds →
| ||
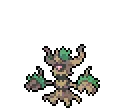
Sword & Shield Evolution
One evolution ahead. Koffing grows into Weezing through a straightforward two-stage chain. A decent partner pool for breeding via one egg group. Eggs are average hatch time. The evolved forms gain up to 150 total stats over Koffing. View every chain in the Evolution Chart.
How to Evolve


Breeding
Breed Koffing easily with 46 breeding partners from the Indeterminate egg group. Pass egg moves like Curse, Grudge, Pain Split and 5 more to offspring.


Sword & Shield Koffing Best Moveset
Best Build
No build content available for this Pokemon in Gen 8.
Try selecting a different game/generation filter, or check back later.
Moves
Without breeding, Koffing misses out on Curse and Grudge. That's 8 egg moves adding depth that the base kit lacks. STAB comes from Belch and Sludge Wave, with coverage across 7 types rounding things out.
Level-Up Moves
TM Moves
Egg Moves
Tutor Moves
Sword & Shield Koffing Locations
A solid number of locations for Koffing with high spawn rates across mid-game routes. The sort toggle below swaps between best odds and earliest access, so you can approach it based on where you are in the game.
Best Locations to Catch Koffing in Sword & Shield
walking encounters for Koffing across 26 spots at Lv. 22-47. The catch is that Sword and Shield don't share every location, so compare what's available in your version.
Koffing Guide
Multiple options from Koffing: Weezing at level 35 and Galarian Weezing at level 35. Each branch takes the 340 BST base in a different direction.
Not a straight line. Koffing can become Weezing at level 35 and Galarian Weezing at level 35. Your choice depends on what you need.
For Sword & Shield, you can run Koffing through the first few routes without issues. 340 BST won't carry you far though. Get it to Weezing as fast as you can.
You can find Koffing in Sword & Shield. The Locations section has the full breakdown of routes and encounter details. It also appears in 19 other games across the series.
Game Availability
One of the original 151, Koffing has appeared in 20 games — most mainline games. From Red & Blue through the latest titles, it's rarely been left out of a regional Pokedex.
Click a game to view version-specific details
- Gen 1Y
 Yellow
 - Gen 1RBDebut

 Red & Blue
 - Gen 2GS

 Gold & Silver
 - Gen 2C
 Crystal
 - Gen 3RS

 Ruby & Sapphire
 - Gen 3FRLG

 FireRed & LeafGreen
 - Gen 3E
 Emerald
 - Gen 4Pt
 Platinum
 - Gen 4HGSS

 HeartGold & SoulSilver
 - Gen 4DP

 Diamond & Pearl
 - Gen 5BW

 Black & White
 - Gen 5B2W2

 Black 2 & White 2
 - Gen 6XY

 X & Y
X & Y - Gen 6ORAS

 Omega Ruby & Alpha Sapphire
 - Gen 7USUM

 Ultra Sun & Ultra Moon
 - Gen 7SM

 Sun & Moon
 - Gen 7LGPE

 Let's Go Pikachu & Eevee
 - Gen 8SwSh

 Sword & Shield
 - Gen 8PLA
 Legends: Arceus
 - Gen 8BDSP

 Brilliant Diamond & Shining Pearl
 - Gen 9SV

 Scarlet & Violet
 - Gen 9LZA
 Legends: Z-A
 - Gen 10WW

 Winds & Waves