Stats & Training
Attack leads and Speed gets almost nothing. That's Dhelmise's stat line in a nutshell. 4 stats sit in respectable range, but the spread is brutal. Very hard to catch and yields 2 Attack EVs.
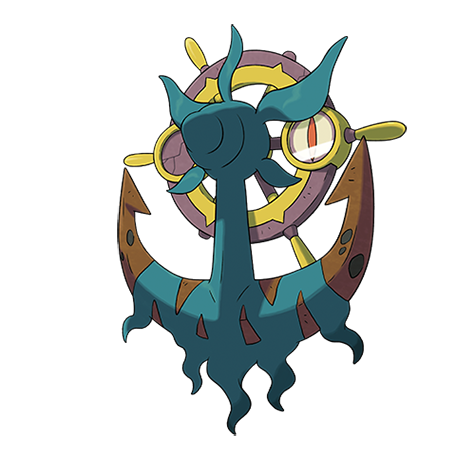
After a piece of seaweed merged with debris from a sunken ship, it was reborn as this ghost Pokémon.
After lowering its anchor, it waits for its prey. It catches large Wailord and drains their life-force.
Dhelmise Weakness
Fire, Ice, Flying, Ghost, and Dark moves hit Dhelmise for super-effective damage. The upside? Normal and Fighting-type moves can't touch it at all. 4 resistances help offset the weaknesses.
| Damage | Types |
|---|---|
| 2x (Weak) | Fire, Ice, Flying, Ghost, Dark |
| 0.5x (Resist) | Water, Electric, Grass, Ground |
| 0x (Immune) | Normal, Fighting |
Volcarona's Heat Wave hits Dhelmise for 64-75%. Lokix deals 62-73% with Sucker Punch.
Volcarona BugFire | A | |
Recommended Build AbilityFlame Body ItemGrassyseed NatureModest Moves
Damage vs Dhelmise View Volcarona builds →Heat Wave 2x64-75% | ||
Annihilape FightingGhost | A | |
Recommended Build AbilityDefiant ItemSitrus Berry NatureJolly Moves View Annihilape builds →
| ||
Lokix BugDark | A | |
Recommended Build AbilityTintedlens ItemHeavy-Duty Boots NatureAdamant Moves
Damage vs Dhelmise View Lokix builds →Knock Off 2x59-69% U Turn31-37% Sucker Punch 2x62-73% | ||
Arcanine Fire | A | |
Recommended Build AbilityIntimidate ItemHeavy-Duty Boots NatureJolly Moves
Damage vs Dhelmise View Arcanine builds →Flare Blitz 2x10²-121%KO | ||
Pelipper Water | B | |
Recommended Build AbilityDrizzle ItemFocus Sash NatureTimid Moves
Damage vs Dhelmise View Pelipper builds →Hurricane 2x62-73% | ||
Evolution
No evolution chain to worry about here. Dhelmise is a standalone Pokemon with no compatible partners for breeding through one egg group. Eggs come out average hatch time. View every chain in the Evolution Chart.
How to Evolve

Breeding
Dhelmise is genderless and can only breed with Ditto. Part of the Mineral egg group.
 Ditto only
Dhelmise Best Moveset
This build takes hits and hits back. Assault Vest provides a special bulk boost with no status moves allowed, Steelworker supports the gameplan, and max HP and Attack EVs mean Dhelmise doesn't crumble to chip damage. Plus the remaining moves backing it up.
Best Build
Dhelmise best EVs are Defense and HP
Bulky Support Moveset
- Power Whip
- Rapid Spin
- Poltergeist
- Knock Off
Recommended Teammates
Doubles Physical Tank Moveset
- Power Whip
- Anchor Shot
- Phantom Force
- Protect
Recommended Teammates
Physical Wallbreaker Moveset
- Poltergeist
- Power Whip
- Anchor Shot
- Liquidation
Recommended Teammates
Doubles Physical Tank Moveset
- Anchor Shot
- Earthquake
- Protect
- Shadow Claw
Recommended Teammates
Physical Tank Moveset
- Power Whip
- Anchor Shot
- Rapid Spin
- Earthquake
Recommended Teammates
Doubles Physical Tank Moveset
- Anchor Shot
- Earthquake
- Protect
- Shadow Claw
Recommended Teammates
Physical Tank Moveset
- Power Whip
- Anchor Shot
- Rapid Spin
- Earthquake
Recommended Teammates
Moves
Level-up moves are just the starting point for Dhelmise. TMs unlock coverage across 8 types and turn a straightforward STAB kit around Solar Blade and Power Whip into something with actual range.
Level-Up Moves
TM Moves
Egg Moves
Tutor Moves
Level-up moves are just the starting point for Dhelmise. TMs unlock coverage across 9 types and turn a straightforward STAB kit around Power Whip and Solar Beam into something with actual range.
Level-up moves are just the starting point for Dhelmise. TMs unlock coverage across 9 types and turn a straightforward STAB kit around Power Whip and Solar Beam into something with actual range.
Dhelmise Locations
Dhelmise appears at moderate rates across 24 spots in early-game routes. Sort by Best below if you want the highest rate, or Earliest if you want the quickest access point in your playthrough.
Best Locations to Catch Dhelmise in Sword & Shield
walking and fishing encounters for Dhelmise across 24 spots at Lv. 13-65. The catch is that Shield and Sword don't share every location, so compare what's available in your version.
Dhelmise's scattered across 4 spots in early-game fishing spots with high spawn rates. Check the list below for the closest location to wherever you are in the game. This one's quick.
Best Locations to Catch Dhelmise in Ultra Sun & Ultra Moon
Catching Dhelmise here means fishing. All 4 encounters require Super Rod at Lv. 10-49, and there aren't any overworld spawns in this game.
Dhelmise appears at moderate rates across 4 spots in early-game fishing spots. Sort by Best below if you want the highest rate, or Earliest if you want the quickest access point in your playthrough.
Best Locations to Catch Dhelmise in Sun & Moon
Dhelmise is a fishing-only catch in this game. 4 spots at Lv. 10-43 using Super Rod, so bring the right rod and check the rates on each location.
Dhelmise Guide
We rate Dhelmise C-Tier: a situational pick that fills a niche. At 517 BST, it fits the wallbreaker role. Base 131 Attack stands out.
Watch for Arcanine (Fire), Walrein (Ice), and Staraptor (Flying) when using Dhelmise. They all hit it super-effectively with STAB. Ghost and Dark-type attackers are also a problem. With 5 weakness types, most competitive teams carry at least one counter. At base 40 Speed, Dhelmise won't outrun any of these threats so switching to a resist is usually the safer play.
Steelworker this Pokémon's Steel moves have 1.5× power. That's the one you want on Dhelmise. It's the only ability Dhelmise has.
Base 40 Speed is low. Priority moves or Trick Room are the way to go. On offense, Dhelmise is a physical attacker with base 131 Attack. Defensively? Enough bulk to take a hit or two. Best used as a wallbreaker.
Dhelmise has answers, but so do you. Status moves (Toxic, Will-O-Wisp) wear it down. Setup sweepers can use it as a boost opportunity. Special attackers bypass its physical bulk.
Game Availability
Dhelmise joined the series in Sun & Moon and has been available in 3 titles so far. With 4 generations of appearances, it's established itself despite the later start.
Click a game to view version-specific details
- Gen 1Y
 Yellow
 - Gen 1RB

 Red & Blue
 - Gen 2GS

 Gold & Silver
 - Gen 2C
 Crystal
 - Gen 3RS

 Ruby & Sapphire
 - Gen 3FRLG

 FireRed & LeafGreen
 - Gen 3E
 Emerald
 - Gen 4Pt
 Platinum
 - Gen 4HGSS

 HeartGold & SoulSilver
 - Gen 4DP

 Diamond & Pearl
 - Gen 5BW

 Black & White
 - Gen 5B2W2

 Black 2 & White 2
 - Gen 6XY

 X & Y
X & Y - Gen 6ORAS

 Omega Ruby & Alpha Sapphire
 - Gen 7USUM

 Ultra Sun & Ultra Moon
 - Gen 7SMDebut

 Sun & Moon
 - Gen 7LGPE

 Let's Go Pikachu & Eevee
 - Gen 8SwSh

 Sword & Shield
 - Gen 8PLA
 Legends: Arceus
 - Gen 8BDSP

 Brilliant Diamond & Shining Pearl
 - Gen 9SV

 Scarlet & Violet
 - Gen 9LZA
 Legends: Z-A
 - Gen 10WW

 Winds & Waves