Stats & Training
Everything pushes toward physical damage here. Zangoose's Attack does the work, Defense pays the price. But you're still getting 2 Attack EVs per KO. Moderately hard to find, on a standard growth curve.
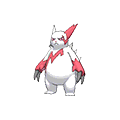
Memories of battling its archrival Seviper are etched into every cell of Zangoose’s body. This Pokémon adroitly dodges attacks with incredible agility.
Zangoose usually stays on all fours, but when angered, it gets up on its hind legs and extends its claws. This Pokémon shares a bitter rivalry with Seviper that dates back over generations.
Zangoose Weakness
Zangoose's Normal typing leaves it vulnerable to Fighting. It shrugs off Ghost-type attacks completely. Zangoose leans offensive (base 115 Atk) rather than trying to tank its weaknesses.
| Damage | Types |
|---|---|
| 2x (Weak) | Fighting |
| 0x (Immune) | Ghost |
Infernape FireFighting | B | |
Obtain MethodEvolve Chimchar (Route 101 Gift) Available Moves Moves
Damage vs Zangoose View Infernape builds →Close Combat 2x143-168%KO Focus Blast 2x143-168%KO Brick Break 2x91-107%KO Low Sweep 2x79-93% | ||
Blaziken FireFighting | B | |
Obtain MethodEvolve Torchic (Route 101 Gift) Available Moves Moves
Damage vs Zangoose View Blaziken builds →High Jump Kick 2x176-207%KO Focus Blast 2x149-176%KO Sky Uppercut 2x115-136%KO Brick Break 2x101-120%KO | ||
Scrafty DarkFighting | B | |
Available Moves Moves
Damage vs Zangoose View Scrafty builds →Focus Punch 2x158-186%KO High Jump Kick 2x138-162%KO Focus Blast 2x76-89% Brick Break 2x80-95% | ||
Heracross BugFighting | C | |
Available Moves Moves
Damage vs Zangoose View Heracross builds →Close Combat 2x167-197%KO Focus Blast 2x70-83% Brick Break 2x10⁵-124%KO Rock Smash 2x57-67% | ||
Emboar FireFighting | C | |
Obtain MethodEvolve Tepig (Route 101 Gift) Available Moves Moves
Damage vs Zangoose View Emboar builds →Focus Blast 2x139-164%KO Hammer Arm 2x138-162%KO Brick Break 2x10³-122%KO Low Sweep 2x91-107%KO | ||
Makuhita Fighting | D | |
Available Moves Moves
Damage vs Zangoose View Makuhita builds →Force Palm 2x52-61% Arm Thrust 2x19-22% | ||
Timburr Fighting | D | |
Timburr Fighting | D | |
Makuhita Fighting | D | |
Available Moves Moves
Damage vs Zangoose View Makuhita builds →Vital Throw 2x57-67% Force Palm 2x50-59% Arm Thrust 2x16-20% | ||
Throh Fighting | C | |
Available Moves Moves
Damage vs Zangoose View Throh builds →Vital Throw 2x79-93% Low Sweep 2x73-87% Revenge 2x70-83% Storm Throw 2x70-83% | ||
Sawk Fighting | C | |
Available Moves Moves
Damage vs Zangoose View Sawk builds →Brick Break 2x101-120%KO Low Sweep 2x90-107%KO Karate Chop 2x70-83% Rock Smash 2x57-67% | ||
Scraggy DarkFighting | D | |
Available Moves Moves
Damage vs Zangoose View Scraggy builds →Brick Break 2x70-83% Low Sweep 2x62-73% Power-Up Punch 2x39-47% Rock Smash 2x39-47% | ||
Mankey Fighting | D | |
Available Moves Moves
Damage vs Zangoose View Mankey builds →Low Sweep 2x64-77% Karate Chop 2x50-60% Rock Smash 2x42-50% Power-Up Punch 2x42-50% | ||
Machop Fighting | D | |
Available Moves Moves
Damage vs Zangoose View Machop builds →Vital Throw 2x68-80% Wake-Up Slap 2x68-80% Low Sweep 2x64-77% Revenge 2x59-70% | ||
Throh Fighting | C | |
Available Moves Moves
Damage vs Zangoose View Throh builds →Vital Throw 2x83-98% Low Sweep 2x77-92% Revenge 2x72-85% Storm Throw 2x72-85% | ||
Sawk Fighting | C | |
Available Moves Moves
Damage vs Zangoose View Sawk builds →Brick Break 2x10⁴-123%KO Low Sweep 2x91-107%KO Karate Chop 2x72-85% Rock Smash 2x59-69% | ||
Scraggy DarkFighting | D | |
Available Moves Moves
Damage vs Zangoose View Scraggy builds →High Jump Kick 2x120-142%KO Brick Break 2x72-85% Low Sweep 2x61-73% Power-Up Punch 2x40-47% | ||
Mankey Fighting | D | |
Available Moves Moves
Damage vs Zangoose View Mankey builds →Low Sweep 2x64-76% Karate Chop 2x51-60% Rock Smash 2x42-51% Power-Up Punch 2x42-51% | ||
Machop Fighting | D | |
Available Moves Moves
Damage vs Zangoose View Machop builds →Vital Throw 2x69-82% Wake-Up Slap 2x69-82% Low Sweep 2x64-76% Revenge 2x61-73% | ||
Throh Fighting | C | |
Available Moves Moves
Damage vs Zangoose View Throh builds →Vital Throw 2x83-98% Low Sweep 2x78-92% Revenge 2x72-86% Storm Throw 2x72-86% | ||
Sawk Fighting | C | |
Available Moves Moves
Damage vs Zangoose View Sawk builds →Brick Break 2x10⁶-125%KO Low Sweep 2x93-110%KO Karate Chop 2x70-83% Rock Smash 2x57-68% | ||
Scraggy DarkFighting | D | |
Available Moves Moves
Damage vs Zangoose View Scraggy builds →High Jump Kick 2x121-143%KO Brick Break 2x70-83% Low Sweep 2x62-74% Power-Up Punch 2x40-48% | ||
Mankey Fighting | D | |
Available Moves Moves
Damage vs Zangoose View Mankey builds →Low Sweep 2x65-77% Karate Chop 2x50-59% Rock Smash 2x43-50% Power-Up Punch 2x43-50% | ||
Machop Fighting | D | |
Available Moves Moves
Damage vs Zangoose View Machop builds →Submission 2x80-95% Vital Throw 2x70-83% Wake-Up Slap 2x70-83% Low Sweep 2x65-77% | ||
Heracross BugFighting | C | |
Available Moves Moves
Damage vs Zangoose View Heracross builds →Close Combat 2x169-199%KO Focus Blast 2x72-85% Brick Break 2x10⁶-125%KO Rock Smash 2x59-69% | ||
Throh Fighting | C | |
Available Moves Moves
Damage vs Zangoose View Throh builds →Focus Blast 2x60-72% Vital Throw 2x84-99% Low Sweep 2x78-92% Revenge 2x72-85% | ||
Sawk Fighting | C | |
Available Moves Moves
Damage vs Zangoose View Sawk builds →Focus Blast 2x60-72% Brick Break 2x10⁶-125%KO Low Sweep 2x93-110%KO Karate Chop 2x72-85% | ||
Scraggy DarkFighting | D | |
Available Moves Moves
Damage vs Zangoose View Scraggy builds →High Jump Kick 2x122-143%KO Focus Blast 2x66-78% Brick Break 2x70-83% Low Sweep 2x63-74% | ||
Mankey Fighting | D | |
Available Moves Moves
Damage vs Zangoose View Mankey builds →Focus Blast 2x66-78% Cross Chop 2x99-116%KO Low Sweep 2x64-76% Karate Chop 2x51-60% | ||
Heracross BugFighting | C | |
Available Moves Moves
Damage vs Zangoose View Heracross builds →Close Combat 2x164-193%KO Focus Blast 2x70-83% Brick Break 2x10⁴-123%KO Rock Smash 2x55-66% | ||
Throh Fighting | C | |
Available Moves Moves
Damage vs Zangoose View Throh builds →Focus Blast 2x58-68% Brick Break 2x87-103%KO Vital Throw 2x82-96% Low Sweep 2x76-90% | ||
Sawk Fighting | C | |
Available Moves Moves
Damage vs Zangoose View Sawk builds →Focus Blast 2x58-68% Brick Break 2x10⁴-123%KO Low Sweep 2x91-107%KO Karate Chop 2x70-83% | ||
Scraggy DarkFighting | D | |
Available Moves Moves
Damage vs Zangoose View Scraggy builds →High Jump Kick 2x117-138%KO Focus Blast 2x65-77% Brick Break 2x69-81% Low Sweep 2x59-70% | ||
Mankey Fighting | D | |
Available Moves Moves
Damage vs Zangoose View Mankey builds →Focus Blast 2x65-77% Cross Chop 2x95-112%KO Brick Break 2x72-85% Low Sweep 2x63-74% | ||
In Omega Ruby & Alpha Sapphire, Breloom's Mach Punch hits Zangoose for 59-69%.
Breloom GrassFighting | B | |
Recommended Build AbilityTechnician ItemMiracleseed NatureJolly Moves
Damage vs Zangoose View Breloom builds →Bullet Seed18-22% Mach Punch 2x59-69% | ||
Omega Ruby & Alpha Sapphire Evolution
Zangoose doesn't evolve, so breeding's where the action is. You'll find a massive partner pool across one egg group, and eggs are average hatch time. It's got 14 egg moves worth looking into. View every chain in the Evolution Chart.
How to Evolve

Breeding
Breed Zangoose easily with 200 breeding partners from the Ground egg group. Pass egg moves like Counter, Curse, Disable and 11 more to offspring.


Omega Ruby & Alpha Sapphire Zangoose Best Moveset
Toxic Orb buys the setup turn. Zangoose clicks Swords Dance, then starts cleaning with Facade and the remaining moves. Adamant nature with max Attack without Speed EVs makes sure nothing tanks a boosted hit comfortably.
Best Build
Zangoose best EVs are Attack and Sp. Def
Physical Attacker Moveset
- Facade
- Quick Attack
- Swords Dance
- Shadow Claw
Recommended Teammates
Moves
Breadth over depth defines this movepool. Zangoose won't stack one type's damage ceiling, but coverage across 14 types means it always has an effective option. Last Resort and Double-Edge anchor the STAB core.
Level-Up Moves
TM Moves
Egg Moves
Tutor Moves
Transfer Moves
Omega Ruby & Alpha Sapphire Zangoose Locations
1 encounter spots for Zangoose at moderate rates starting from mid-game routes. Best and Earliest sort options below help narrow down your approach based on odds vs. Accessibility.
Best Locations to Catch Zangoose in Omega Ruby & Alpha Sapphire
Zangoose Guide
In Omega Ruby & Alpha Sapphire, Zangoose works as a cannon with 458 BST behind it. C-Tier on our list: a niche pick in Omega Ruby & Alpha Sapphire's meta. Facade with Toxic Orb is the standard set.
In Omega Ruby & Alpha Sapphire, watch for Blaziken (Fighting) when using Zangoose. They all hit it super-effectively with STAB. Only 1 weakness means fewer dedicated counters to worry about.
Immunity prevents poison. That's the one you want on Zangoose. Toxic Boost is the hidden ability. Niche, but it has its uses.
Zangoose is a physical attacker with base 115 Attack. Speed tells the real story. Base 90 Speed is workable. Faster than some, slower than many. Fits the cannon role.
For Omega Ruby & Alpha Sapphire, Zangoose has answers, but so do you. Super-effective STAB from faster Pokemon is the simplest answer. Fighting-type attackers hit hardest.
Game Availability
Debuting in Ruby & Sapphire, Zangoose appears in 15 games across 8 generations. A reliable presence in most mainline games, typically found through wild encounters.
Click a game to view version-specific details
- Gen 1Y
 Yellow
 - Gen 1RB

 Red & Blue
 - Gen 2GS

 Gold & Silver
 - Gen 2C
 Crystal
 - Gen 3RSDebut

 Ruby & Sapphire
 - Gen 3FRLG

 FireRed & LeafGreen
 - Gen 3E
 Emerald
 - Gen 4Pt
 Platinum
 - Gen 4HGSS

 HeartGold & SoulSilver
 - Gen 4DP

 Diamond & Pearl
 - Gen 5BW

 Black & White
 - Gen 5B2W2

 Black 2 & White 2
 - Gen 6XY

 X & Y
X & Y - Gen 6ORAS

 Omega Ruby & Alpha Sapphire
 - Gen 7USUM

 Ultra Sun & Ultra Moon
 - Gen 7SM

 Sun & Moon
 - Gen 7LGPE

 Let's Go Pikachu & Eevee
 - Gen 8SwSh

 Sword & Shield
 - Gen 8PLA
 Legends: Arceus
 - Gen 8BDSP

 Brilliant Diamond & Shining Pearl
 - Gen 9SV

 Scarlet & Violet
 - Gen 9LZA
 Legends: Z-A
 - Gen 10WW

 Winds & Waves