Stats & Training
Sandshrew's all-in on Defense at the expense of Sp. Atk. The physical lean is obvious from the bars. Yields 1 Defense EV and follows a medium-fast 1M XP curve.
It loves to bathe in the grit of dry, sandy areas. By sand bathing, this Pokémon rids itself of dirt and moisture clinging to its body.
It burrows into the ground to create its nest. If hard stones impede its tunneling, it uses its sharp claws to scatter them and then carries on digging.
Sandshrew Weakness
Sandshrew's Ice/Steel typing leaves it vulnerable to Fire, Fighting, and Ground. Fire and Fighting hits land at 4x, so they're the biggest threat. It shrugs off Poison-type attacks completely. 8 resistances give it solid defensive coverage on top of that. Sandshrew's physical bulk (base 90 Def) helps cushion physical weakness hits, but special attackers are the bigger threat.
| Damage | Types |
|---|---|
| 4x (Critical) | Fire, Fighting |
| 2x (Weak) | Ground |
| 0.5x (Resist) | Normal, Grass, Flying, Psychic, Bug, Dragon, Fairy |
| 0.25x (Resist) | Ice |
| 0x (Immune) | Poison |
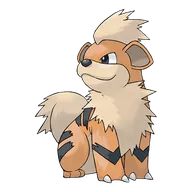 Growlithe Fire | D | |
Available Moves Moves
Damage vs Sandshrew View Growlithe builds →Flame Wheel 4x100-118%KO Ember 4x127-150%KO | ||
 Sizzlipede FireBug | D | |
Available Moves Moves
Damage vs Sandshrew View Sizzlipede builds →Flame Wheel 4x100-118%KO Ember 4x100-118%KO | ||
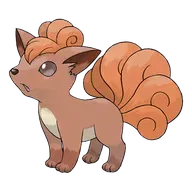 Vulpix Fire | D | |
Available Moves Moves
Damage vs Sandshrew View Vulpix builds →Incinerate 4x145-171%KO Ember 4x100-118%KO | ||
 Pancham Fighting | D | |
Available Moves Moves
Damage vs Sandshrew View Pancham builds →Low Sweep 4x127-150%KO Circle Throw 4x118-139%KO Arm Thrust 4x36-43% | ||
 Machop Fighting | D | |
Available Moves Moves
Damage vs Sandshrew View Machop builds →Low Sweep 4x118-139%KO Revenge 4x10⁹-129%KO | ||
Growlithe Fire | D | |
Available Moves Moves
Damage vs Sandshrew View Growlithe builds →Fire Fang 4x10²-120%KO Flame Wheel 4x10²-120%KO Ember 4x117-138%KO | ||
Sizzlipede FireBug | D | |
Available Moves Moves
Damage vs Sandshrew View Sizzlipede builds →Flame Wheel 4x94-111%KO Ember 4x94-111%KO | ||
Vulpix Fire | D | |
Available Moves Moves
Damage vs Sandshrew View Vulpix builds →Incinerate 4x140-166%KO Ember 4x94-111%KO | ||
Pancham Fighting | D | |
Available Moves Moves
Damage vs Sandshrew View Pancham builds →Low Sweep 4x117-138%KO Circle Throw 4x10⁹-129%KO Arm Thrust 4x38-46% | ||
Machop Fighting | D | |
Available Moves Moves
Damage vs Sandshrew View Machop builds →Vital Throw 4x125-148%KO Low Sweep 4x117-138%KO Revenge 4x10⁹-129%KO | ||
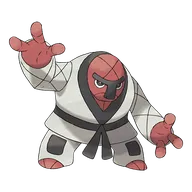 Throh Fighting | C | |
Available Moves Moves
Damage vs Sandshrew View Throh builds →Circle Throw 4x119-142%KO Revenge 4x119-142%KO | ||
Growlithe Fire | D | |
Available Moves Moves
Damage vs Sandshrew View Growlithe builds →Fire Fang 4x10⁶-125%KO Flame Wheel 4x99-117%KO Ember 4x119-142%KO | ||
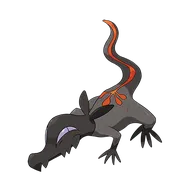 Salandit PoisonFire | D | |
Sizzlipede FireBug | D | |
Available Moves Moves
Damage vs Sandshrew View Sizzlipede builds →Flame Wheel 4x92-108%KO Ember 4x99-117%KO | ||
Vulpix Fire | D | |
Available Moves Moves
Damage vs Sandshrew View Vulpix builds →Incinerate 4x142-167%KO Ember 4x99-117%KO | ||
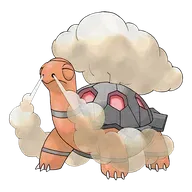 Torkoal Fire | B | |
Available Moves Moves
Damage vs Sandshrew View Torkoal builds →Lava Plume 4x274-323%KO Flame Wheel 4x110-129%KO Ember 4x142-168%KO | ||
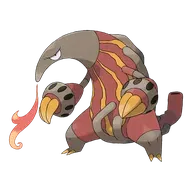 Heatmor Fire | C | |
Available Moves Moves
Damage vs Sandshrew View Heatmor builds →Fire Lash 4x158-187%KO Dig 2x53-62% Incinerate 4x241-284%KO | ||
Salandit PoisonFire | D | |
Available Moves Moves
Damage vs Sandshrew View Salandit builds →Incinerate 4x181-213%KO Ember 4x120-142%KO | ||
Sizzlipede FireBug | D | |
Available Moves Moves
Damage vs Sandshrew View Sizzlipede builds →Flame Wheel 4x87-103%KO Ember 4x98-116%KO Fire Spin 4x87-103%KO | ||
Vulpix Fire | D | |
Available Moves Moves
Damage vs Sandshrew View Vulpix builds →Flamethrower 4x208-245%KO Dig 2x29-34% Incinerate 4x142-168%KO Ember 4x98-116%KO | ||
Torkoal Fire | B | |
Available Moves Moves
Damage vs Sandshrew View Torkoal builds →Lava Plume 4x278-328%KO Flame Wheel 4x110-130%KO Ember 4x141-167%KO | ||
Heatmor Fire | C | |
Available Moves Moves
Damage vs Sandshrew View Heatmor builds →Fire Lash 4x158-186%KO Dig 2x53-62% Incinerate 4x246-291%KO | ||
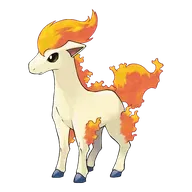 Ponyta Fire | C | |
Available Moves Moves
Damage vs Sandshrew View Ponyta builds →Flame Wheel 4x110-130%KO Flame Charge 4x94-111%KO Ember 4x115-136%KO Fire Spin 4x10⁵-124%KO | ||
Salandit PoisonFire | D | |
Available Moves Moves
Damage vs Sandshrew View Salandit builds →Incinerate 4x184-216%KO Ember 4x126-148%KO | ||
Sizzlipede FireBug | D | |
Available Moves Moves
Damage vs Sandshrew View Sizzlipede builds →Flame Wheel 4x89-105%KO Ember 4x99-118%KO Fire Spin 4x84-99% | ||
Torkoal Fire | B | |
Available Moves Moves
Damage vs Sandshrew View Torkoal builds →Flamethrower 4x300-353%KO Lava Plume 4x266-314%KO Flame Wheel 4x10⁵-123%KO Bulldoze 2x35-41% | ||
Heatmor Fire | C | |
Available Moves Moves
Damage vs Sandshrew View Heatmor builds →Fire Lash 4x152-179%KO Dig 2x50-60% Incinerate 4x238-280%KO | ||
Ponyta Fire | C | |
Available Moves Moves
Damage vs Sandshrew View Ponyta builds →Flame Wheel 4x10⁵-123%KO Flame Charge 4x90-107%KO Ember 4x114-135%KO Fire Spin 4x100-118%KO | ||
Growlithe Fire | D | |
Available Moves Moves
Damage vs Sandshrew View Growlithe builds →Flamethrower 4x257-303%KO Dig 2x39-47% Fire Fang 4x100-118%KO Flame Wheel 4x90-107%KO | ||
Salandit PoisonFire | D | |
Available Moves Moves
Damage vs Sandshrew View Salandit builds →Incinerate 4x176-207%KO Ember 4x119-140%KO | ||
Torkoal Fire | B | |
Available Moves Moves
Damage vs Sandshrew View Torkoal builds →Flamethrower 4x303-357%KO Lava Plume 4x270-319%KO Flame Wheel 4x10⁵-124%KO Bulldoze 2x35-41% | ||
Heatmor Fire | C | |
Available Moves Moves
Damage vs Sandshrew View Heatmor builds →Fire Lash 4x156-184%KO Dig 2x51-61% Incinerate 4x243-286%KO | ||
Ponyta Fire | C | |
Available Moves Moves
Damage vs Sandshrew View Ponyta builds →Flame Wheel 4x10⁵-124%KO Flame Charge 4x92-108%KO Ember 4x114-135%KO Fire Spin 4x101-119%KO | ||
Growlithe Fire | D | |
Available Moves Moves
Damage vs Sandshrew View Growlithe builds →Flamethrower 4x261-308%KO Dig 2x41-49% Fire Fang 4x101-119%KO Flame Wheel 4x92-108%KO | ||
Salandit PoisonFire | D | |
Available Moves Moves
Damage vs Sandshrew View Salandit builds →Incinerate 4x178-211%KO Ember 4x123-146%KO | ||
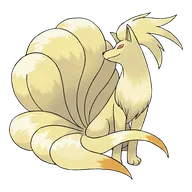 Ninetales Fire | A | |
Available Moves Moves
Damage vs Sandshrew View Ninetales builds →Fire Blast 4x365-430%KO Inferno 4x331-390%KO Flamethrower 4x302-355%KO Dig 2x43-52% | ||
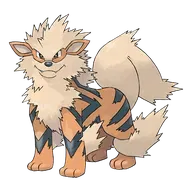 Arcanine Fire | B | |
Available Moves Moves
Damage vs Sandshrew View Arcanine builds →Burn Up 4x510-600%KO Flare Blitz 4x259-305%KO Flamethrower 4x357-420%KO Dig 2x58-68% | ||
Torkoal Fire | B | |
Available Moves Moves
Damage vs Sandshrew View Torkoal builds →Heat Wave 4x331-390%KO Flamethrower 4x314-370%KO Lava Plume 4x280-330%KO Stomping Tantrum 2x45-53% | ||
Heatmor Fire | C | |
Available Moves Moves
Damage vs Sandshrew View Heatmor builds →Fire Lash 4x157-185%KO Dig 2x52-62% Stomping Tantrum 2x49-58% Incinerate 4x250-295%KO | ||
Ponyta Fire | C | |
Available Moves Moves
Damage vs Sandshrew View Ponyta builds →Inferno 4x280-330%KO Flame Wheel 4x110-130%KO Flame Charge 4x93-110%KO Ember 4x114-135%KO | ||
In Sword & Shield, Volcarona's Psychic hits Sandshrew for 51-60%. Krookodile threatens a KO with Earthquake (131-154%). Buzzwole's Close Combat also KOs at 372-438%.
 Volcarona BugFire | A | |
Recommended Build AbilityFlame Body ItemHeavy-Duty Boots NatureModest Moves
Damage vs Sandshrew View Volcarona builds →Psychic51-60% | ||
 Krookodile GroundDark | B | |
Recommended Build AbilityIntimidate ItemChoice Scarf NatureJolly Moves
Damage vs Sandshrew View Krookodile builds →Earthquake 2x131-154%KO Knock Off43-50% | ||
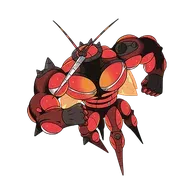 Buzzwole BugFighting | B | |
Recommended Build AbilityBeastboost ItemRocky Helmet NatureAdamant Moves
Damage vs Sandshrew View Buzzwole builds →Close Combat 4x372-438%KO Earthquake 2x10³-122%KO | ||
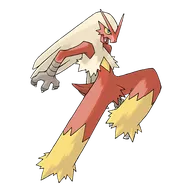 Blaziken FireFighting | B | |
Recommended Build AbilitySpeed Boost ItemLeftovers NatureAdamant Moves
Damage vs Sandshrew View Blaziken builds →Close Combat 4x370-436%KO Flare Blitz 4x370-436%KO | ||
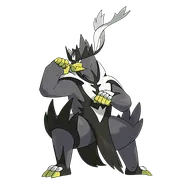 Urshifu FightingDark | C | |
Fighting deals 4x damage to SandshrewView Urshifu → | ||
Sword & Shield Evolution
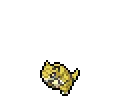
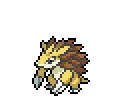
Sandshrew evolves into Sandslash. It's a two-stage chain with the method shown below. A massive partner pool for breeding via one egg group. Eggs are average hatch time. The evolved forms gain up to 150 total stats over Sandshrew. View every chain in the Evolution Chart.
How to Evolve
Breeding
Breed Sandshrew easily with 152 breeding partners from the Ground egg group. Pass egg moves like Counter, Crush Claw, Curse and 3 more to offspring.











Sword & Shield Sandshrew Best Moveset
Best Build
No build content available for this Pokemon in Gen 8.
Try selecting a different game/generation filter, or check back later.
Moves
You'll want to breed for Counter and Crush Claw on Sandshrew. These egg moves aren't just nice to have. Combined with STAB from Steel Roller and Blizzard, they expand what Sandshrew can actually threaten in practice.
Level-Up Moves
TM Moves
Egg Moves
Tutor Moves
Sword & Shield Alolan Sandshrew Locations
Alolan Sandshrew is available from mid-game routes onward at high spawn rates. 18 encounter spots give you plenty of options. Grab one early and it'll be ready to evolve or train by mid-game.
Best Locations to Catch Alolan Sandshrew in Sword & Shield
Alolan Sandshrew's encounter pool splits between Shield and Sword. You've got 18 walking spots at Lv. 16-21 total, but your version determines which ones actually show up.
Sandshrew Guide
Get Sandshrew to Sandslash at level 22. At 300 BST, Sandshrew is just the starting point.
Level 22 gets you Sandslash. Not the fastest evolution, so consider Exp. Share or route grinding to speed it up.
In Sword & Shield, Sandshrew does the job early-game if you need a Ice/Steel type on your team. Evolve it into Sandslash before the later gyms and it holds up fine through the story.
You can find Sandshrew in Sword & Shield. The Locations section has the full breakdown of routes and encounter details. It also appears in 19 other games across the series.
Game Availability
Sandshrew first appeared in Red & Blue and spans 20 games across 10 generations. It later gained an Alolan form in Generation 7, adding new dimensions to its competitive identity.
Click a game to view version-specific details
- Gen 1Y
 Yellow
 - Gen 1RBDebut

 Red & Blue
 - Gen 2GS

 Gold & Silver
 - Gen 2C
 Crystal
 - Gen 3RS

 Ruby & Sapphire
 - Gen 3FRLG

 FireRed & LeafGreen
 - Gen 3E
 Emerald
 - Gen 4Pt
 Platinum
 - Gen 4HGSS

 HeartGold & SoulSilver
 - Gen 4DP
 Diamond & Pearl
 - Gen 5BW

 Black & White
 - Gen 5B2W2

 Black 2 & White 2
 - Gen 6XY

 X & Y
X & Y - Gen 6ORAS

 Omega Ruby & Alpha Sapphire
 - Gen 7USUM

 Ultra Sun & Ultra Moon
 - Gen 7SMAlolan

 Sun & Moon
 - Gen 7LGPE

 Let's Go Pikachu & Eevee
 - Gen 8SwSh

 Sword & Shield
 - Gen 8PLA
 Legends: Arceus
 - Gen 8BDSP

 Brilliant Diamond & Shining Pearl
 - Gen 9SV

 Scarlet & Violet
 - Gen 9LZA
 Legends: Z-A
 - Gen 10WW

 Winds & Waves