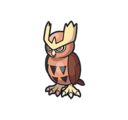
Stats & Training
Nothing fancy in Noctowl's spread. It leans special with HP out front. And you'll get 2 HP EVs per KO for it. Follows a medium-fast 1M XP curve.
Its eyes are special. They can pick out objects as long as there is the tiniest amount of light.
If it flips its head upside down, it’s a sign that it is engaged in very complex thinking.
Noctowl Weakness
Noctowl is weak to Electric, Ice, and Rock. On the flip side, it's immune to Ground and Ghost-type moves entirely. Noctowl's special bulk (base 96 Sp.Def) helps absorb special-type weaknesses, though physical moves exploit the lower Defense.
| Damage | Types |
|---|---|
| 2x (Weak) | Electric, Ice, Rock |
| 0.5x (Resist) | Grass, Bug |
| 0x (Immune) | Ground, Ghost |
Onix RockGround | C | |
Available Moves Moves
Damage vs Noctowl View Onix builds →Stone Edge 2x77-91% Rock Slide 2x58-70% Rock Tomb 2x47-56% Rock Throw 2x40-49% | ||
Geodude RockGround | C | |
Available Moves Moves
Damage vs Noctowl View Geodude builds →Stone Edge 2x10⁵-126%KO Rock Slide 2x81-98% Rock Tomb 2x65-77% Rollout 2x35-42% | ||
Shinx Electric | D | |
Available Moves Moves
Damage vs Noctowl View Shinx builds →Volt Switch 2x35-42% Shock Wave 2x35-42% Charge Beam 2x28-35% Thunder Shock 2x23-28% | ||
Onix RockGround | C | |
Available Moves Moves
Damage vs Noctowl View Onix builds →Stone Edge 2x67-80% Rock Slide 2x51-61% Rock Tomb 2x41-49% Rock Throw 2x35-43% | ||
Geodude RockGround | C | |
Available Moves Moves
Damage vs Noctowl View Geodude builds →Stone Edge 2x92-110%KO Rock Slide 2x71-86% Rock Tomb 2x57-67% Rollout 2x31-37% | ||
Pachirisu Electric | C | |
Available Moves Moves
Damage vs Noctowl View Pachirisu builds →Thunderbolt 2x41-49% Volt Switch 2x35-43% Shock Wave 2x31-37% Charge Beam 2x24-31% | ||
Electrike Electric | D | |
Available Moves Moves
Damage vs Noctowl View Electrike builds →Thunderbolt 2x51-61% Volt Switch 2x41-49% Shock Wave 2x35-43% Charge Beam 2x31-37% | ||
Shinx Electric | D | |
Available Moves Moves
Damage vs Noctowl View Shinx builds →Thunderbolt 2x41-49% Volt Switch 2x31-37% Shock Wave 2x31-37% Charge Beam 2x24-31% | ||
Graveler RockGround | C | |
Available Moves Moves
Damage vs Noctowl View Graveler builds →Stone Edge 2x10⁹-129%KO Rock Slide 2x82-96% Rock Tomb 2x67-80% Rock Throw 2x56-66% | ||
Onix RockGround | C | |
Available Moves Moves
Damage vs Noctowl View Onix builds →Stone Edge 2x65-77% Rock Slide 2x49-58% Rock Tomb 2x39-47% Rock Throw 2x35-41% | ||
Pachirisu Electric | C | |
Available Moves Moves
Damage vs Noctowl View Pachirisu builds →Thunder 2x44-52% Thunderbolt 2x37-44% Volt Switch 2x30-36% Spark 2x41-50% | ||
Nosepass Rock | C | |
Available Moves Moves
Damage vs Noctowl View Nosepass builds →Thunder 2x29-35% Stone Edge 2x65-77% Thunderbolt 2x25-29% Power Gem 2x32-39% | ||
Electrike Electric | D | |
Available Moves Moves
Damage vs Noctowl View Electrike builds →Thunder 2x56-66% Thunderbolt 2x47-55% Volt Switch 2x37-44% Thunder Fang 2x41-50% | ||
Sudowoodo Rock | C | |
Available Moves Moves
Damage vs Noctowl View Sudowoodo builds →Stone Edge 2x114-135%KO Rock Slide 2x86-102%KO Rock Tomb 2x70-83% Rock Throw 2x58-69% | ||
Graveler RockGround | C | |
Available Moves Moves
Damage vs Noctowl View Graveler builds →Stone Edge 2x10⁹-129%KO Rock Slide 2x82-96% Rock Tomb 2x67-80% Rock Throw 2x56-66% | ||
Onix RockGround | C | |
Available Moves Moves
Damage vs Noctowl View Onix builds →Stone Edge 2x65-77% Rock Slide 2x49-58% Rock Tomb 2x39-47% Rock Throw 2x35-41% | ||
Pachirisu Electric | C | |
Available Moves Moves
Damage vs Noctowl View Pachirisu builds →Thunder 2x44-52% Thunderbolt 2x37-44% Volt Switch 2x30-36% Spark 2x41-50% | ||
Nosepass Rock | C | |
Available Moves Moves
Damage vs Noctowl View Nosepass builds →Thunder 2x29-35% Stone Edge 2x65-77% Thunderbolt 2x25-29% Power Gem 2x32-39% | ||
Sudowoodo Rock | C | |
Available Moves Moves
Damage vs Noctowl View Sudowoodo builds →Stone Edge 2x110-130%KO Rock Slide 2x83-98% Rock Tomb 2x67-79% Rock Throw 2x57-67% | ||
Graveler RockGround | C | |
Available Moves Moves
Damage vs Noctowl View Graveler builds →Stone Edge 2x10⁵-123%KO Rock Slide 2x79-93% Rock Tomb 2x65-77% Rock Throw 2x53-63% | ||
Onix RockGround | C | |
Available Moves Moves
Damage vs Noctowl View Onix builds →Stone Edge 2x61-72% Rock Slide 2x47-56% Rock Tomb 2x37-44% Rock Throw 2x31-37% | ||
Pachirisu Electric | C | |
Available Moves Moves
Damage vs Noctowl View Pachirisu builds →Thunder 2x41-49% Thunderbolt 2x35-42% Volt Switch 2x27-33% Spark 2x41-49% | ||
Nosepass Rock | C | |
Available Moves Moves
Damage vs Noctowl View Nosepass builds →Thunder 2x27-33% Stone Edge 2x61-72% Thunderbolt 2x23-28% Power Gem 2x31-37% | ||
Sudowoodo Rock | C | |
Available Moves Moves
Damage vs Noctowl View Sudowoodo builds →Stone Edge 2x10⁸-127%KO Rock Slide 2x82-97% Rock Tomb 2x65-78% Rock Throw 2x55-65% | ||
Graveler RockGround | C | |
Available Moves Moves
Damage vs Noctowl View Graveler builds →Stone Edge 2x10⁴-123%KO Rock Slide 2x78-93% Rock Tomb 2x64-76% Rock Throw 2x53-63% | ||
Onix RockGround | C | |
Available Moves Moves
Damage vs Noctowl View Onix builds →Stone Edge 2x60-71% Rock Slide 2x45-54% Rock Tomb 2x37-43% Rock Throw 2x31-37% | ||
Magnemite ElectricSteel | C | |
Available Moves Moves
Damage vs Noctowl View Magnemite builds →Thunder 2x71-84% Thunderbolt 2x58-69% Discharge 2x53-63% Volt Switch 2x45-54% | ||
Pachirisu Electric | C | |
Available Moves Moves
Damage vs Noctowl View Pachirisu builds →Thunder 2x42-50% Thunderbolt 2x35-41% Volt Switch 2x27-32% Spark 2x40-47% | ||
Sudowoodo Rock | C | |
Available Moves Moves
Damage vs Noctowl View Sudowoodo builds →Stone Edge 2x10⁷-127%KO Rock Slide 2x80-95% Rock Tomb 2x64-77% Rock Throw 2x54-64% | ||
Graveler RockGround | C | |
Available Moves Moves
Damage vs Noctowl View Graveler builds →Stone Edge 2x10³-121%KO Rock Slide 2x77-91% Rock Tomb 2x61-72% Rock Throw 2x53-62% | ||
Onix RockGround | C | |
Available Moves Moves
Damage vs Noctowl View Onix builds →Stone Edge 2x60-70% Rock Slide 2x44-52% Rock Tomb 2x36-42% Rock Throw 2x30-36% | ||
Magnemite ElectricSteel | C | |
Available Moves Moves
Damage vs Noctowl View Magnemite builds →Thunder 2x70-83% Thunderbolt 2x58-68% Discharge 2x51-60% Volt Switch 2x44-52% | ||
Pachirisu Electric | C | |
Available Moves Moves
Damage vs Noctowl View Pachirisu builds →Thunder 2x41-48% Thunderbolt 2x34-40% Discharge 2x30-36% Volt Switch 2x27-32% | ||
In Brilliant Diamond & Shining Pearl, Weavile's Ice Shard hits Noctowl for 53-63%. Jolteon threatens a KO with Thunder (122-144%).
Weavile DarkIce | A | |
Recommended Build AbilityPressure ItemHeavy-Duty Boots NatureJolly Moves
Damage vs Noctowl View Weavile builds →Knock Off43-51% Ice Shard 2x53-63% | ||
Jolteon Electric | B | |
Recommended Build AbilityVoltabsorb ItemChoice Specs NatureTimid Moves
Damage vs Noctowl View Jolteon builds →Thunder 2x122-144%KO | ||
Lapras WaterIce | C | |
Recommended Build AbilityHydration ItemLeftovers NatureModest Moves
Damage vs Noctowl View Lapras builds →Surf31-37% | ||
Brilliant Diamond & Shining Pearl Evolution
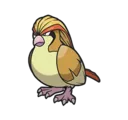
Noctowl is what Hoothoot becomes. Breed it for Hoothoot eggs (quick to hatch). A decent partner pool for breeding via one egg group. Eggs are quick to hatch. The evolution from Hoothoot pushed Noctowl to 452 total stats. Sp.Atk saw the largest single gain at +50. View every chain in the Evolution Chart.
How to Evolve
Breeding
Breed with Noctowl to get Hoothoot eggs easily using 31 partners from the Flying egg group. Notable egg moves include Agility, Feather Dance, Hurricane and 6 more.


Brilliant Diamond & Shining Pearl Noctowl Best Moveset
Tintedlens helps Noctowl stick around while dealing real damage. Leftovers for passive recovery each turn, max HP and Sp. Atk EVs for the right balance, and Air Slash as the main threat. Not the fastest, but it doesn't need to be.
Best Build
Noctowl best EVs are Sp. Atk and HP
Doubles Special Tank Moveset
- Hypnosis
- Dream Eater
- Shadow Ball
- Air Slash
Recommended Teammates
Bulky Support Moveset
- Nasty Plot
- Agility
- Recycle
- Air Slash
Recommended Teammates
Moves
Egg moves make a real difference. Noctowl gets Agility and Feather Dance exclusively through breeding, filling gaps that TMs and level-up can't touch. Psychic and Fairy coverage and more rounds out the picture alongside Giga Impact and Hyper Beam.
Level-Up Moves
TM Moves
Egg Moves
Tutor Moves
How to Get Noctowl in Brilliant Diamond & Shining Pearl
A solid number of locations for Noctowl with decent spawn rates across mid-game routes. The sort toggle below swaps between best odds and earliest access, so you can approach it based on where you are in the game.
Where To Catch Noctowl in Brilliant Diamond & Shining Pearl
To get Noctowl, start by catching Hoothoot through walking encounters at Lv. 14-54. The chain covers 2 catchable stages before reaching the final form.
 Step 1Catch HoothootRoute 211 - WestBrilliant DiamondGrass Lv.14 Route10%EarlyNightRoute 211 - WestShining PearlGrass Lv.14 Route10%EarlyNightGreat Marsh - Area 5Shining PearlGrass Lv.20-22 Facility20%MidNightGreat Marsh - Area 5Brilliant DiamondGrass Lv.20-22 Facility20%MidNightGreat Marsh - Area 6Shining PearlGrass Lv.20-22 Facility20%MidNightGreat Marsh - Area 6Brilliant DiamondGrass Lv.20-22 Facility20%MidNightGreat Marsh - Area 3Shining PearlGrass Lv.22-24 Facility20%MidNightGreat Marsh - Area 3Brilliant DiamondGrass Lv.22-24 Facility20%MidNightGreat Marsh - Area 4Shining PearlGrass Lv.22-24 Facility20%MidNightGreat Marsh - Area 4Brilliant DiamondGrass Lv.22-24 Facility20%MidNightGreat Marsh - Area 1Shining PearlGrass Lv.24 Facility10%MidNightGreat Marsh - Area 1Brilliant DiamondGrass Lv.24 Facility10%MidNightGreat Marsh - Area 2Shining PearlGrass Lv.24 Facility10%MidNightGreat Marsh - Area 2Brilliant DiamondGrass Lv.24 Facility10%MidNightRoute 210 - NorthBrilliant DiamondGrass Lv.24 Route10%MidNightRoute 210 - NorthShining PearlGrass Lv.24 Route10%MidNightFountainspring CaveBrilliant DiamondGrass Lv.25-29 CaveMidRequires StrengthFountainspring CaveShining PearlGrass Lv.25-29 CaveMidRequires StrengthGrassland CaveBrilliant DiamondGrass Lv.25-29 CaveMidRequires StrengthGrassland CaveShining PearlGrass Lv.25-29 CaveMidRequires StrengthRiverbank CaveShining PearlGrass Lv.25-29 CaveMidRequires StrengthRiverbank CaveBrilliant DiamondGrass Lv.25-29 CaveMidRequires StrengthSpacious CaveBrilliant DiamondGrass Lv.25-29 CaveMidRequires StrengthSpacious CaveShining PearlGrass Lv.25-29 CaveMidRequires StrengthStill-Water CavernShining PearlGrass Lv.25-29 CaveMidRequires StrengthStill-Water CavernBrilliant DiamondGrass Lv.25-29 CaveMidRequires StrengthSunlit CavernShining PearlGrass Lv.25-29 CaveMidRequires StrengthSunlit CavernBrilliant DiamondGrass Lv.25-29 CaveMidRequires Strength
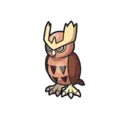 Step 2Noctowl ✓Route 210 - NorthShining PearlGrass Lv.25 Route10%MidNightRoute 210 - NorthBrilliant DiamondGrass Lv.25 Route10%MidNightGreat Marsh - Area 1Brilliant DiamondGrass Lv.26 Facility10%MidNightGreat Marsh - Area 1Shining PearlGrass Lv.26 Facility10%MidNightGreat Marsh - Area 2Shining PearlGrass Lv.26 Facility10%MidNightGreat Marsh - Area 2Brilliant DiamondGrass Lv.26 Facility10%MidNightRoute 211 - EastShining PearlGrass Lv.28 Route10%MidNightRoute 211 - EastBrilliant DiamondGrass Lv.28 Route10%MidNightLake AcuityShining PearlGrass Lv.34-36 Water20%LateNightLake AcuityBrilliant DiamondGrass Lv.34-36 Water20%LateNightLake ValorShining PearlGrass Lv.34-36 Water20%LateNightLake ValorBrilliant DiamondGrass Lv.34-36 Water20%LateNightRoute 216Shining PearlGrass Lv.33 Route10%LateNightRoute 216Brilliant DiamondGrass Lv.33 Route10%LateNightAcuity LakefrontShining PearlGrass Lv.35 Water10%LateNightAcuity LakefrontBrilliant DiamondGrass Lv.35 Water10%LateNightRoute 217Shining PearlGrass Lv.35 Route10%LateNightRoute 217Brilliant DiamondGrass Lv.35 Route10%LateNightMt. Coronet - SummitShining PearlGrass Lv.39 Cave10%LateNightMt. Coronet - SummitBrilliant DiamondGrass Lv.39 Cave10%LateNightSendoff SpringShining PearlGrass Lv.53-5420%PostNightSendoff SpringBrilliant DiamondGrass Lv.53-5420%PostNightor evolve from Hoothoot (Step 1)
Noctowl Guide
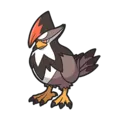
In Brilliant Diamond & Shining Pearl, Noctowl looks average on paper at 452 BST. But Tinted Lens is why it sees play. Build around that and it pulls its weight. C-Tier on our tier list. Air Slash with Leftovers is the standard set.
In Brilliant Diamond & Shining Pearl, Noctowl's biggest threats include Jolteon (Electric), Cloyster (Ice), and Aerodactyl (Rock), all carrying super-effective STAB moves.
Noctowl gets Tinted Lens, Insomnia, and Keen Eye. But Tinted Lens is the one that matters. It's the centerpiece of every viable set. Build around that.
Noctowl is leaning toward the special side (base 86 Sp. Atk). Enough bulk to take a hit or two, too. Speed tells the real story. Base 70 Speed is workable. Faster than some, slower than many.
For Brilliant Diamond & Shining Pearl, the core moveset is Air Slash, Roost, Hypervoice, and Heat Wave. Air Slash leads at 20% usage. This set covers the balanced role with a mix of damage and utility.
Game Availability
Debuting in Gold & Silver, Noctowl appears in 17 games across 9 generations. A reliable presence in most mainline games, typically found through wild encounters.
Click a game to view version-specific details
- Gen 1Y
 Yellow
 - Gen 1RB

 Red & Blue
 - Gen 2GSDebut

 Gold & Silver
 - Gen 2C
 Crystal
 - Gen 3RS

 Ruby & Sapphire
 - Gen 3FRLG

 FireRed & LeafGreen
 - Gen 3E
 Emerald
 - Gen 4Pt
 Platinum
 - Gen 4HGSS

 HeartGold & SoulSilver
 - Gen 4DP

 Diamond & Pearl
 - Gen 5BW

 Black & White
 - Gen 5B2W2

 Black 2 & White 2
 - Gen 6XY

 X & Y
X & Y - Gen 6ORAS

 Omega Ruby & Alpha Sapphire
 - Gen 7USUM

 Ultra Sun & Ultra Moon
 - Gen 7SM

 Sun & Moon
 - Gen 7LGPE

 Let's Go Pikachu & Eevee
 - Gen 8SwSh

 Sword & Shield
 - Gen 8PLA
 Legends: Arceus
 - Gen 8BDSP

 Brilliant Diamond & Shining Pearl
 - Gen 9SV

 Scarlet & Violet
 - Gen 9LZA
 Legends: Z-A
 - Gen 10WW

 Winds & Waves