
Is Metang Good in Brilliant Diamond & Shining Pearl Playthrough?
Metang at level 20-44 is a slog. Keep going to Metagross. The Exp. Share takes the edge off.
Roark's team hits Beldum's weaknesses hard.
Beldum trades roughly evenly with Gardenia's team.
Maylene's team hits Beldum's weaknesses hard.
Crasher Wake's team hits Beldum's weaknesses hard.
Fantina's Pokemon outpace and outclass Beldum here.
Byron's team hits Beldum's weaknesses hard.
Candice's team hits Beldum's weaknesses hard.
Volkner's team hits Beldum's weaknesses hard.
Metagross has the type edge here and should clean up Aaron's team.
Metagross has the type edge here and should clean up Bertha's team.
Metagross trades roughly evenly with Flint's team.
Metagross trades roughly evenly with Lucian's team.
Metagross trades roughly evenly with Cynthia's team.
Catch Beldum on Route 228 (walking, Lv 53, common). Swarm.
Your Beldum should hit Level 45 before you reach Aaron, at typical leveling pace.
How to Get Metang in Brilliant Diamond & Shining Pearl
Can't catch Metang directly. Start with Beldum at solid rates from the locations below, then evolve at level 45. The 3-stage chain from Beldum to Metang is where the leveling time goes.
How to Obtain Metang in BDSP
To get Metang, start by catching Beldum through walking encounters at Lv. 53-63. The chain covers 1 catchable stage before reaching the final form.
Metang Weakness
Metang's Steel/Psychic typing leaves it vulnerable to Fire, Ground, Ghost, and Dark. It shrugs off Poison-type attacks completely. 9 resistances give it solid defensive coverage on top of that.
| Damage | Types |
|---|---|
| 2x (Weak) | Fire, Ground, Ghost, Dark |
| 0.5x (Resist) | Normal, Grass, Ice, Flying, Rock, Dragon, Steel, Fairy |
| 0.25x (Resist) | Psychic |
| 0x (Immune) | Poison |
What is Metang Weak Against
GoodBest Pokemon Against Metang
Cubone Ground | C | |
Available Moves Moves
Damage vs Metang View Cubone builds →Earthquake 2x56-67% Fire Blast 2x40-49% Thief 2x24-31% | ||
Phanpy Ground | D | |
Geodude RockGround | C | |
Available Moves Moves
Damage vs Metang View Geodude builds →Earthquake 2x73-87% Fire Blast 2x38-44% | ||
Onix RockGround | C | |
Available Moves Moves
Damage vs Metang View Onix builds →Earthquake 2x49-60% Payback 2x18-22% | ||
Cubone Ground | C | |
Available Moves Moves
Damage vs Metang View Cubone builds →Earthquake 2x60-70% Fire Blast 2x47-55% Thief 2x23-30% | ||
Phanpy Ground | D | |
Geodude RockGround | C | |
Available Moves Moves
Damage vs Metang View Geodude builds →Earthquake 2x81-96% Fire Blast 2x38-47% | ||
Onix RockGround | C | |
Available Moves Moves
Damage vs Metang View Onix builds →Earthquake 2x60-70% Payback 2x21-26% | ||
Marowak Ground | C | |
Available Moves Moves
Damage vs Metang View Marowak builds →Earthquake 2x74-88% Thief 2x32-38% Fire Blast 2x46-54% | ||
Donphan Ground | B | |
Available Moves Moves
Damage vs Metang View Donphan builds →Earthquake 2x101-120%KO Knock Off 2x46-54% Fire Fang 2x46-54% | ||
Gastrodon WaterGround | C | |
Gabite DragonGround | C | |
Available Moves Moves
Damage vs Metang View Gabite builds →Earthquake 2x80-95% Shadow Claw 2x40-47% Bite 2x33-40% Fire Blast 2x46-54% | ||
Ponyta Fire | C | |
Marowak Ground | C | |
Available Moves Moves
Damage vs Metang View Marowak builds →Earthquake 2x74-88% Thief 2x32-38% Fire Blast 2x46-54% | ||
Donphan Ground | B | |
Available Moves Moves
Damage vs Metang View Donphan builds →Earthquake 2x101-120%KO Knock Off 2x46-54% Fire Fang 2x46-54% | ||
Absol Dark | C | |
Available Moves Moves
Damage vs Metang View Absol builds →Night Slash 2x78-92% Shadow Claw 2x52-61% Fire Blast 2x61-73% | ||
Quagsire WaterGround | C | |
Available Moves Moves
Damage vs Metang View Quagsire builds →Earthquake 2x78-92% Thief 2x32-38% | ||
Gastrodon WaterGround | C | |
Marowak Ground | C | |
Available Moves Moves
Damage vs Metang View Marowak builds →Earthquake 2x71-84% Thief 2x28-34% Fire Blast 2x45-54% | ||
Hippowdon Ground | B | |
Available Moves Moves
Damage vs Metang View Hippowdon builds →Earthquake 2x91-108%KO Crunch 2x49-58% Fire Fang 2x40-48% | ||
Donphan Ground | B | |
Available Moves Moves
Damage vs Metang View Donphan builds →Earthquake 2x99-117%KO Knock Off 2x44-52% Fire Fang 2x44-52% | ||
Absol Dark | C | |
Available Moves Moves
Damage vs Metang View Absol builds →Night Slash 2x73-87% Shadow Claw 2x49-58% Fire Blast 2x59-70% | ||
Quagsire WaterGround | C | |
Available Moves Moves
Damage vs Metang View Quagsire builds →Earthquake 2x76-90% Thief 2x30-36% | ||
Marowak Ground | C | |
Available Moves Moves
Damage vs Metang View Marowak builds →Earthquake 2x71-84% Thief 2x28-34% Fire Blast 2x44-52% | ||
Hippowdon Ground | B | |
Available Moves Moves
Damage vs Metang View Hippowdon builds →Earthquake 2x93-109%KO Crunch 2x49-58% Fire Fang 2x41-49% | ||
Donphan Ground | B | |
Available Moves Moves
Damage vs Metang View Donphan builds →Earthquake 2x97-115%KO Knock Off 2x42-50% Fire Fang 2x42-50% | ||
Absol Dark | C | |
Available Moves Moves
Damage vs Metang View Absol builds →Night Slash 2x74-87% Shadow Claw 2x49-58% Fire Blast 2x58-69% | ||
Skuntank PoisonDark | C | |
Available Moves Moves
Damage vs Metang View Skuntank builds →Sucker Punch 2x57-67% Dig 2x42-50% Fire Blast 2x57-67% Shadow Claw 2x37-45% | ||
Marowak Ground | C | |
Available Moves Moves
Damage vs Metang View Marowak builds →Earthquake 2x70-83% Thief 2x30-35% Fire Blast 2x43-50% | ||
Steelix SteelGround | B | |
Available Moves Moves
Damage vs Metang View Steelix builds →Earthquake 2x73-86% Crunch 2x39-47% Fire Fang 2x32-38% | ||
Hippowdon Ground | B | |
Available Moves Moves
Damage vs Metang View Hippowdon builds →Earthquake 2x90-107%KO Crunch 2x49-57% Fire Fang 2x39-47% | ||
Rapidash Fire | B | |
Absol Dark | C | |
Available Moves Moves
Damage vs Metang View Absol builds →Night Slash 2x73-86% Shadow Claw 2x49-57% Fire Blast 2x57-68% | ||
Marowak Ground | C | |
Available Moves Moves
Damage vs Metang View Marowak builds →Earthquake 2x70-82% Thief 2x29-34% Fire Blast 2x42-50% | ||
Garchomp DragonGround | S | |
Available Moves Moves
Damage vs Metang View Garchomp builds →Earthquake 2x10⁵-123%KO Crunch 2x56-66% Shadow Claw 2x49-58% Fire Blast 2x61-72% | ||
Rapidash Fire | B | |
Rhydon GroundRock | C | |
Available Moves Moves
Damage vs Metang View Rhydon builds →Earthquake 2x10⁵-123%KO Shadow Claw 2x49-58% Thief 2x42-50% Fire Blast 2x39-47% | ||
Steelix SteelGround | B | |
Available Moves Moves
Damage vs Metang View Steelix builds →Earthquake 2x73-86% Crunch 2x39-47% Fire Fang 2x32-38% | ||
In Brilliant Diamond & Shining Pearl, Garchomp's Earthquake hits Metang for 68-81%. Tyranitar threatens a KO with Crunch (91-107%). Charizard deals 65-77% with Flamethrower.
Garchomp DragonGround | S | |
Recommended Build AbilityRough Skin ItemLeftovers NatureJolly Moves
Damage vs Metang View Garchomp builds →Earthquake 2x68-81% | ||
Tyranitar RockDark | A | |
Recommended Build AbilitySand Stream ItemChoice Band NatureAdamant Moves
Damage vs Metang View Tyranitar builds →Crunch 2x91-107%KO Stone Edge28-33% Earthquake 2x76-90% | ||
Charizard Fire | B | |
Recommended Build AbilityBlaze ItemHeavy-Duty Boots NatureTimid Moves
Damage vs Metang View Charizard builds →Flamethrower 2x65-77% Air Slash13-16% Dragon Pulse10-12% | ||
Gengar GhostPoison | B | |
Recommended Build AbilityCursedbody ItemChoice Scarf NatureTimid Moves
Damage vs Metang View Gengar builds →Shadow Ball 2x65-77% Giga Drain10-12% | ||
Metang Evolutions
Metang is the middle stage between Beldum and Metagross. It's a three-stage line with one more evolution to go. For breeding, takes forever to hatch with no compatible partners via one egg group. So far, HP got the biggest boost (+20 from Beldum). The final form adds another 180 stats on top. View every chain in the Evolution Chart.
How to Evolve


Breeding
Metang is genderless — breed with Ditto to produce Beldum eggs. Part of the Mineral egg group.
 Ditto only
BDSP Metang Best Moveset
100 Defense with Steel/Psychic typing resisting 8 types and AbilityClear Body preventing stat drops. 75 Attack at 50 Speed gives the moveset modest physical identity. One evolution from Metagross where the offensive and defensive stats both reach elite levels.
Best Build
Metang best EVs are HP and Attack
Physical Tank Moveset
- Iron Head
- Hone Claws
- Zen Headbutt
- Rock Slide
Recommended Teammates
Moves List
Without TMs, Metang's movepool is bare bones. With them, you get coverage across 8 types on top of Psychic and Meteor Mash for STAB. The natural kit handles basics, but TMs are doing the real work.
How to Read the Moves Table
Tabs
- Level-Up
- Learned by leveling up.
- TM
- Taught by a Technical Machine.
- Egg
- Inherited via breeding.
- Tutor
- NPC tutor (cost: items, BP, money).
- Reminder
- An NPC reteaches any move this Pokemon could have learned by leveling up.
- Transfer
- Carried over from an older game using Pokemon HOME.
- Event
- Given out through Mystery Gift events.
Visual Signals
CAT (Category)
How the move deals damage and which stats it uses.
A small dot on the icon's corner marks the move as contact. That triggers abilities like Static, Flame Body, Rough Skin, or Iron Barbs, plus items like Rocky Helmet and Sticky Barb.
Tier (S to D)
Each move's competitive rank in RankedBoost's system. TM, Egg, and Tutor sort by tier by default (best first). On Level-Up, click the Tier header to do the same.
PWR (Power)
Base damage. Numbers shown in a type color include STAB (base × 1.5). Hover any colored number to see the math.
— means no power (status moves) or variable power.
Sorting & Filter
Click any column header to sort. Level-Up opens with Lv 1 at the top. TM, Egg, and Tutor open with the highest-tier moves at the top.
Search filters by move name or type. The Filter button limits the list to STAB, Physical, Special, or Status moves.
Level-Up Moves
TM Moves
Egg Moves
Tutor Moves
Base Stats
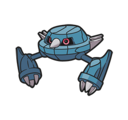
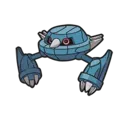
It is formed by two Beldum joining together. Its steel body won’t be scratched if it collides with a jet.
Metang Brilliant Diamond & Shining Pearl Guide
In Brilliant Diamond & Shining Pearl, Metang isn't fully evolved, so it's not built for competitive play. You'll want to evolve it into Metagross to unlock its full potential. At 420 BST, it's a stepping stone rather than a team anchor.
In Brilliant Diamond & Shining Pearl, watch for Charizard (Fire), Rhydon (Ground), and Misdreavus (Ghost) when using Metang. They all hit it super-effectively with STAB. Dark-type attackers are also a problem.
Clear Body prevents stats from being lowered by other Pokémon. That's the one you want on Metang. Light Metal is the hidden ability. Niche, but it has its uses.
In Brilliant Diamond & Shining Pearl, Metang fills the balanced role. It's a physical attacker with base 75 Attack. Base 50 Speed is low. Priority moves or Trick Room are the way to go. And it's enough bulk to take a hit or two.
In Brilliant Diamond & Shining Pearl, Metang does the job early-game if you need a Steel/Psychic type on your team. Evolve it into Metagross before the later gyms and it holds up fine through the story.
Game Availability
Metang first appeared in Ruby & Sapphire and has been available in 16 games across 8 generations. Obtainable through catching or hatching as a base form in most titles where it appears.
Click a game to view version-specific details
- Gen 1RB

 Red & Blue
 - Gen 1Y
 Yellow
 - Gen 2GS

 Gold & Silver
 - Gen 2C
 Crystal
 - Gen 3RSDebut

 Ruby & Sapphire
 - Gen 3E
 Emerald
 - Gen 3FRLG

 FireRed & LeafGreen
 - Gen 4DP

 Diamond & Pearl
 - Gen 4Pt
 Platinum
 - Gen 4HGSS

 HeartGold & SoulSilver
 - Gen 5BW

 Black & White
 - Gen 5B2W2

 Black 2 & White 2
 - Gen 6XY

 X & Y
X & Y - Gen 6ORAS

 Omega Ruby & Alpha Sapphire
 - Gen 7SM

 Sun & Moon
 - Gen 7USUM

 Ultra Sun & Ultra Moon
 - Gen 7LGPE

 Let's Go Pikachu & Eevee
 - Gen 8SwSh

 Sword & Shield
 - Gen 8BDSP

 Brilliant Diamond & Shining Pearl
 - Gen 8PLA
 Legends: Arceus
 - Gen 9SV

 Scarlet & Violet
 - Gen 9LZA
 Legends: Z-A
 - Gen 10WW

 Winds & Waves