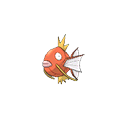

Is Magikarp Good in Omega Ruby & Alpha Sapphire Playthrough?
Magikarp splashes in every body of water in Hoenn. Get one early and grind to level 20. Gyarados on the other side is one of the best investments in the franchise, and ORAS makes it even better with a Mega Evolution.
Roxanne's typing presses Magikarp's defenses.
Magikarp trades roughly evenly with Brawly's team.
Wattson's Pokemon outpace and outclass Magikarp here.
Flannery's typing presses Magikarp's defenses.
Norman's typing presses Magikarp's defenses.
Winona's typing presses Magikarp's defenses.
Tate & Liza's Pokemon outpace and outclass Magikarp here.
Gyarados trades roughly evenly with Wallace's team.
Gyarados trades roughly evenly with Sidney's team.
Gyarados has the type edge here and should clean up Phoebe's team.
Gyarados trades roughly evenly with Glacia's team.
Gyarados trades roughly evenly with Drake's team.
Gyarados has the type edge here and should clean up Steven's team.
Catch Magikarp on Sootopolis City (Surf, Lv 25-35, common).
Your Magikarp should hit Level 20 before you reach Wallace, at typical leveling pace.
How to Get Magikarp in Omega Ruby & Alpha Sapphire
Easy grab on Magikarp with high spawn rates across 276 locations in early-game fishing spots. Two different catch methods are in play here. The sorted list below shows the full spread so you can pick the most convenient spot.
Where To Catch Magikarp in ORAS
To get Magikarp, start by catching Magikarp through fishing and surfing encounters at Lv. 5-40. The chain covers 2 catchable stages before reaching the final form.
 Step 1Magikarp ✓Route 104 - Area 1Lv.5-15Old RodRate 100%Route 104 - Area 2Lv.5-15Old RodRate 100%Sootopolis City - Area 1Lv.5-15Old RodRate 100%Sootopolis City - Area 2Lv.5-15Old RodRate 100%Meteor Falls - Area 2Lv.5-10Old RodRate 65%Meteor Falls - Area 3Lv.5-10Old RodRate 65%Meteor Falls - Area 4Lv.5-10Old RodRate 65%Seafloor Cavern - Area 1Lv.5-10Old RodRate 65%Battle ResortLv.10-15Old RodRate 65%Dewford TownLv.10-15Old RodRate 65%Ever Grande CityLv.10-15Old RodRate 65%Lilycove CityLv.10-15Old RodRate 65%Meteor Falls - Area 1Lv.10-15Old RodRate 65%Mossdeep CityLv.10-15Old RodRate 65%Pacifidlog TownLv.10-15Old RodRate 65%Petalburg CityLv.10-15Old RodRate 65%Route 102Lv.10-15Old RodRate 65%Route 103Lv.10-15Old RodRate 65%Route 105 - OutsideLv.10-15Old RodRate 65%Route 106Lv.10-15Old RodRate 65%Route 107Lv.10-15Old RodRate 65%Route 108Lv.10-15Old RodRate 65%Route 109Lv.10-15Old RodRate 65%Route 110Lv.10-15Old RodRate 65%Route 111 - SouthLv.10-15Old RodRate 65%Route 114Lv.10-15Old RodRate 65%Route 115Lv.10-15Old RodRate 65%Route 117Lv.10-15Old RodRate 65%Route 118Lv.10-15Old RodRate 65%Route 120 - EastLv.10-15Old RodRate 65%Route 120 - WestLv.10-15Old RodRate 65%Route 122Lv.10-15Old RodRate 65%Route 123Lv.10-15Old RodRate 65%Route 124Lv.10-15Old RodRate 65%Route 125Lv.10-15Old RodRate 65%Route 126Lv.10-15Old RodRate 65%Route 127Lv.10-15Old RodRate 65%Route 128Lv.10-15Old RodRate 65%Route 129Lv.10-15Old RodRate 65%Route 130Lv.10-15Old RodRate 65%Route 131Lv.10-15Old RodRate 65%Route 132Lv.10-15Old RodRate 65%Route 133Lv.10-15Old RodRate 65%Route 134Lv.10-15Old RodRate 65%Safari Zone - Area 1Lv.10-15Old RodRate 65%Safari Zone - Area 2Lv.10-15Old RodRate 65%Safari Zone - Area 3Lv.10-15Old RodRate 65%Safari Zone - Area 4Lv.10-15Old RodRate 65%Scorched Slab - 1FLv.10-15Old RodRate 65%Scorched Slab - B1FLv.10Old RodRate 65%Sea Mauville - Area 1Lv.10-15Old RodRate 65%Sea Mauville - Area 2Lv.10-15Old RodRate 65%Sea Mauville - Area 3Lv.10-15Old RodRate 65%Sea Mauville - Area 4Lv.10-15Old RodRate 65%Seafloor Cavern - Area 4Lv.10Old RodRate 65%Seafloor Cavern - Area 5Lv.10Old RodRate 65%Sealed ChamberLv.10-15Old RodRate 65%Shoal Cave - Area 5Lv.10-15Old RodRate 65%Shoal Cave - Area 6Lv.10-15Old RodRate 65%Slateport CityLv.10-15Old RodRate 65%Team Magma/Aqua HideoutLv.10-15Old RodRate 65%Victory Road - Area 1Lv.10-15Old RodRate 65%Victory Road - Area 2Lv.10-15Old RodRate 65%Victory Road - Area 3Lv.10-15Old RodRate 65%Victory Road - Area 4Lv.10-15Old RodRate 65%Route 119Lv.10Old RodRate 60%Route 104 - Area 1Lv.25Good RodRate 100%Route 104 - Area 2Lv.25Good RodRate 100%Sootopolis City - Area 1Lv.25-35Surfing on waterRate 100%Sootopolis City - Area 1Lv.25Good RodRate 100%Sootopolis City - Area 2Lv.25-35Surfing on waterRate 100%Sootopolis City - Area 2Lv.25Good RodRate 100%Route 104 - Area 1Lv.30-40Super RodRate 100%Route 104 - Area 2Lv.30-40Super RodRate 100%Sootopolis City - Area 1Lv.30-35Super RodRate 95%Sootopolis City - Area 2Lv.30-35Super RodRate 95%Safari Zone - Area 1Lv.25Good RodRate 65%Safari Zone - Area 2Lv.25Good RodRate 65%Safari Zone - Area 3Lv.25Good RodRate 65%Safari Zone - Area 4Lv.25Good RodRate 65%Battle ResortLv.25Good RodRate 60%Dewford TownLv.25Good RodRate 60%Ever Grande CityLv.25Good RodRate 60%Lilycove CityLv.25Good RodRate 60%Meteor Falls - Area 1Lv.25Good RodRate 60%Mossdeep CityLv.25Good RodRate 60%Pacifidlog TownLv.25Good RodRate 60%Petalburg CityLv.25Good RodRate 60%Route 102Lv.25Good RodRate 60%Route 103Lv.25Good RodRate 60%Route 105 - OutsideLv.25Good RodRate 60%Route 106Lv.25Good RodRate 60%Route 107Lv.25Good RodRate 60%Route 108Lv.25Good RodRate 60%Route 109Lv.25Good RodRate 60%Route 110Lv.25Good RodRate 60%Route 111 - SouthLv.25Good RodRate 60%Route 114Lv.25Good RodRate 60%Route 115Lv.25Good RodRate 60%Route 117Lv.25Good RodRate 60%Route 118Lv.25Good RodRate 60%Route 119Lv.25Good RodRate 60%Route 120 - EastLv.25Good RodRate 60%Route 120 - WestLv.25Good RodRate 60%Route 122Lv.25Good RodRate 60%Route 123Lv.25Good RodRate 60%Route 124Lv.25Good RodRate 60%Route 125Lv.25Good RodRate 60%Route 126Lv.25Good RodRate 60%Route 127Lv.25Good RodRate 60%Route 128Lv.25Good RodRate 60%Route 129Lv.25Good RodRate 60%Route 130Lv.25Good RodRate 60%Route 131Lv.25Good RodRate 60%Route 132Lv.25Good RodRate 60%Route 133Lv.25Good RodRate 60%Route 134Lv.25Good RodRate 60%Scorched Slab - 1FLv.25Good RodRate 60%Scorched Slab - B1FLv.25Good RodRate 60%Sea Mauville - Area 1Lv.25Good RodRate 60%Sea Mauville - Area 2Lv.25Good RodRate 60%Sea Mauville - Area 3Lv.25Good RodRate 60%Sea Mauville - Area 4Lv.25Good RodRate 60%Seafloor Cavern - Area 4Lv.25Good RodRate 60%Seafloor Cavern - Area 5Lv.25Good RodRate 60%Sealed ChamberLv.25Good RodRate 60%Shoal Cave - Area 5Lv.25Good RodRate 60%Shoal Cave - Area 6Lv.25Good RodRate 60%Slateport CityLv.25Good RodRate 60%Team Magma/Aqua HideoutLv.25Good RodRate 60%Victory Road - Area 1Lv.25Good RodRate 60%Victory Road - Area 2Lv.25Good RodRate 60%Victory Road - Area 3Lv.25Good RodRate 60%Victory Road - Area 4Lv.25Good RodRate 60%Meteor Falls - Area 2Lv.30Good RodRate 60%Meteor Falls - Area 3Lv.30Good RodRate 60%Meteor Falls - Area 4Lv.30Good RodRate 60%Seafloor Cavern - Area 1Lv.30Good RodRate 60%
 Step 2Catch or Evolve into GyaradosSootopolis City - Area 1Lv.40Super RodRate 5%Sootopolis City - Area 2Lv.40Super RodRate 5%or evolve from Magikarp (Step 1)
Magikarp Weakness
Electric and Grass moves hit Magikarp for super-effective damage. It resists 4 types, giving it decent defensive coverage. Magikarp's physical bulk (base 55 Def) helps cushion physical weakness hits, but special attackers are the bigger threat.
| Damage | Types |
|---|---|
| 2x (Weak) | Electric, Grass |
| 0.5x (Resist) | Fire, Water, Ice, Steel |
What is Magikarp Weak Against
GoodBest Pokemon Against Magikarp
Maractus Grass | C | |
Available Move Moves
Damage vs Magikarp View Maractus builds →Petal Dance 2x468-551%KO | ||
Roserade GrassPoison | B | |
Parasect BugGrass | C | |
Cacturne GrassDark | C | |
Lilligant Grass | C | |
Available Move Moves
Damage vs Magikarp View Lilligant builds →Petal Dance 2x482-567%KO | ||
In Omega Ruby & Alpha Sapphire, Raikou can KO Magikarp with Thunderbolt (463-545%). Breloom's Bullet Seed hits Magikarp for 75-88%.
Raikou Electric | B | |
Recommended Build AbilityPressure ItemLeftovers NatureTimid Moves
Damage vs Magikarp View Raikou builds →Volt Switch 2x360-424%KO Thunderbolt 2x463-545%KO Shadow Ball137-161%KO | ||
Breloom GrassFighting | B | |
Recommended Build AbilityTechnician ItemFocus Sash NatureJolly Moves
Damage vs Magikarp View Breloom builds →Mach Punch59-70% Bullet Seed 2x75-88% | ||
Magikarp Evolutions
Magikarp evolves into Gyarados. It's a two-stage chain with the method shown below. A decent partner pool for breeding via two egg groups. Eggs are hatches fast. The evolved forms gain up to 340 total stats over Magikarp. View every chain in the Evolution Chart.
How to Evolve


ORAS Magikarp Best Moveset
Water at 10 Attack. The moveset has no function. AbilitySwift Swim doubles Speed in rain but there's nothing to attack with. Gyarados one evolution away is A-tier with AbilityIntimidate and Mega access.
Best Build
Utility Moveset
- Flail
- Splash
- Tackle
- Bounce
Recommended Teammates
Moves List
Magikarp's options are limited here. You've got Water STAB for STAB damage, but there isn't much beyond Water hitting power. TMs help fill gaps, though the kit stays tight.
How to Read the Moves Table
Tabs
- Level-Up
- Learned by leveling up.
- TM
- Taught by a Technical Machine.
- Egg
- Inherited via breeding.
- Tutor
- NPC tutor (cost: items, BP, money).
- Reminder
- An NPC reteaches any move this Pokemon could have learned by leveling up.
- Transfer
- Carried over from an older game using Pokemon HOME.
- Event
- Given out through Mystery Gift events.
Visual Signals
CAT (Category)
How the move deals damage and which stats it uses.
A small dot on the icon's corner marks the move as contact. That triggers abilities like Static, Flame Body, Rough Skin, or Iron Barbs, plus items like Rocky Helmet and Sticky Barb.
Tier (S to D)
Each move's competitive rank in RankedBoost's system. TM, Egg, and Tutor sort by tier by default (best first). On Level-Up, click the Tier header to do the same.
PWR (Power)
Base damage. Numbers shown in a type color include STAB (base × 1.5). Hover any colored number to see the math.
— means no power (status moves) or variable power.
Sorting & Filter
Click any column header to sort. Level-Up opens with Lv 1 at the top. TM, Egg, and Tutor open with the highest-tier moves at the top.
Search filters by move name or type. The Filter button limits the list to STAB, Physical, Special, or Status moves.
Level-Up Moves
TM Moves
Egg Moves
Tutor Moves
Base Stats
Magikarp is a pathetic excuse for a Pokémon that is only capable of flopping and splashing. This behavior prompted scientists to undertake research into it.
Magikarp is virtually useless in battle as it can only splash around. As a result, it is considered to be weak. However, it is actually a very hardy Pokémon that can survive in any body of water no matter how polluted it is.
Magikarp Omega Ruby & Alpha Sapphire Guide
- Where in the Omega Ruby & Alpha Sapphire Safari Zone can I find Magikarp?
See the Locations section above for where to find Magikarp in Omega Ruby & Alpha Sapphire.
Safari rules: You can only use Safari Balls. No battling. Two tactical items shift the catch/flee trade-off:
- Throw bait to keep Magikarp from fleeing (flee rate cut to 1/4) but it becomes harder to catch (catch factor halved).
- Throw a rock to make Magikarp easier to catch (catch factor doubled) but it flees twice as often.
- Each effect lasts 2-6 random turns; throwing one cancels the other.
In Omega Ruby & Alpha Sapphire, Magikarp does the job early-game if you need a Water type on your team. Evolve it into Gyarados before the later gyms and it holds up fine through the story.
Game Availability
Magikarp has been part of the series since Red & Blue, appearing in 22 titles across all 10 generations. As a Gen 1 original, it's one of the most consistently available Pokemon in the franchise.
Click a game to view version-specific details
- Gen 1RBDebut

 Red & Blue
 - Gen 1Y
 Yellow
 - Gen 2GS

 Gold & Silver
 - Gen 2C
 Crystal
 - Gen 3RS

 Ruby & Sapphire
 - Gen 3E
 Emerald
 - Gen 3FRLG

 FireRed & LeafGreen
 - Gen 4DP

 Diamond & Pearl
 - Gen 4Pt
 Platinum
 - Gen 4HGSS

 HeartGold & SoulSilver
 - Gen 5BW

 Black & White
 - Gen 5B2W2

 Black 2 & White 2
 - Gen 6XY

 X & Y
X & Y - Gen 6ORAS

 Omega Ruby & Alpha Sapphire
 - Gen 7SM

 Sun & Moon
 - Gen 7USUM

 Ultra Sun & Ultra Moon
 - Gen 7LGPE

 Let's Go Pikachu & Eevee
 - Gen 8SwSh

 Sword & Shield
 - Gen 8BDSP

 Brilliant Diamond & Shining Pearl
 - Gen 8PLA
 Legends: Arceus
 - Gen 9SV

 Scarlet & Violet
 - Gen 9LZA
 Legends: Z-A
 - Gen 10WW

 Winds & Waves