

Is Dewgong Good in Omega Ruby & Alpha Sapphire Playthrough?
Dewgong's AbilityThick Fat cuts Fire and Ice damage in half, and Water/Ice covers Drake's Dragon E4. Not powerful enough for Steven's team, but serviceable through the E4 if Ice coverage is the gap you need to fill.
Seel resists most of Roxanne's coverage and hits back hard.
Seel has the type edge here and should clean up Brawly's team.
Seel trades roughly evenly with Wattson's team.
Seel resists most of Flannery's coverage and hits back hard.
Seel trades roughly evenly with Norman's team.
Seel trades roughly evenly with Winona's team.
Dewgong has the type edge here and should clean up Tate & Liza's team.
Wallace's typing presses Dewgong's defenses.
Dewgong has the type edge here and should clean up Sidney's team.
Dewgong trades roughly evenly with Phoebe's team.
Dewgong trades roughly evenly with Glacia's team.
Dewgong has the type edge here and should clean up Drake's team.
Dewgong trades roughly evenly with Steven's team.
Catch Dewgong on Shoal Cave (walking, Lv 34, rare). DexNav.
Catch Seel on Route 125 (walking, Lv 30, rare). DexNav.
How to Get Dewgong in Omega Ruby & Alpha Sapphire
Dewgong sits at moderate rates across 12 spots in late-game routes. Pick one from the sorted list and commit to it. Jumping between areas wastes more time than waiting in the right location.
Where To Catch Dewgong in ORAS
To get Dewgong, start by catching Seel through walking encounters at Lv. 30-34. The chain covers 2 catchable stages before reaching the final form.
 Step 1Catch SeelRoute 125Lv.30GrassRate 5%DexNav chain
 Step 2Dewgong ✓Shoal Cave - Area 1Lv.34CaveRate 5%DexNav chainShoal Cave - Area 2Lv.34CaveRate 5%DexNav chainShoal Cave - Area 3Lv.34CaveRate 5%DexNav chainShoal Cave - Area 4Lv.34CaveRate 5%DexNav chainShoal Cave - Area 5Lv.34CaveRate 5%DexNav chainShoal Cave - Area 6Lv.34CaveRate 5%DexNav chainor evolve from Seel (Step 1)
Dewgong Weakness
Dewgong's Water/Ice typing leaves it vulnerable to Electric, Grass, Fighting, and Rock. Thick Fat reduces Fire/Ice damage, further improving the defensive spread.
| Damage | Types |
|---|---|
| 2x (Weak) | Electric, Grass, Fighting, Rock |
| 0.5x (Resist) | Water |
| 0.25x (Resist) | Ice |
What is Dewgong Weak Against
VulnerableBest Pokemon Against Dewgong
Aerodactyl Rock | B | |
Obtain MethodRustboro City Gift Available Moves Moves
Damage vs Dewgong View Aerodactyl builds →Rock Tomb 2x54-64% Thunder Fang 2x38-45% | ||
Timburr Fighting | C | |
Available Moves Moves
Damage vs Dewgong View Timburr builds →Wake-Up Slap 2x51-61% Rock Tomb 2x30-36% | ||
Archen Rock | C | |
Obtain MethodRustboro City Gift | ||
Ludicolo WaterGrass | C | |
Leafeon Grass | C | |
Hitmonlee Fighting | B | |
Available Moves Moves
Damage vs Dewgong View Hitmonlee builds →High Jump Kick 2x122-144%KO Rock Tomb 2x39-46% | ||
Hariyama Fighting | B | |
Available Moves Moves
Damage vs Dewgong View Hariyama builds →Vital Throw 2x68-81% Rock Tomb 2x39-46% | ||
Throh Fighting | C | |
Available Moves Moves
Damage vs Dewgong View Throh builds →Vital Throw 2x58-69% Rock Tomb 2x34-40% | ||
Sawk Fighting | C | |
Available Moves Moves
Damage vs Dewgong View Sawk builds →Brick Break 2x73-87% Rock Tomb 2x40-48% | ||
Gurdurr Fighting | C | |
Available Moves Moves
Damage vs Dewgong View Gurdurr builds →Wake-Up Slap 2x61-72% Rock Tomb 2x35-42% | ||
Hitmonlee Fighting | B | |
Available Moves Moves
Damage vs Dewgong View Hitmonlee builds →High Jump Kick 2x125-147%KO Rock Tomb 2x40-47% | ||
Sawk Fighting | C | |
Available Moves Moves
Damage vs Dewgong View Sawk builds →Brick Break 2x76-91% Rock Tomb 2x42-49% | ||
Hariyama Fighting | B | |
Available Moves Moves
Damage vs Dewgong View Hariyama builds →Vital Throw 2x69-82% Rock Tomb 2x40-47% | ||
Magnezone ElectricSteel | B | |
Lanturn WaterElectric | C | |
Hitmonlee Fighting | B | |
Available Moves Moves
Damage vs Dewgong View Hitmonlee builds →High Jump Kick 2x125-147%KO Rock Tomb 2x39-46% | ||
Torterra GrassGround | C | |
Obtain MethodEvolve Turtwig (Route 101 Gift) Available Moves Moves
Damage vs Dewgong View Torterra builds →Wood Hammer 2x10⁹-129%KO Rock Tomb 2x38-45% Rock Smash 2x25-30% | ||
Sawk Fighting | C | |
Available Moves Moves
Damage vs Dewgong View Sawk builds →Brick Break 2x77-91% Rock Tomb 2x40-48% | ||
Hariyama Fighting | B | |
Available Moves Moves
Damage vs Dewgong View Hariyama builds →Vital Throw 2x71-83% Rock Tomb 2x39-46% | ||
Magnezone ElectricSteel | B | |
Heracross BugFighting | B | |
Available Moves Moves
Damage vs Dewgong View Heracross builds →Close Combat 2x121-143%KO Stone Edge 2x68-81% Bullet Seed 2x18-21% | ||
Roserade GrassPoison | B | |
Hitmonlee Fighting | B | |
Available Moves Moves
Damage vs Dewgong View Hitmonlee builds →High Jump Kick 2x126-149%KO Stone Edge 2x66-78% | ||
Blaziken FireFighting | B | |
Obtain MethodEvolve Torchic (Route 101 Gift) Available Moves Moves
Damage vs Dewgong View Blaziken builds →High Jump Kick 2x126-149%KO Solar Beam 2x64-75% Stone Edge 2x66-78% | ||
Infernape FireFighting | B | |
Obtain MethodEvolve Chimchar (Route 101 Gift) Available Moves Moves
Damage vs Dewgong View Infernape builds →Close Combat 2x10⁴-123%KO Solar Beam 2x60-71% Stone Edge 2x58-68% | ||
Hariyama Fighting | B | |
Available Moves Moves
Damage vs Dewgong View Hariyama builds →Close Combat 2x114-135%KO Stone Edge 2x64-76% | ||
Heracross BugFighting | B | |
Available Moves Moves
Damage vs Dewgong View Heracross builds →Close Combat 2x118-139%KO Stone Edge 2x67-78% Bullet Seed 2x18-21% | ||
Roserade GrassPoison | B | |
Hitmonlee Fighting | B | |
Available Moves Moves
Damage vs Dewgong View Hitmonlee builds →High Jump Kick 2x123-145%KO Stone Edge 2x64-76% | ||
Blaziken FireFighting | B | |
Obtain MethodEvolve Torchic (Route 101 Gift) Available Moves Moves
Damage vs Dewgong View Blaziken builds →High Jump Kick 2x123-145%KO Solar Beam 2x62-73% Stone Edge 2x64-76% | ||
Rampardos Rock | B | |
Obtain MethodEvolve Cranidos (Rustboro City Gift) Available Moves Moves
Damage vs Dewgong View Rampardos builds →Head Smash 2x190-223%KO Brick Break 2x64-75% Thunderbolt 2x30-36% | ||
Gurdurr Fighting | C | |
Available Moves Moves
Damage vs Dewgong View Gurdurr builds →Focus Punch 2x127-150%KO Stone Edge 2x57-67% | ||
Hariyama Fighting | B | |
Available Moves Moves
Damage vs Dewgong View Hariyama builds →Close Combat 2x114-135%KO Stone Edge 2x64-75% | ||
Cobalion SteelFighting | B | |
Obtain MethodMirage Spots Interact Encounter Available Moves Moves
Damage vs Dewgong View Cobalion builds →Close Combat 2x90-106%KO Stone Edge 2x50-59% Volt Switch 2x31-36% | ||
Heracross BugFighting | B | |
Available Moves Moves
Damage vs Dewgong View Heracross builds →Close Combat 2x119-141%KO Stone Edge 2x66-78% Bullet Seed 2x17-20% | ||
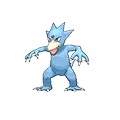
In Omega Ruby & Alpha Sapphire, Tyranitar can KO Dewgong with Stone Edge (131-154%).
Tyranitar RockDark | A | |
Recommended Build AbilitySand Stream ItemChoice Band NatureRelaxed Moves
Damage vs Dewgong View Tyranitar builds →Stone Edge 2x131-154%KO Pursuit27-31% Crunch52-62% Superpower 2x10⁴-123%KO | ||
Dewgong Evolutions
Dewgong is the evolved form of Seel. Breeding produces Seel eggs, and they're average hatch time. Evolving from Seel gave Dewgong the biggest boost in HP (+25), bringing the total to 475 stats. View every chain in the Evolution Chart.
How to Evolve
Breeding
Breed with Dewgong to get Seel eggs easily using 200 partners from the Ground and Water1 egg groups. Notable egg moves include Belch, Disable, Encore and 14 more.


ORAS Dewgong Best Moveset
Water/Ice at 90 HP and 95 Sp. Def with AbilityThick Fat halving Fire and Ice damage. The moveset offers Water/Ice TermStab from 70 offenses but can't compete against Lapras and Walrein, who bring higher stats and better bulk for the same coverage.
Best Build
Dewgong best EVs are HP and Sp. Atk
Bulky Support Moveset
- Surf
- Rest
- Rain Dance
- Ice Beam
Recommended Teammates
Moves List
The natural movepool does the job, but Belch and Disable from the egg pool give Dewgong something extra. Pair those with Blizzard and Aqua Tail for STAB and coverage across 7 types for reach, and the kit fills out nicely.
How to Read the Moves Table
Tabs
- Level-Up
- Learned by leveling up.
- TM
- Taught by a Technical Machine.
- Egg
- Inherited via breeding.
- Tutor
- NPC tutor (cost: items, BP, money).
- Reminder
- An NPC reteaches any move this Pokemon could have learned by leveling up.
- Transfer
- Carried over from an older game using Pokemon HOME.
- Event
- Given out through Mystery Gift events.
Visual Signals
CAT (Category)
How the move deals damage and which stats it uses.
A small dot on the icon's corner marks the move as contact. That triggers abilities like Static, Flame Body, Rough Skin, or Iron Barbs, plus items like Rocky Helmet and Sticky Barb.
Tier (S to D)
Each move's competitive rank in RankedBoost's system. TM, Egg, and Tutor sort by tier by default (best first). On Level-Up, click the Tier header to do the same.
PWR (Power)
Base damage. Numbers shown in a type color include STAB (base × 1.5). Hover any colored number to see the math.
— means no power (status moves) or variable power.
Sorting & Filter
Click any column header to sort. Level-Up opens with Lv 1 at the top. TM, Egg, and Tutor open with the highest-tier moves at the top.
Search filters by move name or type. The Filter button limits the list to STAB, Physical, Special, or Status moves.
Level-Up Moves
TM Moves
Egg Moves
Tutor Moves
Reminder Moves
Transfer Moves
Base Stats
Dewgong loves to snooze on bitterly cold ice. The sight of this Pokémon sleeping on a glacier was mistakenly thought to be a mermaid by a mariner long ago.
Dewgong Omega Ruby & Alpha Sapphire Guide
In Omega Ruby & Alpha Sapphire, Don't let Dewgong's 475 base stat total fool you. Thick Fat is what makes it tick. It punches way above its weight class. We rate it C-Tier. Surf with Damprock is the standard set.
In Omega Ruby & Alpha Sapphire, Run Thick Fat on Dewgong. It's the ability that defines how you build around it and the main reason it holds a competitive niche. Dewgong also gets Hydration and Ice Body, but they don't compare.
In Omega Ruby & Alpha Sapphire, Dewgong fills the balanced role. It's a special attacker with base 70 Sp. Atk. Base 70 Speed is workable. Faster than some, slower than many. And it's enough bulk to take a hit or two.
In Omega Ruby & Alpha Sapphire, run Surf, Rest, Raindance, and Ice Beam on Dewgong. Surf is the most common pick at 0% usage. Surf provides reliable STAB damage.
Game Availability
Dewgong has been part of the series since Red & Blue, appearing in 19 titles across all 10 generations. As a Gen 1 original, it's one of the most consistently available Pokemon in the franchise.
Click a game to view version-specific details
- Gen 1RBDebut

 Red & Blue
 - Gen 1Y
 Yellow
 - Gen 2GS

 Gold & Silver
 - Gen 2C
 Crystal
 - Gen 3RS

 Ruby & Sapphire
 - Gen 3E
 Emerald
 - Gen 3FRLG

 FireRed & LeafGreen
 - Gen 4DP

 Diamond & Pearl
 - Gen 4Pt
 Platinum
 - Gen 4HGSS

 HeartGold & SoulSilver
 - Gen 5BW

 Black & White
 - Gen 5B2W2

 Black 2 & White 2
 - Gen 6XY

 X & Y
X & Y - Gen 6ORAS

 Omega Ruby & Alpha Sapphire
 - Gen 7SM

 Sun & Moon
 - Gen 7USUM

 Ultra Sun & Ultra Moon
 - Gen 7LGPE

 Let's Go Pikachu & Eevee
 - Gen 8SwSh

 Sword & Shield
 - Gen 8BDSP

 Brilliant Diamond & Shining Pearl
 - Gen 8PLA
 Legends: Arceus
 - Gen 9SV

 Scarlet & Violet
 - Gen 9LZA
 Legends: Z-A
 - Gen 10WW

 Winds & Waves