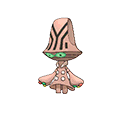

Is Beheeyem Good in Omega Ruby & Alpha Sapphire Playthrough?
Psychic with 125 Special Attack and 95 Special Defense. AbilitySynchronize passes status back. The 40 Speed means everything goes first, but the bulk absorbs the hit and the counterattack is powerful. A slow cannon.
Elgyem has the type edge here and should clean up Roxanne's team.
Elgyem resists most of Brawly's coverage and hits back hard.
Wattson's typing presses Elgyem's defenses.
Elgyem has the type edge here and should clean up Flannery's team.
Elgyem trades roughly evenly with Norman's team.
Winona's typing presses Elgyem's defenses.
Tate & Liza's typing presses Beheeyem's defenses.
Beheeyem trades roughly evenly with Wallace's team.
Sidney's Pokemon outpace and outclass Beheeyem here.
Beheeyem trades roughly evenly with Phoebe's team.
Beheeyem trades roughly evenly with Glacia's team.
Beheeyem trades roughly evenly with Drake's team.
Steven's team hits Beheeyem's weaknesses hard.
Catch Elgyem on Route 121 (walking, Lv 30, common). DexNav.
Your Elgyem should hit Level 42 before you reach Tate & Liza, at typical leveling pace.
How to Get Beheeyem in Omega Ruby & Alpha Sapphire
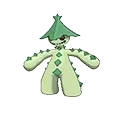
Beheeyem doesn't appear wild. Catch Elgyem instead, it shows up at solid rates. Evolve it at level 42 to get Beheeyem. The 2-stage line is mapped in the step cards below.
How to Obtain Beheeyem in ORAS
To get Beheeyem, start by catching Elgyem through walking encounters at Lv. 30-31. The chain covers 1 catchable stage before reaching the final form.
 Step 1Catch ElgyemRoute 121Lv.30GrassRate 60%DexNav chainMt. Pyre - Area 5Lv.31CaveRate 60%DexNav chainMt. Pyre - Area 6Lv.31CaveRate 60%DexNav chainMt. Pyre - Area 7Lv.31CaveRate 60%DexNav chain
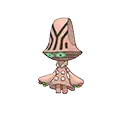 Step 2Beheeyem ✓
Beheeyem Weakness
Type-wise, Beheeyem takes extra damage from Bug, Ghost, and Dark. With 75 HP and balanced defenses, Beheeyem can afford to eat a neutral hit or two.
| Damage | Types |
|---|---|
| 2x (Weak) | Bug, Ghost, Dark |
| 0.5x (Resist) | Fighting, Psychic |
What is Beheeyem Weak Against
VulnerableBest Pokemon Against Beheeyem
Sableye DarkGhost | C | |
Available Moves Moves
Damage vs Beheeyem View Sableye builds →Shadow Claw 2x56-66% Feint Attack 2x49-58% | ||
Mightyena Dark | C | |
Shedinja BugGhost | C | |
Available Moves Moves
Damage vs Beheeyem View Shedinja builds →Shadow Claw 2x62-74% Thief 2x36-44% Leech Life 2x22-27% | ||
Zorua Dark | C | |
Nuzleaf GrassDark | D | |
Sableye DarkGhost | C | |
Available Moves Moves
Damage vs Beheeyem View Sableye builds →Shadow Claw 2x56-66% Knock Off 2x49-59% | ||
Zorua Dark | C | |
Available Moves Moves
Damage vs Beheeyem View Zorua builds →Foul Play 2x67-79% U-turn 2x33-40% | ||
Sandile GroundDark | C | |
Mightyena Dark | C | |
Scraggy DarkFighting | C | |
Zoroark Dark | B | |
Available Moves Moves
Damage vs Beheeyem View Zoroark builds →Foul Play 2x94-111%KO U-turn 2x46-56% Shadow Claw 2x46-56% | ||
Krokorok GroundDark | C | |
Available Moves Moves
Damage vs Beheeyem View Krokorok builds →Crunch 2x65-77% Shadow Claw 2x38-45% | ||
Sableye DarkGhost | C | |
Available Moves Moves
Damage vs Beheeyem View Sableye builds →Shadow Claw 2x55-65% Knock Off 2x53-62% | ||
Mightyena Dark | C | |
Scraggy DarkFighting | C | |
Zoroark Dark | B | |
Available Moves Moves
Damage vs Beheeyem View Zoroark builds →Foul Play 2x97-115%KO U-turn 2x48-57% Shadow Claw 2x48-57% | ||
Shiftry GrassDark | C | |
Cacturne GrassDark | C | |
Krokorok GroundDark | C | |
Available Moves Moves
Damage vs Beheeyem View Krokorok builds →Crunch 2x67-79% Shadow Claw 2x39-47% | ||
Sableye DarkGhost | C | |
Available Moves Moves
Damage vs Beheeyem View Sableye builds →Shadow Claw 2x57-68% Knock Off 2x52-62% | ||
Krookodile GroundDark | B | |
Available Moves Moves
Damage vs Beheeyem View Krookodile builds →Foul Play 2x10⁴-124%KO Shadow Claw 2x52-62% | ||
Absol Dark | C | |
Available Moves Moves
Damage vs Beheeyem View Absol builds →Sucker Punch 2x97-115%KO Shadow Claw 2x56-66% | ||
Scrafty DarkFighting | C | |
Zoroark Dark | B | |
Available Moves Moves
Damage vs Beheeyem View Zoroark builds →Foul Play 2x96-113%KO Shadow Ball 2x50-59% U-turn 2x47-56% | ||
Heracross BugFighting | B | |
Available Moves Moves
Damage vs Beheeyem View Heracross builds →Megahorn 2x140-165%KO Night Slash 2x54-65% Shadow Claw 2x54-65% | ||
Krookodile GroundDark | B | |
Available Moves Moves
Damage vs Beheeyem View Krookodile builds →Foul Play 2x10²-121%KO Shadow Claw 2x51-60% | ||
Absol Dark | C | |
Available Moves Moves
Damage vs Beheeyem View Absol builds →Sucker Punch 2x95-112%KO Shadow Claw 2x55-65% | ||
Scrafty DarkFighting | C | |
Zoroark Dark | B | |
Available Moves Moves
Damage vs Beheeyem View Zoroark builds →Foul Play 2x94-110%KO Shadow Ball 2x49-58% U-turn 2x46-55% | ||
Heracross BugFighting | B | |
Available Moves Moves
Damage vs Beheeyem View Heracross builds →Megahorn 2x137-162%KO Night Slash 2x53-63% Shadow Claw 2x53-63% | ||
Krookodile GroundDark | B | |
Available Moves Moves
Damage vs Beheeyem View Krookodile builds →Foul Play 2x10⁴-123%KO Shadow Claw 2x51-61% | ||
Hydreigon DarkDragon | B | |
Available Moves Moves
Damage vs Beheeyem View Hydreigon builds →Dark Pulse 2x76-90% U-turn 2x46-55% | ||
Absol Dark | C | |
Available Moves Moves
Damage vs Beheeyem View Absol builds →Sucker Punch 2x96-113%KO X-Scissor 2x64-75% Shadow Claw 2x56-66% | ||
Heracross BugFighting | B | |
Available Moves Moves
Damage vs Beheeyem View Heracross builds →Megahorn 2x138-163%KO Night Slash 2x54-64% Shadow Claw 2x54-64% | ||
Volcarona BugFire | B | |
In Omega Ruby & Alpha Sapphire, Tyranitar can KO Beheeyem with Crunch (144-170%). Scizor threatens a KO with U-turn (164-193%). Gengar's Shadow Ball also KOs at 111-131%.
Tyranitar RockDark | A | |
Recommended Build AbilitySand Stream ItemChoice Band NatureRelaxed Moves
Damage vs Beheeyem View Tyranitar builds →Stone Edge90-106%KO Pursuit 2x73-86% Crunch 2x144-170%KO Superpower36-42% | ||
Scizor BugSteel | B | |
Recommended Build AbilityTechnician ItemChoice Band NatureAdamant Moves
Damage vs Beheeyem View Scizor builds →Bullet Punch47-56% U Turn 2x164-193%KO Superpower47-55% Knock Off 2x101-120%KO | ||
Gengar GhostPoison | B | |
Recommended Build AbilityLevitate ItemChoice Specs NatureTimid Moves
Damage vs Beheeyem View Gengar builds →Shadow Ball 2x111-131%KO Sludge Bomb62-73% Focus Blast27-32% | ||
Beheeyem Evolutions
Beheeyem is the evolved form of Elgyem. Breeding produces Elgyem eggs, and they're average hatch time. Evolving from Elgyem gave Beheeyem the biggest boost in Sp.Atk (+40), bringing the total to 485 stats. View every chain in the Evolution Chart.
How to Evolve
Breeding
Breed with Beheeyem to get Elgyem eggs easily using 56 partners from the Humanshape egg group. Notable egg moves include Ally Switch, Astonish, Barrier and 7 more.


ORAS Beheeyem Best Moveset
125 Sp. Atk fires Psychic TermStab at real power. AbilityAnalytic as a hidden ability boosts damage when acting last, and 40 Speed guarantees going last. The moveset turns the low Speed into an advantage through Analytic but can't earn a slot over Reuniclus or Alakazam.
Best Build
Beheeyem best EVs are Sp. Atk and Sp. Def
Special Wallbreaker Moveset
- Psychic
- Barrier
- Dark Pulse
- Energy Ball
Recommended Teammates
Moves List
Breeding's the move. Ally Switch and Astonish give Beheeyem options it can't learn any other way, and coverage across 8 types already covers a decent range on top of Synchronoise and Dream Eater. The egg moves push it further.
How to Read the Moves Table
Tabs
- Level-Up
- Learned by leveling up.
- TM
- Taught by a Technical Machine.
- Egg
- Inherited via breeding.
- Tutor
- NPC tutor (cost: items, BP, money).
- Reminder
- An NPC reteaches any move this Pokemon could have learned by leveling up.
- Transfer
- Carried over from an older game using Pokemon HOME.
- Event
- Given out through Mystery Gift events.
Visual Signals
CAT (Category)
How the move deals damage and which stats it uses.
A small dot on the icon's corner marks the move as contact. That triggers abilities like Static, Flame Body, Rough Skin, or Iron Barbs, plus items like Rocky Helmet and Sticky Barb.
Tier (S to D)
Each move's competitive rank in RankedBoost's system. TM, Egg, and Tutor sort by tier by default (best first). On Level-Up, click the Tier header to do the same.
PWR (Power)
Base damage. Numbers shown in a type color include STAB (base × 1.5). Hover any colored number to see the math.
— means no power (status moves) or variable power.
Sorting & Filter
Click any column header to sort. Level-Up opens with Lv 1 at the top. TM, Egg, and Tutor open with the highest-tier moves at the top.
Search filters by move name or type. The Filter button limits the list to STAB, Physical, Special, or Status moves.
Level-Up Moves
TM Moves
Egg Moves
Tutor Moves
Transfer Moves
Base Stats
Apparently, it communicates by flashing its three fingers, but those patterns haven’t been decoded.
It uses psychic power to control an opponent’s brain and tamper with its memories.
Beheeyem Omega Ruby & Alpha Sapphire Guide
In Omega Ruby & Alpha Sapphire, Beheeyem has a 485 base stat total and ranks as C-Tier: a niche pick in Omega Ruby & Alpha Sapphire's meta. It works best as a support. Psychic with Choice Band is the standard set.
In Omega Ruby & Alpha Sapphire, Beheeyem's biggest threats include Scyther (Bug), Chandelure (Ghost), and Weavile (Dark), all carrying super-effective STAB moves. At base 40 Speed, Beheeyem won't outrun any of these threats so switching to a resist is usually the safer play.
Telepathy is the go-to ability for Beheeyem. It protects against friendly Pokémon's damaging moves. Its hidden ability Analytic can work in specific setups. Synchronize is the other option. Pick based on what your team needs.
In Omega Ruby & Alpha Sapphire, Beheeyem fills the support role. It's a special attacker with base 125 Sp. Atk. Base 40 Speed is low. Priority moves or Trick Room are the way to go. And it's enough bulk to take a hit or two.
For Omega Ruby & Alpha Sapphire, the core moveset is Psychic, Barrier, Dark Pulse, and Energy Ball. Psychic leads at 0% usage. Psychic provides reliable STAB damage.
Game Availability
Introduced in Black & White, Beheeyem has appeared in 7 games across 6 generations. Later debuts mean fewer total appearances, but it's been a consistent presence since its introduction.
Click a game to view version-specific details
- Gen 1RB

 Red & Blue
 - Gen 1Y
 Yellow
 - Gen 2GS

 Gold & Silver
 - Gen 2C
 Crystal
 - Gen 3RS

 Ruby & Sapphire
 - Gen 3E
 Emerald
 - Gen 3FRLG

 FireRed & LeafGreen
 - Gen 4DP

 Diamond & Pearl
 - Gen 4Pt
 Platinum
 - Gen 4HGSS

 HeartGold & SoulSilver
 - Gen 5BWDebut

 Black & White
 - Gen 5B2W2

 Black 2 & White 2
 - Gen 6XY

 X & Y
X & Y - Gen 6ORAS

 Omega Ruby & Alpha Sapphire
 - Gen 7SM

 Sun & Moon
 - Gen 7USUM

 Ultra Sun & Ultra Moon
 - Gen 7LGPE

 Let's Go Pikachu & Eevee
 - Gen 8SwSh

 Sword & Shield
 - Gen 8BDSP

 Brilliant Diamond & Shining Pearl
 - Gen 8PLA
 Legends: Arceus
 - Gen 9SV

 Scarlet & Violet
 - Gen 9LZA
 Legends: Z-A
 - Gen 10WW

 Winds & Waves